The Lazy Girls Manicure: The Fake Nail Edit

There are two things in life that I really like: 1) fake nails and 2) being lazy.

While I super respect girls who are amazing at nails and can do all kinds of nail art, I am terrible at it. In fact, I can barely even paint my own nails properly. And even if I do manage to make them look less like I’ve dipped my finger tips into a pot of paint, I am too impatient to wait for them to dry properly and ruin them that way. ZUT ALORS, I am truly an idiot.

So obvi, the only option really is to opt for fake nails. My usual buys are the Boot’s pack of 100 nails which I glue on and paint when I can be arsed. But there are so many beautiful fake nails out there that are definitely worth trying, especially if you’re looking for fake nails that involve zero effort – as well as the opportunity to lie to people who compliment you and pretend you did the nail art yourself.

Here are some of my faves, which I’m sure you will agree are the most beautiful things on the planet ever.

Ted Baker | Faked to Perfection Range
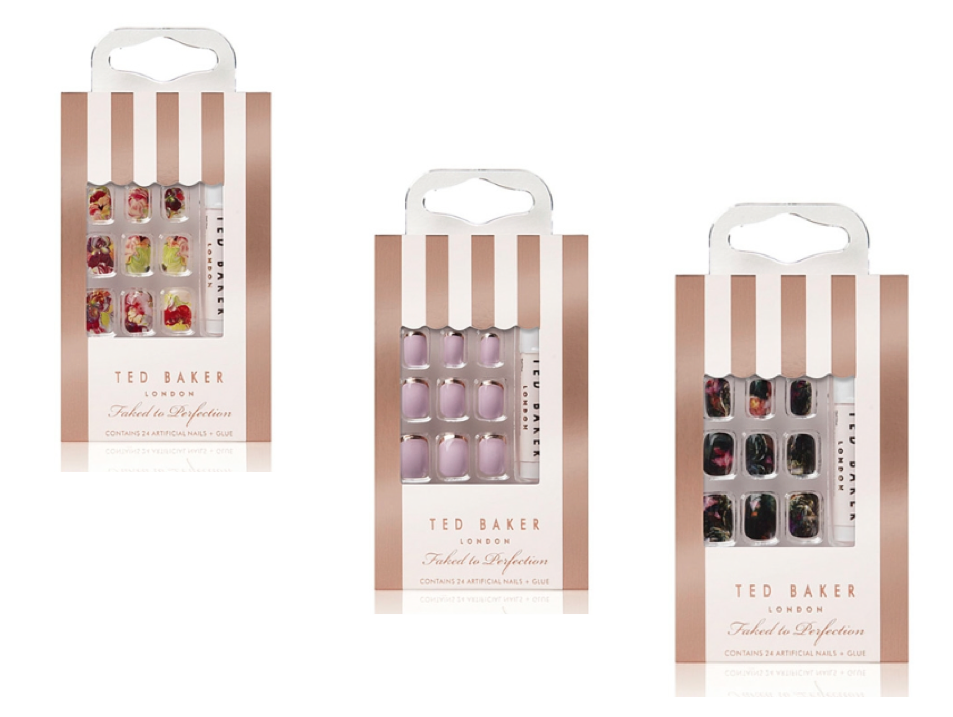
Screen Shot 2014-08-15 at 16.36.57The Ted Baker fake nail range is absolutely beautiful and I have so much love for every single set of fake nails they offer. Each costs £8 to buy, and includes 24 nails and glue. For £8, I really don’t think you can shake your head at that really.

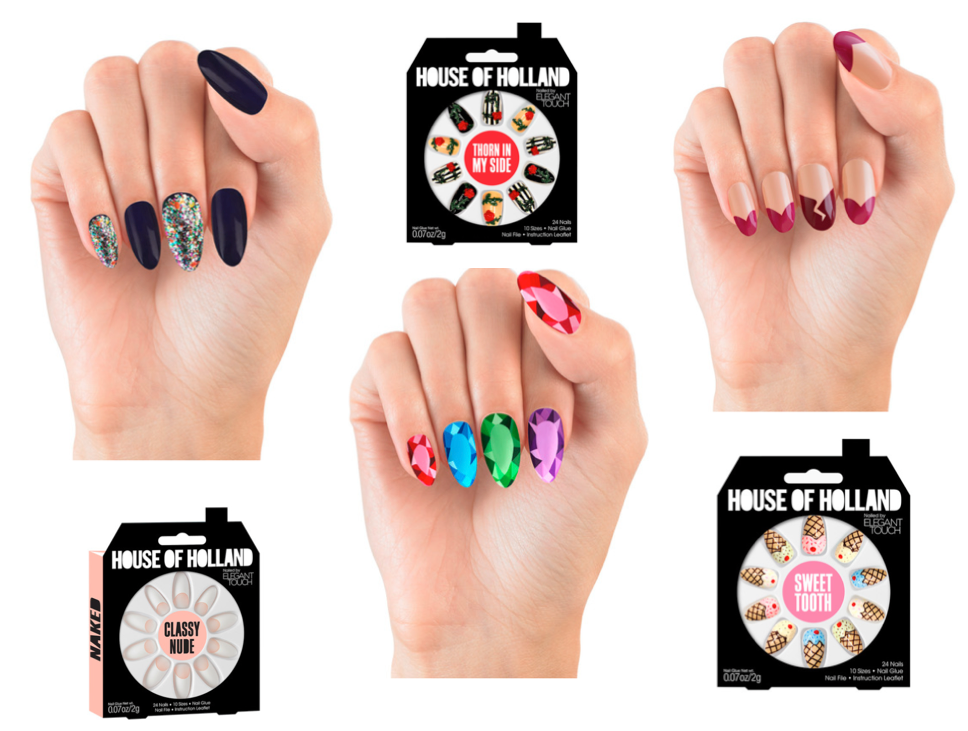
House of Holland | x Elegant Touch Range

Screen Shot 2014-08-15 at 16.47.42

If you’ve never come across the House of Holland range of nails, have you been living under a rock with tiny people who know nothing? For anyone looking for amazing nail art that even real life idiots like Josie Cunningham could do, these are an absolute must. The range is quirky and I love it. Some of them come across as a little bit cringe, and I wouldn’t recommend that anyone puts ‘Yolo’ on their hands unless they personally want a punch off me and Claire.

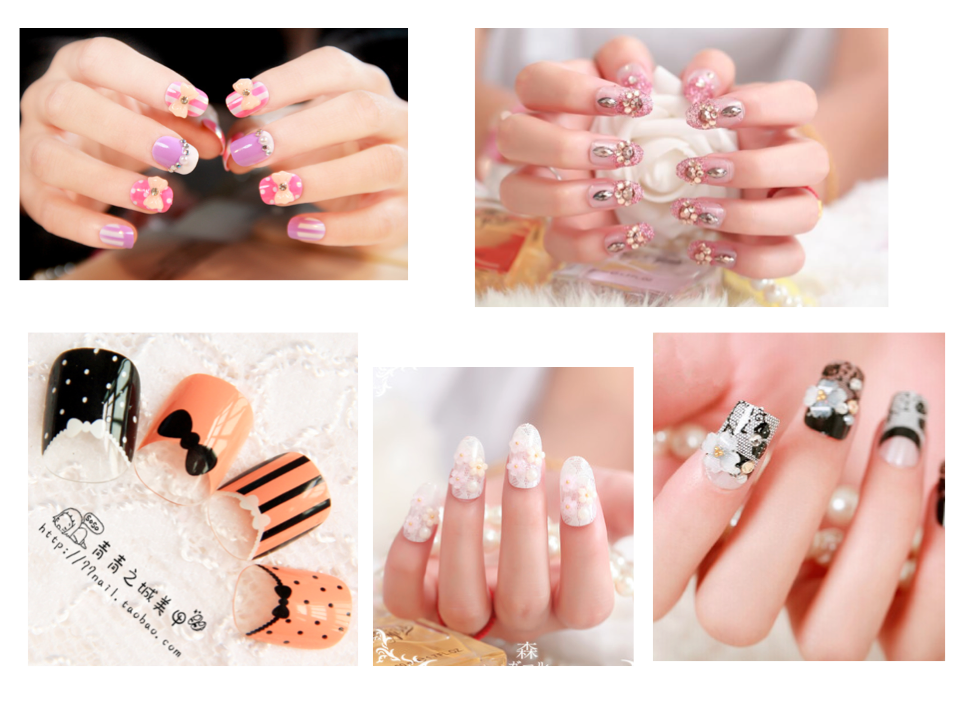
Ali Express | ‘Popular Cute Fake Nails’

Screen Shot 2014-08-15 at 17.06.40

Ali Express is an absolutely mad website and shopping on it is pretty bizarre, but it really is a good one to find a bargain on. This couldn’t be more true when it comes to fake nails, because they have a RIDICULOUS amount of nail art on the go for prices that are cheaper than it would cost you for a shot of apple sours. This is a great site if you’re a fan of 3D nails in particular – and I kid you not, prices start from cheaper than £1. Some of them are a bit loud, but worth a look if you’re keen for a bold nail look.

Do you wear fake nails? Which are your faves?


14-Piece Real Techniques Dupe Set | Review

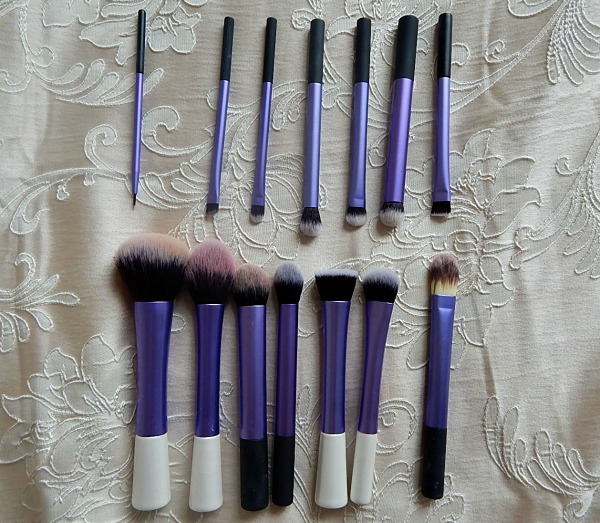
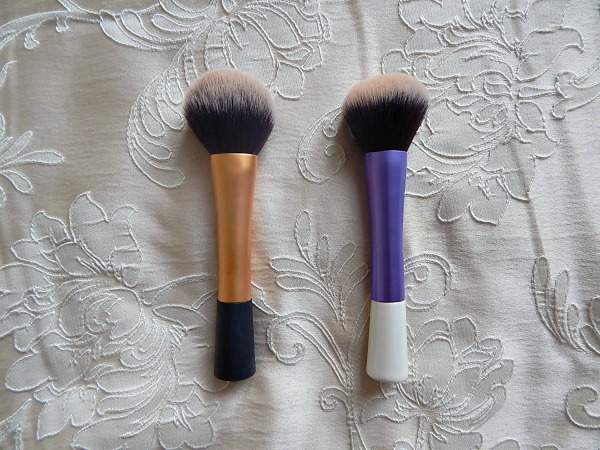
RT Dupes3Ooh look, someone’s paid a visit to Knock-Off Nigel! Love them or hate them, dupes always get a lot of attention in both the beauty and fashion industries. Let’s be honest, apart from those of us with money falling out of our booties, there’s always a slight appeal to rip-0ffs – even if it’s just out of curiosity to see how well the dupe matches up to the real deal.

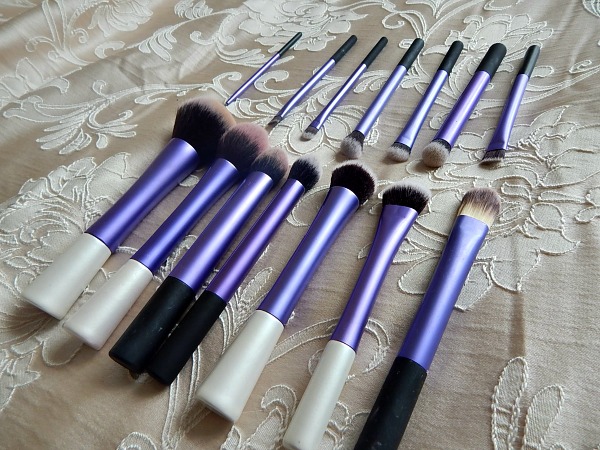
I recently spied this 14-piece Real Technique lookalike set of brushes on another blog  and aftering finding out it was in the sale on AliExpress for around £8 I couldn’t really resist ordering it. I already own a few Real Techniques ‘inspired'(ahem)  brushes that I bought last September (that you can see in this post if you so wish) and with my buffing brush finally starting to shed a little, I realised I could do with a replacement. My brush collection is pretty poor in general too, so I figured adding to my toolkit wasn’t a bad idea. Who knows, maybe I’ll finally start being bothered to wear eyeshadow if I have more ways to poke myself in the eye…

RT Dupes 2Firstly I’ll point out there’s not even a buffing  brush in this set, but obviously that’s my own fault for being a tit and not even bothering to check. However, what the set does include is pretty impressive. There’s a variety of eyeshadow and eyeliner brushes, a couple of flat brushes for liquid foundations or concealers, and a range of powder brushes with different varieties of angles for all your pressing and contouring needs.

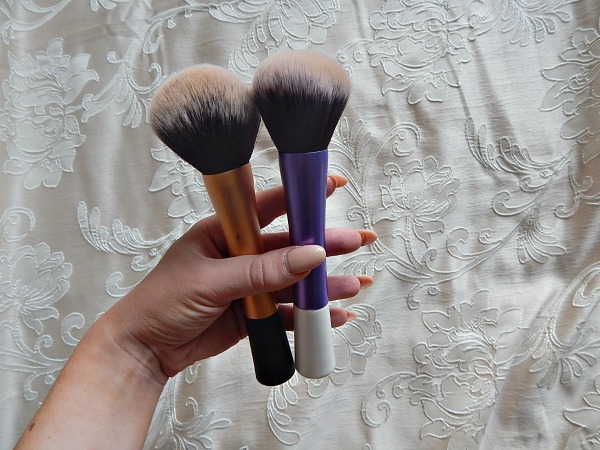
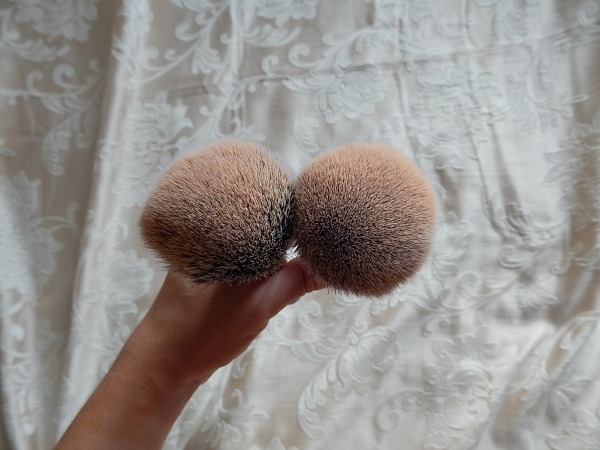
As a collection, they obviously look great (though yes, the different coloured bases do annoy me), but to be honest the quality varies a LOT amongst the set. Some of the bristles, particularly on the eyeshadow brushes, are really stiff. This means they aren’t the best if you want to blend, or actually, y’know, keep your eyes not-stabbed. However, a few of the other brushes are really good. My two faves are the large face brush, which I use for powder, and the slightly conical powder brush, which I use for angling bronzer underneath my cheekbones. To show how good the face brush is, here it is next to the genuine Real Techniques face brush:

RT Dupes 4 RT Dupes 5 RT Dupes 6The fakey is slightly smaller than the real thing, and the bristles are a bit less dense. But other than that, these brushes are practically identical, feeling equally soft and luxurious. Of course only time will really tell how the dupe matches up in terms of shedding and keeping its softness, but for now I’m really impressed with this one and a few others from the collection.

It’s quite unusual for us to give such a lukewarm review of products as we tend to either love things or want to throw them into the fiery pits of hell, but my feelings towards this set are genuinely a bit meeeeeh. Overall I’d say it’s still decent value for money, even if only for the face brushes (I mean, £8, c’mon). However, with half of the brushes being pretty useless for me personally, I’d probably still rather just pick up a few brushes of choice separately via eBay.

Have any of you tried RT dupes? What do you think?

Seventeen Back Lash Mascara Review

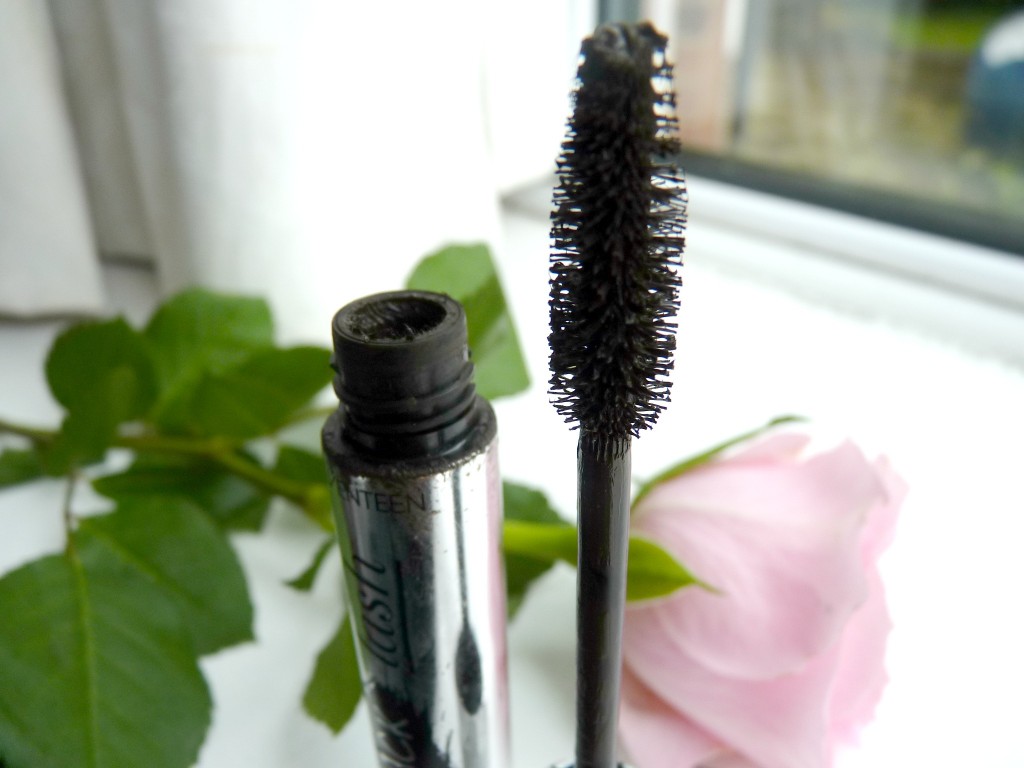
P1070303

Anyone who knows me and Claire at all will know that the quest for the perfect mascara is always present. From Benefit’s They’re Real to horrible excuses for mascaras like Rimmel’s Scandaleyes Rockin’ Curves, we’ve tried and tested so many different brands with varying degrees of success. I like to try and buy a different mascara each time I run out because to frankly, I haven’t found anything that has made me think ‘Zut Alors, I must give up my life as a rather short, stumpy ginger girl and dedicate it to this here tube of mascara’.

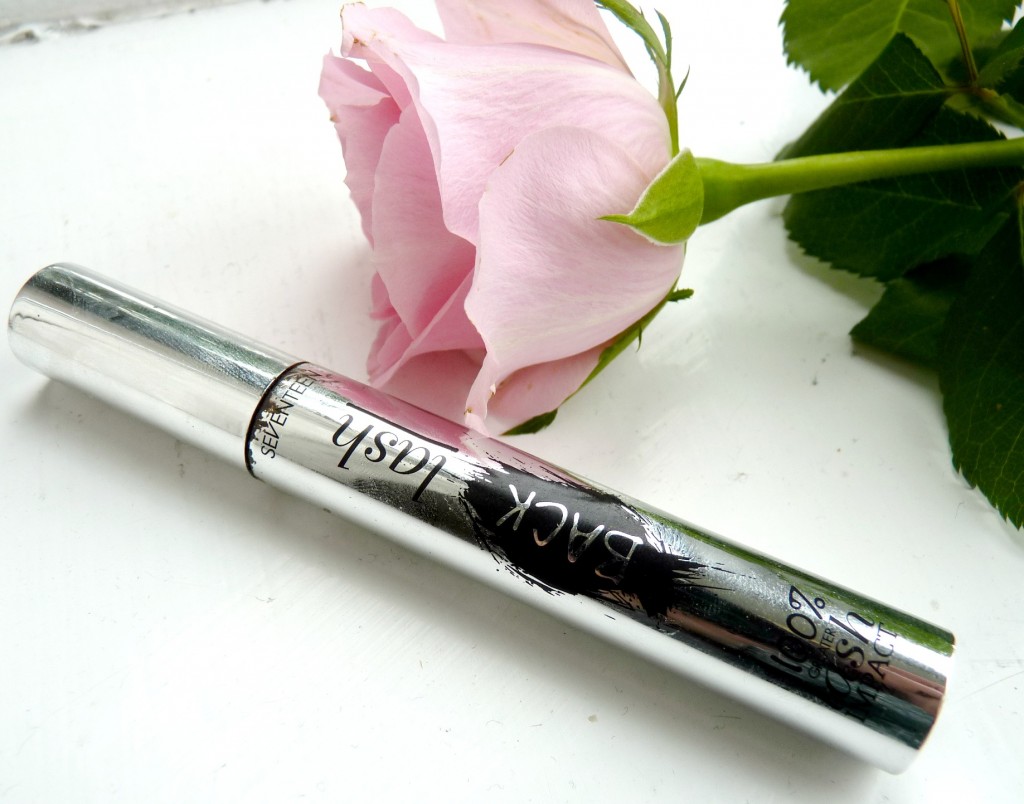
Unfortunately, Seventeen’s Back Lash Mascara hasn’t quite done that for me. Don’t get me wrong, it’s fine. There’s nothing particularly wrong with it, it’s just that it doesn’t wow me (…who do I think I am? Simon Cowell?). So without further waffle (I want a waffle), here’s my Seventeen Back Lash Mascara review. With bells on.

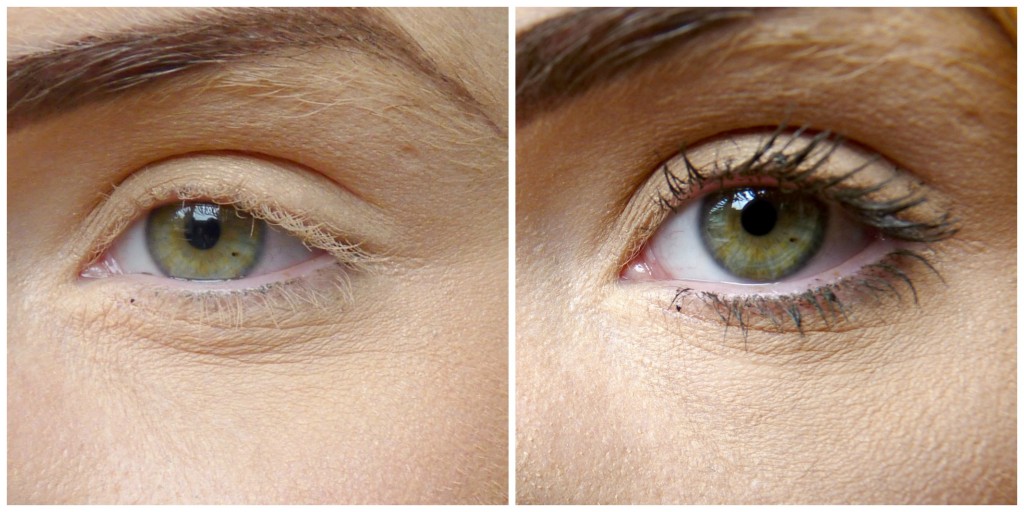
P1070307Lets get started with the brush. I’m a fan of most brushes. Claire’s partial to a nice plastic brush that separates the lashes properly, but I’m not too fussed whether its fibre or plastic. Although there’s a hugey caveat on that. If it’s fibre, it can’t be rubbish. While Seventeen’s Back Lash Mascara isn’t exactly rubbish per say, it’s a bit on the weak side. As you can see from the before and after pics below, it’s  tends to clump my eyelashes together a bit. Ewwwwwwwwwwwwwwwwww.

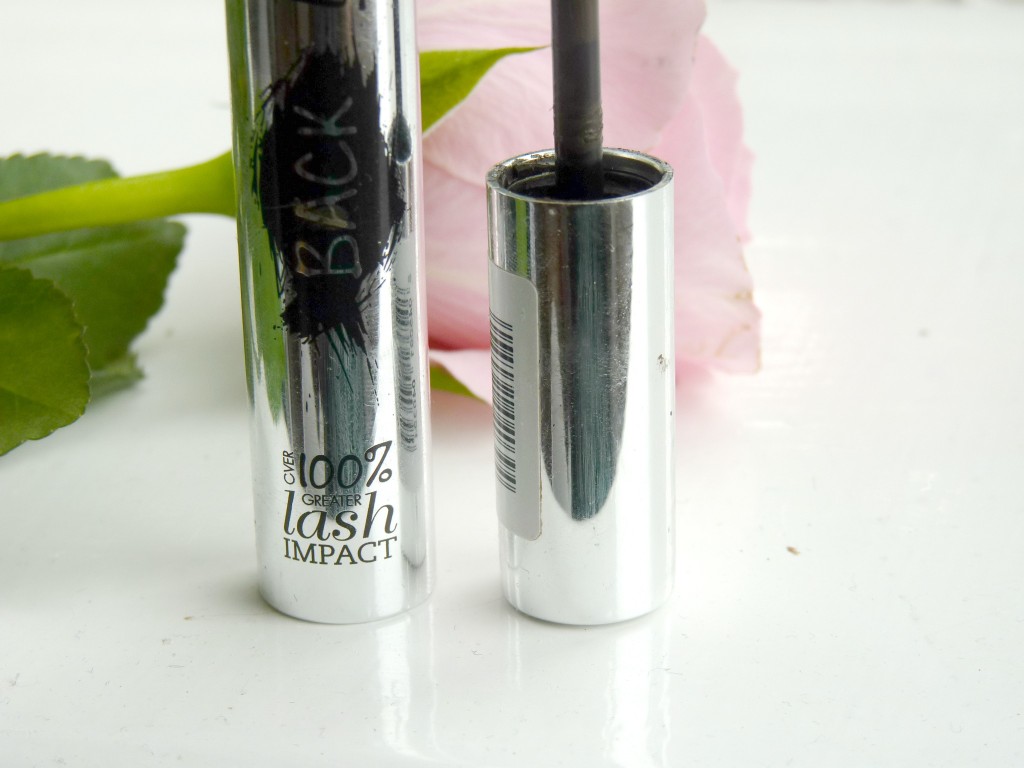
P1070308On the other hand, it doesn’t flake off and lasts really well. I also hugely enjoy the silver packaging, it makes me feel mega jazzy. If I ever get stranded at the discoteque without a glow stick, I would quite happily whip this bad boy out and flail around.

I just can’t agree that it gives me over 100% greater lash impact. Maybe like, 23% greater lash impact but lets all be honest, that’s not particularly hard since I have the blondest eyelashes known to womankind. Any mascara would give me a greater impact, in the sense that it would actually make my eyes visible (fun fact, my aunty once told me that I should get my eyelashes tinted because they made my face look piggy. Cheers hun).

Before and afterSo would I repurchase Seventeen’s Back Lash Mascara? Probably not. But its handy enough to make me look less piggy eyed, so for that I will thank Seventeen profusely, and perhaps ask them to send a letter to my aunt in South Africa explaining that.

If you’d like to buy this silver tube of relatively alright mascara, you can do so for £6.49 at Boots.

Have you tried Seventeen’s Back Lash Mascara? Do you think its aight too?


Angel Eyes Eyelash Extensions | Review

Ladies and gentlemen, I have a confession to make: I am a stumpy girl. I have stumpy legs, a stumpy body, stumpy fingers and even my hair long ago decided to give up growing and just become stumpy hair. Basically, nothing on my body has ever been arsed to grow to an agreeable length. Unsurprisingly this also includes my eyelashes, hence why I’m borderline obsessed with mascara and have wanted to give eyelash extensions a go since approximately FOREVER (and even more so following an unfortunate recent incident with an eyelash curler where I might have… er… snipped off half my lashes).

Recently at a press day I was lucky enough to be given the chance to try out some semi-permanenent false lashes from Angel Eyes, which I was SO excited about. Before I had them done, I got chatting to the founder of Angel Eyes, Marie Di-Rito, who devised the unique 7-step technique after years of experience in eyelash extensions. This technique is now taught to lash technicians in salons all over the UK that fit Angel Eyes extensions, so you’re guaranteed the same amazing quality wherever you get them done.

Angel Eyes Lash Extensions

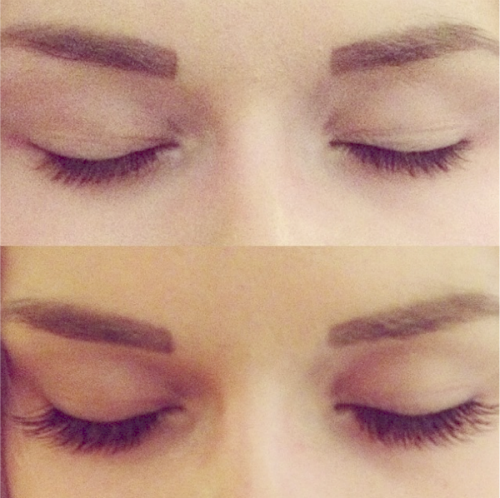
Before / After

After an initial consultation where we discussed what look I wanted, I opted for the ‘Socialite’ lashes which are designed to last between 2-3 weeks before you need infills. Application only took around 15 minutes and I was so pleased with the results. As you can see, my lashes transformed from being mousey little stumps to thick, full, dark fluttery things of dreams. I thought they might feel a bit uncomfortable or at least heavy in the same way that some strip lashes do, but in all honesty I couldn’t feel these at all.

I’ve heard of other people having lash extensions and waking up the next morning to find they’ve nearly all fell out, so I was curious to see how long these would last. However, they really impressed me. I lost one or two lashes in the first couple of days but other than that they basically stayed put. You’re advised not to use oil-based mascaras which I thought I’d struggle with, but they looked so good that I quickly grew used to not needing mascara. I was careful wiping my eyeliner off at night and tried not to touch my eyes during the day, but other than that I got on with my life as normal and they were no hassle whatsoever.

Angel Eyes Lash Extensions

Looking cock-eyed but fluttery

I’d been advised that the lashes could only be removed by an Angel Eyes technician, which did make me wonder whether I’d actually given over my eyeballs to some sort of witchcraft. I also thought it might end up being a bit of a pain as my nearest technician seemed to be in Leicester and I find it a bit of a chore just getting off the sofa sometimes. However, after just over 2 weeks a few more of the lashes had started to shed and then I couldn’t help but start picking just a bit… I’ll point out that this is totally not what they advise and you really should get them removed by a professional to avoid damaging your own lashes – but mine remained absolutely fine.

Overall I was really impressed with the lashes and think I could have got another week out of them if I hadn’t got a bit pick-happy. I have a few important occasions coming up in the summer and I would definitely be tempted to get them again as they’re so perfect for a holiday (as a side note, they’ve also been tested in conditions ranging from blizzards and strong winds to 40 degree temperatures, so whatever holiday you’re on they’ll definitely last!) or just adding some glamour to your everyday look.

If you’re interested in getting Angel Eyes eyelash extensions then you can take a look at their handy salon finder to find a technician near to you. I’d also like to say a huge thank you to the wonderful ladies at the CiCi PR event who hooked me up with my lashes – you released me from my stumpy life for a couple of weeks, which may go on record as being the best weeks of my life.

Have any of you had eyelash extensions before? What did you think?

Karora Tinted Self Tan Mist | Review

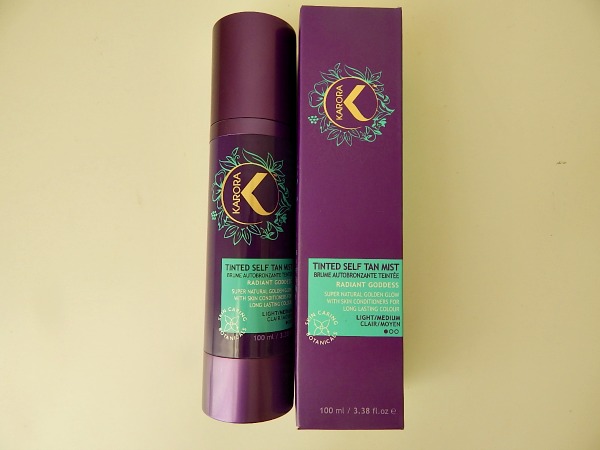
Karora Tan 2Happy Sunday chicas! Today’s review is for all my fellow fake tanners out there (shout out to the girls for whom white bed sheets can only ever be a dream – the struggle is real, so real).

Last week I was invited to an event in Manchester by CiCi PR, where I was lucky enough to come away with a bottle of Karora Tinted Self Tan Mist to try out. I hadn’t heard of Karora before, which actually isn’t too much of a surprise as it’s quite a high-end tanning brand and I considered myself to be quite the fancy Nancy when I progressed from £3 St Moriz to £6 Cocoa Brown. Karora retails for between £14.99 to £26.99 so is out of my usual price range, but I was crazy excited to give it a go.

Karora prides itself on being a ‘botanical bronzing range with skincare status’. The Tinted Self Tan Mist which I tried is packed with skin-benefiting ingredients including aloe, acai berry, argan and coconut oil, meaning that you get the bronzed glow without any of the chemicals found in other fake tans. Usually I’d be all ‘chemicals schmemicals’ about claims like that, but I’ve got to admit that the tan did feel much more moisturising and nourishing to apply than any other tan I’ve used before. It goes on light, but with a handy guide colour, and leaves a faint citrus-y smell.

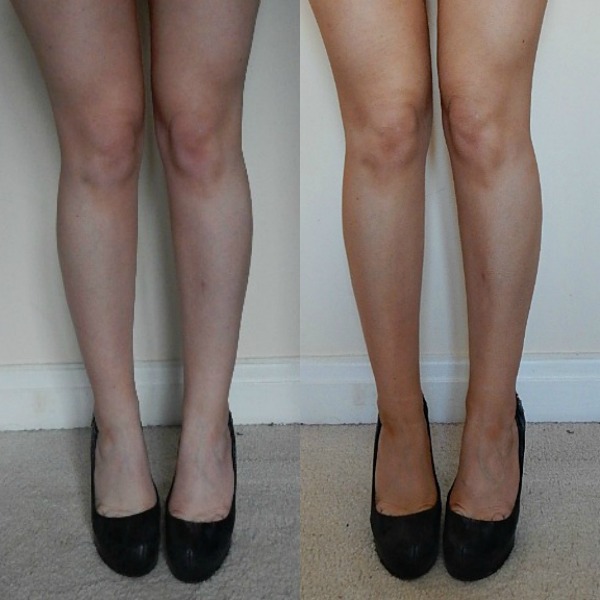
Karora Tan Before and AfterI applied before bed and then when I woke up in this morning, ta daaa! I know these photos were taken at different times of the day and even the carpet looks a tad anaemic but I assure you the difference was as prominent.

The colour was beautifully even and, dare I say it, natural-looking (not that I have any memory of what a natural tan looks like, so long has it been since my pasty body graced a beach). I tried out the Light-Medium shade and am still really impressed with the colour; for a night out I would probably prefer the Medium-Dark shade, but as a day-to-day tan for the working week this is absolutely perfect.

It’s also definitely worth pointing out that I only used a couple of spritzes for each part of my body to achieve this colour, so I think the bottle should last a fairly long time.  When you compare that with a cheaper brand like St Moriz that I used to plough through at an alarming rate, the higher price tag suddenly doesn’t seem so bad.

The Tinted Self Tan Mist retails for £17.99 and can currently be found online or in Lloyds pharmacy.

Have you ever tried Karora?

A Cheat’s Guide to Nail Art: Primark False Nails

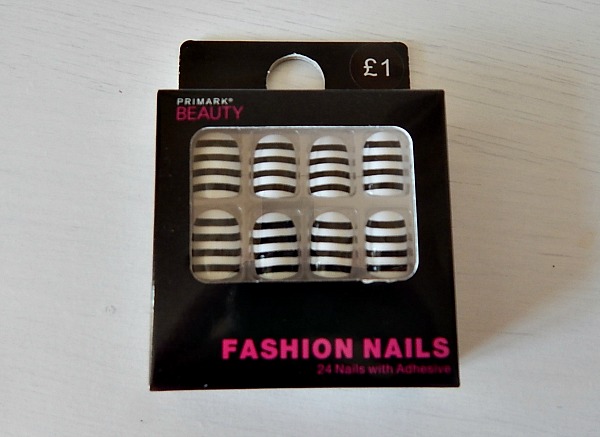
Primark Nails 1Happy Easter err’body! I’m going to keep this one short and sweet, frankly because I have a hangover and a Sunday dinner is waiting for me (I love this blog, but I love gravy more).

While I was in Primark last week I decided to pick up a pack of their false nails to give a whirl. I usually wear clear false nails from Boots and paint over them, never attempting any sort of nail art because I’m what’s known as a ‘cackhanded idiot’ and it would just go terribly wrong. So I liked the idea of trying these out and getting an instant bit of nail art on my hand-toes.

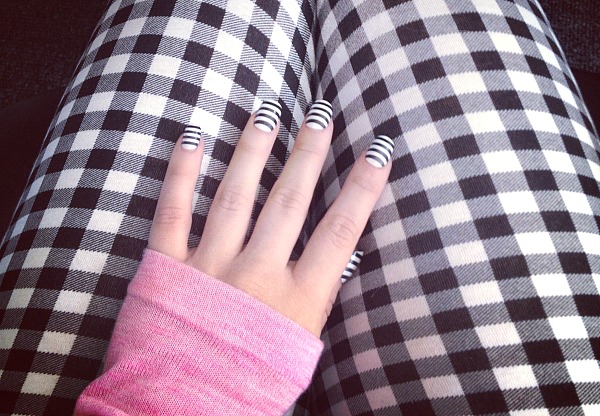
Primark Nails 2I’m actually really impressed with these, especially considering the teeny tiny price tag. I didn’t struggle finding nails that were the right size – which is good in itself seeing as I have spade hands – and they felt sturdy once on. You get about 20 nails in the pack too, so you can easily replace ones that fall of or give yourself a completely new set. The pack also comes with glue, which was surprisingly good. The nails lasted for about four days before one or two started pinging off, at which point I got impatient and started picking at them anyway.

My only beef with the nails is that there isn’t a great choice in terms of patterns in the range. There seemed to be a few aztec ones, a neon leopard print and something weird with rabbits on (let’s hope that was an Easter novelty) – so nothing I was particularly amazed by aside from these ones. Overall though these are brilliant for people like me who will never be able to do nail art without it looking like some horrible accident has happened.

Have any of you tried the Primark false nails?

Please nominate Stylingo.co.uk for the Best Blogging Duo award in this year’s Company Style Blogger Awards!

Makeup Mini Haul: Rimmel on Boots 3 for 2

DSCN4868Did I mention that I was going to South Africa this week? No? Well I am. And good heavens am I excited.

In fact, I am so excited that I might accidentally shoot Claire in the bathroom because I think she’s an intruder (…too soon?). Inappropriate jokes aside, I am really looking forward to it and I have also been doing a helluva lot of shopping. You can see the clothes I bought for my little trip here. Unfortunately, because I spent a million GBP on clothes, my makeup budget was slightly lacking, which is why I obvs had to hit Boots and take advantage of some 3 for 2 excellence.*

* You may notice that I have 4 things. I don’t know why that happened either. I probably forgot how to count again.

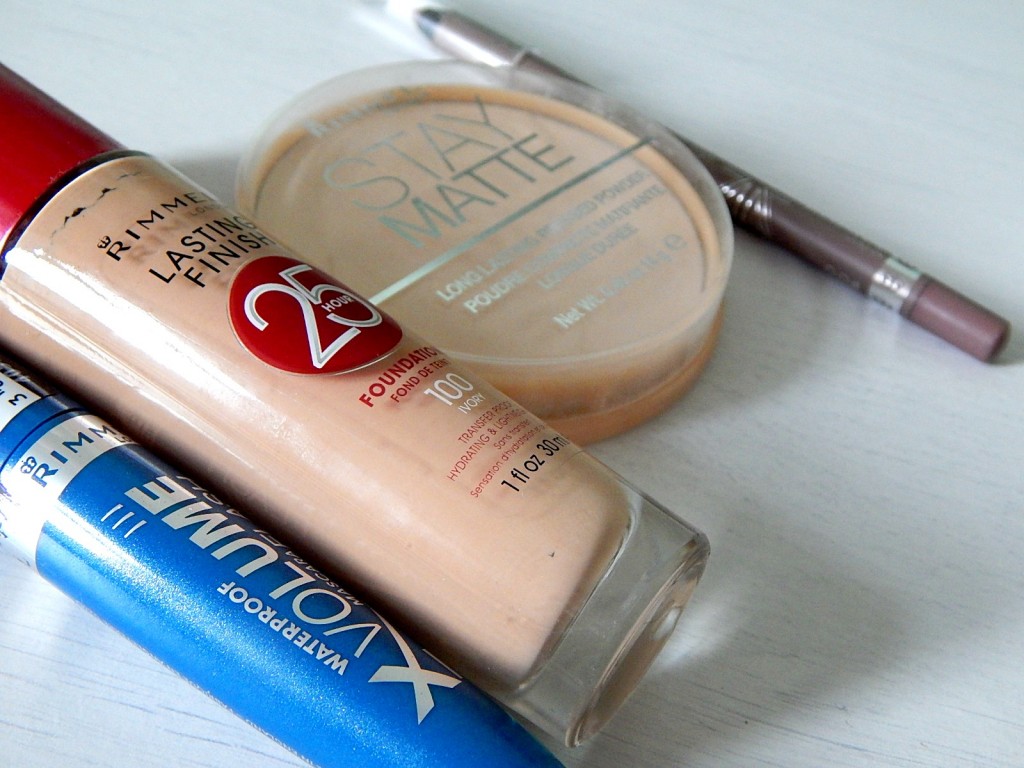
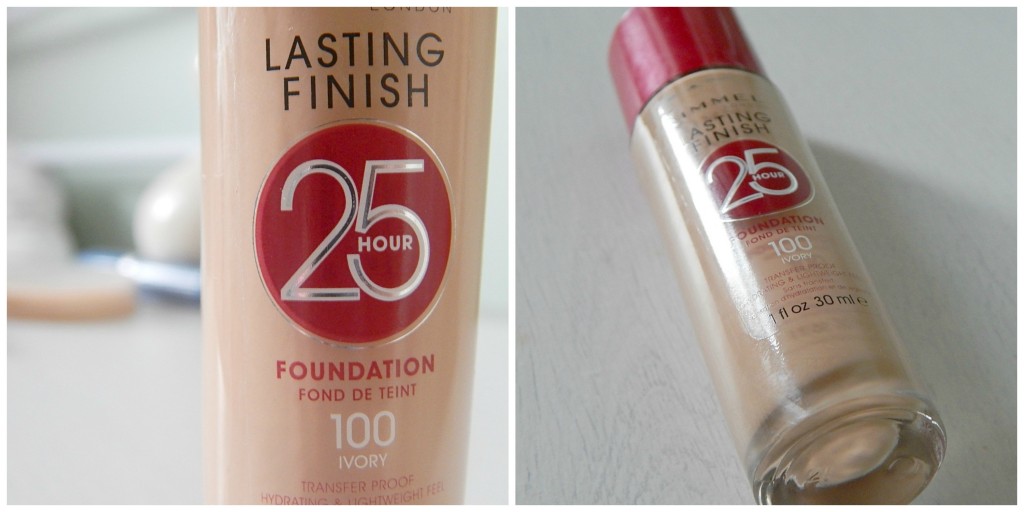
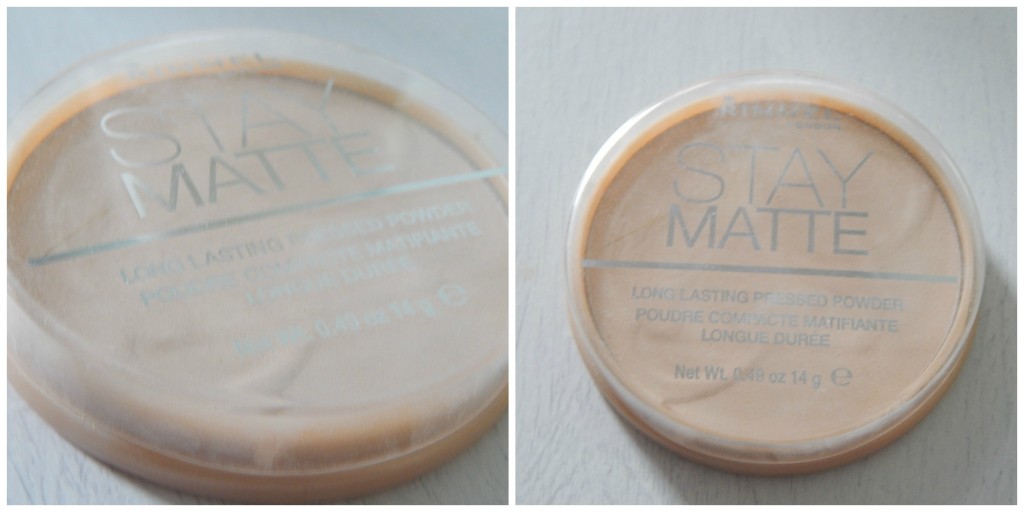
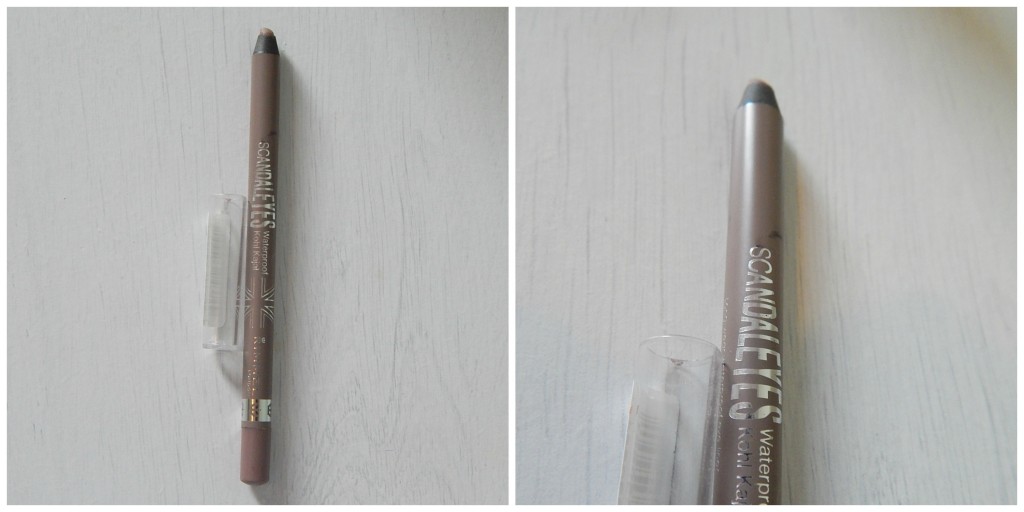
Rimmel is one of my go to makeup brands, which you might think is slightly surprising considering my absolutely slating review of Rimmel’s Scadaleyes Rockin’ Curves mascara (read all about the uselessness that it is here). Even so, I love their foundations, their powders and have found that you can’t go wrong with their eyeliners either. Which is why I decided to get a few of their bits to take away with me.

PicMonkey Collage

My absolutely favourite foundation, I won’t rave on too much on here but you can read my full review over here. It’s going to help me keep my face on when it’s a bit on the sweaty side over in SA, fo sho.

lskfkldjsfsA nicely finger printed photo, soz guys. Anywho, this is another one of my staple makeup products and I love it. It does help to keep my discoball face at bay and it’s cheap too!

waterproof eyelinerIt’s surprisingly hard to find a waterproof pencil eyeliner anywhere, so I literally grabbed this before I could say ‘Huzzah and thanks to Queen Lizzy’. I’m actually planning on using this on my eyebrows so I don’t look like a complete lunatic when I slow-mo run out of the sea.

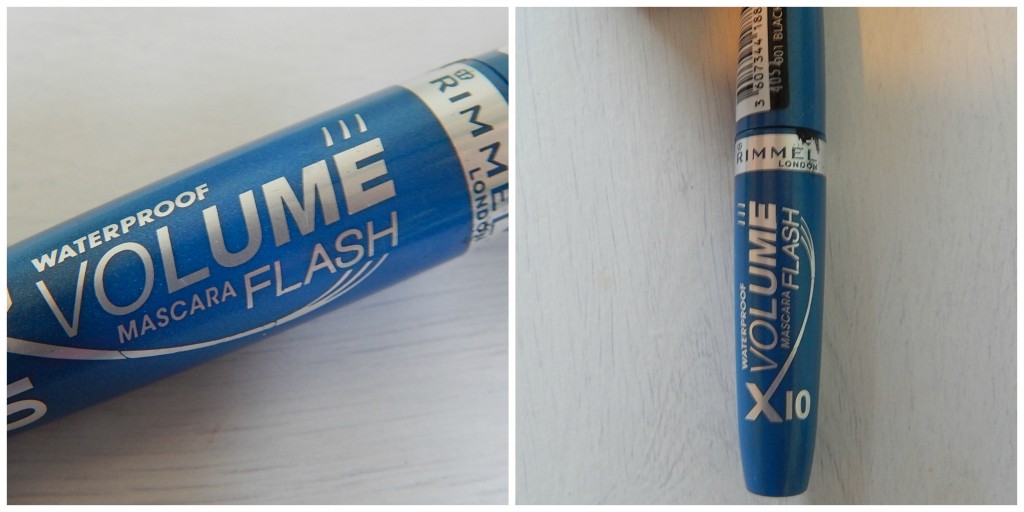
waterproof mascaraThis Rimmel mascara is actually alright, definitely a step up from the terrible Scandaleyes one. It’s not exactly the best in terms of length or volume, but the waterproof side to things is good enough and again, will help me not look like an albino rabbit on the beach.

So girls, please share with me your Boots 3 for 2 purchases but try not to give me too much holiday makeup advice, I don’t have the time or money to buy anymore and I will probably cry into my pillow and/or accidentally rob Duty Free on my way there.

 || Don’t forget that you can follow us on InstagramBloglovin’ and Twitter! ||

Cocoa Brown 1 Hour Tan | Review & Photos

CB 8We’ve all been there. You decide fairly last minute that you’re going ‘out out’ and have to start a rushed attempt at getting ready. You’re paler than Pale Gail the Paleontologist and realise with horror that you’ve fully run out of instant wash-off tan.

You now have two options: 1, you go out pale. That’s not happening, obviously. So 2, you risk putting on a layer of normal developing tan and just not washing it off, figuring that the club’s dark anyway so it doesn’t matter if you progressively get more tanned throughout the night. Then you see the pictures the next day and realise you started the night as a bronzed goddess and ended up looking like Sir Trevor McDonald. 

Well thankfully – no offence Trev – those nights are now in the past.

Cocoa Brown fake tan, developed by Irish beauty expert Marissa Carter, promises to give you a golden glow that develops in just 1 hour. I was really excited when I first heard about this; it effectively could mean the end of overnight tanning sessions and maybe, just maybe, mean that I can allow myself to have white bedsheets again for the first time since I was 15.

I was in Primark last week and finally remembered to pick up a bottle. I’ve tried it out twice now and can confirm: it’s really bloody good.

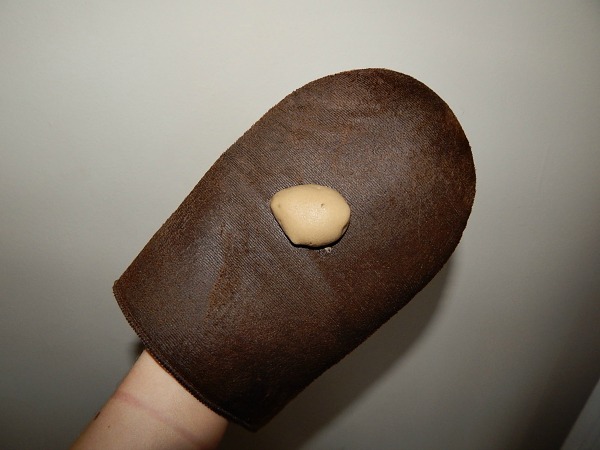
CB 7Cocoa Brown is a mousse, which is my favourite form of fake tan anyway as I find that it tends to apply more evenly and with less mess than sprays or liquids. It’s also got a pale coffee colour to it, which is dark enough that you can see where you’re applying the tan but not so dark that you have heart palpitations when some drops on your cream carpet. 

A lot of the reviews I’ve read so far of the tan have commented on the smell – or shall we say, lack thereof. Cocoa Brown is missing the traditional biscuity smell that we all know and love; it’s lightly fragranced but nothing too overpowering – and certainly doesn’t smell like a Custard Cream.

But enough chit chat, WHAT ABOUT THE RESULTS?

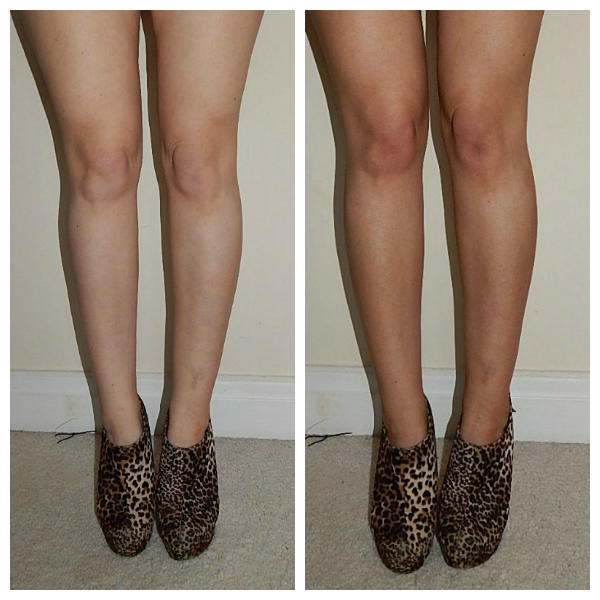
CB Collage flashBefore Application / After Application

As you can see, the tan left me with a lovely, even coat of colour after just one hour of development. It’s not the darkest tan in the world, but I think this is still really good for one layer and of course you can layer up. The tan also gets darker the longer you leave it on for, with the Cocoa Brown website saying that three hours is all that’s needed for a dark glow.

The tan dries quickly and doesn’t feel at all sticky, and after one hour you’re ready to wash off and get on with your life. Having first used it last week I can say that it’s one of the best cases of fading I’ve experienced with fake tan; whereas St Moriz can go very speckly and leave you looking a bit like you’ve got some sort of disease, Cocoa Brown fades nice and evenly.

At £6, it’s not as cheap as brands like St Moriz – but I do think the formula’s got the edge here. Overall I’m completely impressed and a total convert to the Cocoa Brown brand. So that’s another reason for me to pop into Primark each time I’m in town – farewell, funds.

Have any of you tried Cocoa Brown 1 Hour Tan? What do you think?

|| Don’t forget that you can follow us on InstagramBloglovin’ and Twitter! ||

Maybelline Baby Skin Primer Review: Don’t Believe the Hype

After Claire’s brilliant post yesterday (about the dark side of Instagram), it feels a bit wrong to be diving in with a beauty product review. Because, you know, the issues I have with primer are definitely up there in terms of importance. While I’m throwing myself willy nilly back into beauty blogging, I do recommend you give her post a read and let us know what you think.

So.

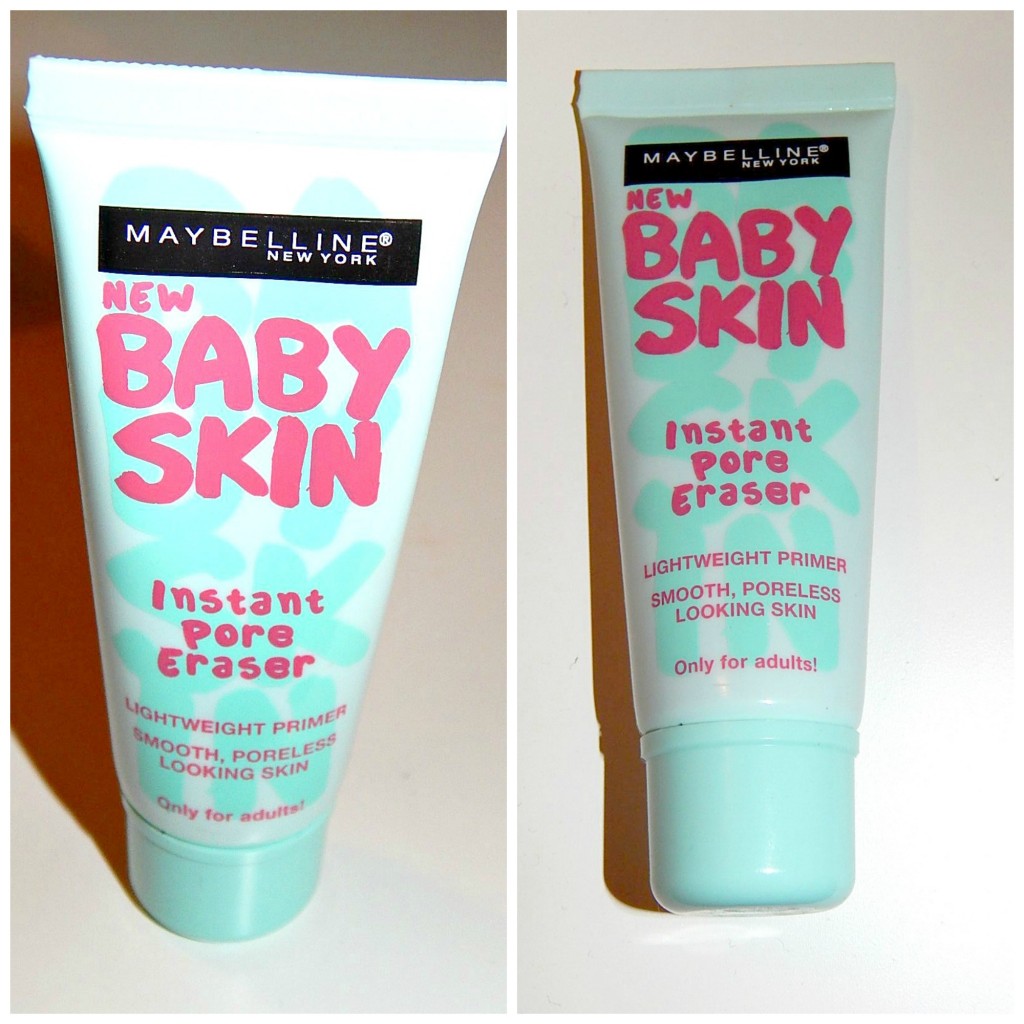
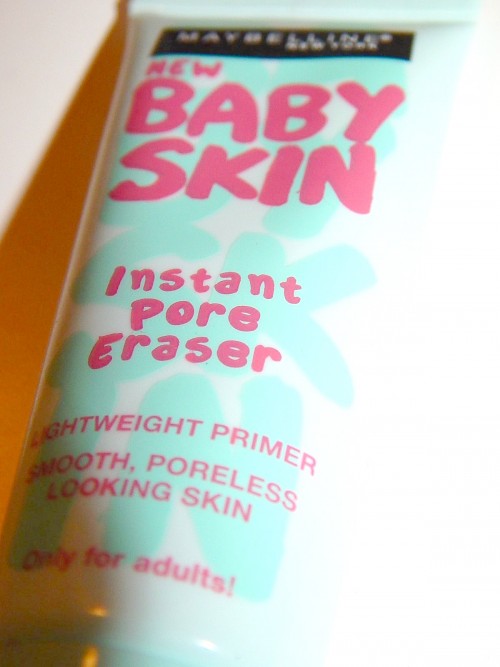
As usual, I’ve managed to get caught up in the hype of Maybelline’s ‘Baby’ range. I’m not sure what it is about this bandwagon, but ever since the Baby Lips fiasco (which, lets be honest, was just Vaseline in nicer packaging), we’ve all been keen to see what Maybelline would bring out next. When the Baby Skin Instant Pore Eraser Primer (HOW MANY WORDS) popped up on beauty blogs and in stores, I was like “yes, get on my face”. I hurled myself to Boots as soon as I possibly could and bought it. What a mistake.

BabySkinCollage

I worry that Claire and I are becoming a bit too free with our bad reviews (check out our From Bag to Bin post as an example), but the fact is we like to complain and if something isn’t right, we will most definitely share it with you. And probably use quite a few adjectives in the process.

I am just not impressed with this primer at all. AT ALL I TELL YOU. As a serial primer user, I’ve used a lot of different products over the years. From high street to high end, I’m casually working my way through what’s on the market to find the best primer out there. Unfortunately, Maybelline’s offering is way, way, way down my list.

Maybelline has described it as a “lightweight primer” for “smooth, poreless looking skin”. Personally, I like to use primers for both keeping makeup on my face for longer and reducing the size of my face caverns pores. So, the fact that Maybelline haven’t mentioned much about it making makeup last rang a few warning bells in my tiny head. While I agree that pores are a terrible problem that many of us struggle to deal with, I don’t really see the point of a primer that doesn’t help makeup length in any way. And unfortunately, the Baby Skin Primer doesn’t do anything for helping my foundation last. I still find myself powdering my shiny bits throughout the day and lasting wise, things still look a bit on the worrying side by the time I get home from work.

BabySkin2

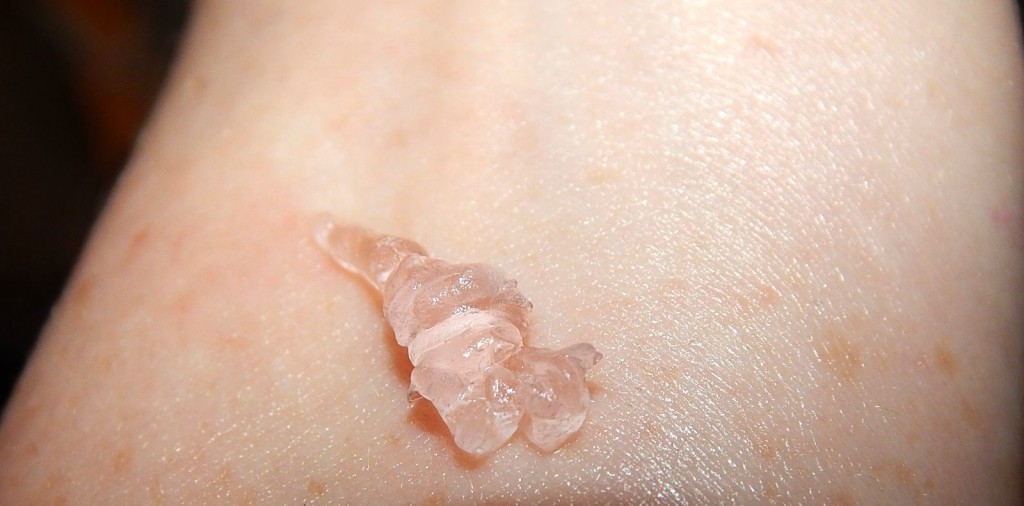
Another one of my problems with the Baby Skin Primer is the way it feels. I put a picture up on our Instagram the other day and mentioned that I found it quite greasy. With oily skin, I really hate anything that feels remotely greasy on my skin so I wasn’t massively keen on how it felt initially. Also, the gel is quite stiff, which is a bit odd when you squeeze it from the tube. After our blogger pal Imogen mentioned it felt ‘silicone-y’, I realise that is exactly what it’s like (partly because it does actually contain silicone) – it doesn’t feel nice and fresh like other primers, but rather like you’re smearing solid petrol on your face.

BabySkinSwatch

So…apart from it being like petrol and generally rubbish, what are the good points? Fair play to Maybelline, it does help to reduce the size of my pores. As that is supposed to be the main aim of the product, it does do quite well and it gives a nice ‘blur’ effect to my features. However, I’ve found that other primers do the job better (Seventeen’s Flawless Poreless Primer for example) and there’s no way by the Queen’s pantaloons that I would go out just wearing Baby Skin. For that, I would rather use the magical Skin Perfect Primer by Dermalogica and rest assured that my face looks mega.

This may even be the most damning review I’ve written to date (although Barry M’s TRAGIC AND WRONG Eyebrow Pen might come close), but I will finish with this: it is not a dupe for Benefit’s Porefessional. It’s not a dupe for anything, apart from maybe the tears of an Orangutan.

|| Don’t forget that you can follow us on InstagramBloglovin’ and Twitter! ||

How to Shape Your Eyebrows at Home | Eyebrow Stencils

Eyebrows 1I’m well aware that this is a #FirstWorldProblems issue, but I’ve got to admit that I spend an alarming amount of my time worrying about my eyebrows.

Like most other girls of my age in the UK, in my teens I definitely followed the ‘less is more’ mantra for my eyebrows and so between the ages of about 13 to 18 – okay, 13 to 21 (embarrassing) – I barely had any eyebrow to speak of. Eventually, big eyebrows came into fashion and we all realised that we looked like chavvy gimps. The challenge then was how to go about growing out our eyebows and, even more problematically, what the hell we were supposed to do with them afterwards.

Eyebrow shaping is a tricky thing, no matter what magazines tell you about just ‘following the natural arch’. What the hell? I plucked away my natural arch years ago and it’s not showing much sign of coming back.

Many people therefore choose to leave eyebrow shaping to the professionals – but even that is a risky business. Once I spent months and months religiously growing out my eyebrows, only to go and have them threaded by a woman who – despite me saying over and over again “I just want them tidying up” – went on to completely rip out all of my hairs and leave me with baldy chicken skin. So, if we can’t trust the professionals to shape our eyebrows, what can we do? The answer is simple – eyebrow stencils.

What Are Eyebrow Stencils?

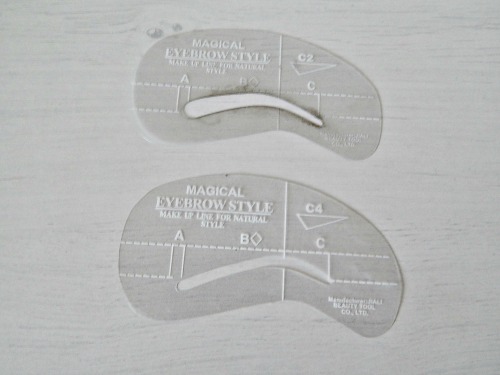
Eyebrows 2Eyebrow stencils are things I only learned about a few months ago. I think they’re mainly used for girls who draw on/fill in their eyebrows every day and want to achieve the same flawless shape each time, but they can also be used for initially shaping.
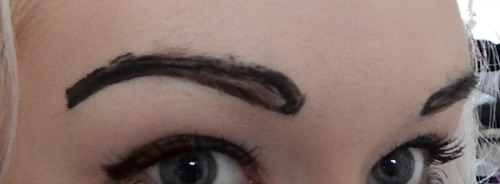
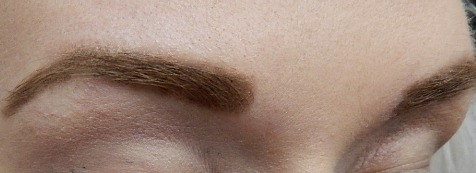
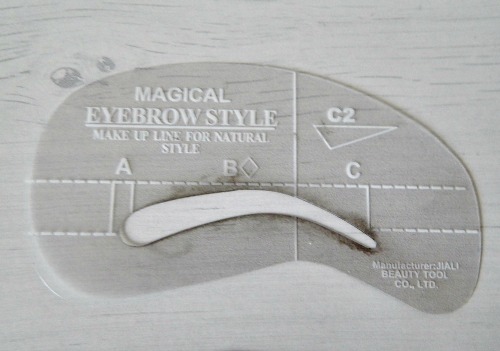
I bought a pack of stencils from eBay, which you can get for the tiny price of £1.29. This came with 4 stencils, all different shapes so you can choose the right one for you. Some were super thin, so I opt for C2 which is the thickest shape of the 4. If you’re not sure which stencil to use then you can always outline with each of them in turn to decide which one suits you best before plunging in with the plucking.

How to Use Eyebrow Stencils

Eyebrows 3Shaping your eyebrows with stencils is pretty straightforward. Use the stencils and make an outline of the shape on your eyebrows. You could do this with powder or pencil, but I prefer to use a liquid eyeliner pen – mainly because I think it looks really funny. Apologies I couldn’t get any photos of this actual step – I needed a third hand coming out of my arse to do so, and unfortunately humans haven’t evolved to have that yet.

Once you have your shape, start plucking away around the outline with gay abandon. However scary it might be, my top tip is to trust the stencil.  Don’t get attached to where your eyebrow hairs used to be and feel like you’re plucking too much – you need to follow the stencil if you want to get the proper shape. Also, that old saying about never plucking above your eyebrow – I’d say just ignore it. The majority of the time when you get your brows done professionally they’ll go above the eyebrow, so I think it’s just one of those beauty myths.

Eyebrows FinalOnce you’ve finished plucking, wash off the outline and say hello to your new eyebrows. As well as getting rid of a lot of unneeded hair, I think the stencils are also brilliant for showing you the parts of your eyebrows that you need to grow back. Particularly when it comes to the middle part of my brows, I have a tendency to over-pluck, and carry on plucking whenever the strays grow back. The stencils should show you where your eyebrows should really start from, meaning that you know to grow these bits out (and can fill in with powder/pencil in the meantime).

Overall I think eyebrow stencils are a good DIY eyebrow shaping tool, and are perfect for those of us who are a bit scared of our own eyebrows. For such a cheap price they’re definitely worth giving a go.

What do you use to shape your eyebrows? Do you ever DIY or do you trust the professionals?

|| Don’t forget that you can follow us on InstagramBloglovin’ and Twitter! ||