Help Me, I’m a Dinosaur: Combating Dry Skin in Winter

I’m pretty sure everybody in my life is sick of hearing me complain about my dry skin. At least 4 times everyday someone will hear me shouting ‘I HATE MY SKIN’ and ‘I AM A SCALY WENCH’, and it must get quite annoying. However, the fact of the matter is that I am a scaly wench and my winter skin is driving me up the wall.

Prepare yourself for what can only be described as the most boring post known to human kind – BUT I hope that it will give help and advice to anyone who’s struggling with looking like a T-Rex.

My skin has never been this bad before and I’m blaming it on a combination of getting old and cold weather. Unfortunately, my normal moisturising routine hasn’t been working. Usually I use either Dove or Nivea, but if you have very dry skin that is broken in areas – these are both a no-no. Anything with perfumes and chemicals irritates bad skin and to be quite honest, these just aren’t strong enough to cope with very dry, dinosaur-like skin.

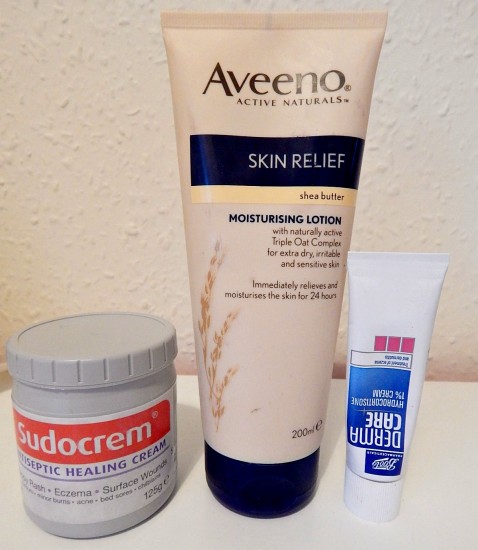
After trying lots of different combinations and even having a bath in olive oil (I don’t recommend trying it, you come out smelling of salad), I’ve found the best combination that is slowly starting to improve my skin.

DSCN3496

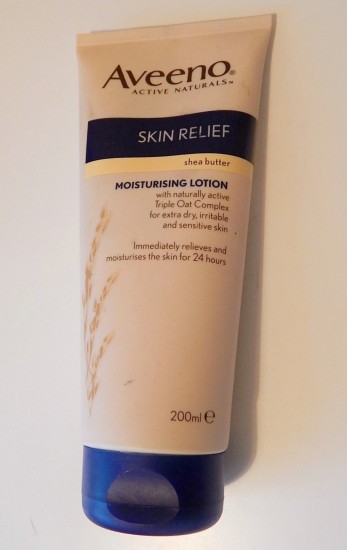
Aveeno Daily Moisturising Lotion

This is weirdly hard to get hold of, it’s a bit hit and miss whether Boots and Superdrug has it in stock. If you do manage to get hold of it, then you are a lucky thang and your skin will be as soft as a baby’s botty. It’s an emollient based lotion that combines oatmeal and some other nonsense to make a brilliant moisturiser that I suspect of wizardry. I had this recommended to me by my doctor and it’s a great lotion to use everyday. It treats already dry patches fairly well, but if you have really stubborn bits of eczema or dry skin – you may need something stronger. Other plus points include that it is fragrance free and it is not as thick as E45 cream, meaning it’s great for everyday use.

There was also an article in the Daily Mail recently about how a lot of creams and skincare have the chemical Methylisothiazolinone in them – this can cause allergic reactions and flare up eczema, so if you are have skin probs then you might want to check the label of your moisturiser!

DSCN3504

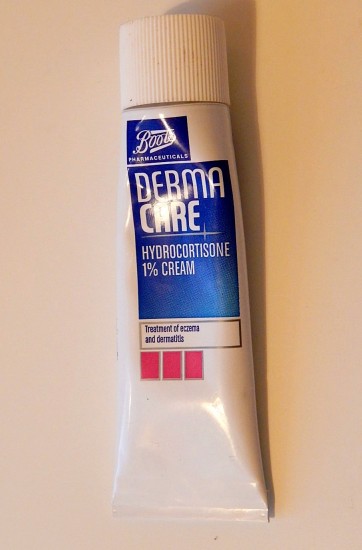
Derma Care Hydrocortisone Cream

This stuff is magical when used on smaller areas of dry skin. You’re not meant to use it for more than 7 days, you can’t use it on sensitive (i.e. face) skin and you’re not supposed to use it on large areas. Saying that, even with a ridiculous amount of limits and rules (fight the power), it’s really good for patches of dry skin or eczema. I’ve found that it works almost instantly and that you can notice a difference within a couple of hours of using it. My hands are the bits that seem to get hit the most by dry skin, so it’s great to use on my tiny chubby fists. If you’re finding that your regular moisturiser isn’t doing the job and suspect yourself of eczema, definitely give this a whirl. It’s £3.49 from Boots – not bad, eh!

DSCN3501

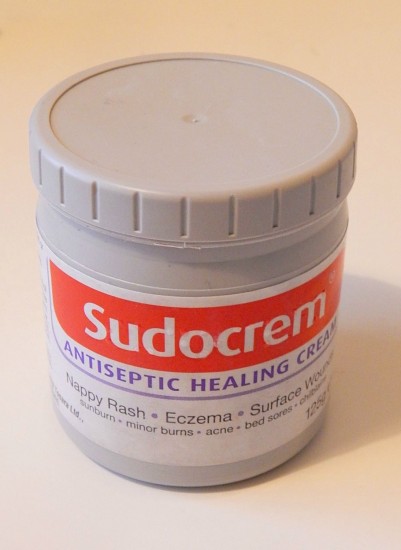
Sudrocream Antiseptic Healing Cream

No skincare list would be complete without Sudocrem. I literally use this for everything: spots, blisters, cuts, scrapes…and any other injuries I manage to inflict on myself. I am currently using this on my horrible cracked dinosaur skin, particularly if I have got a bit too vigorous with my scratching and broken the skin. It works really well, which is no surprise because Sudocrem is magical and brilliant.

Stylingo Top Tip: Slather Sudocrem on your face before bed if you’re suffering from a break out. Tiny little Sudocrem wizards will work tirelessly as you sleep to get rid of any unwanted blemishes. 

If you still are looking vaguely T-Rex like and want to go even further than these 3 products, then E45 Bath Oil is really good too (much better than the olive kind). Hitting your skin with a double whammy of an oil bath and Aveeno, you will literally love your life more than someone who loves life a lot. It’s also worth mentioning that keeping your diet in healthy oils is important too – lots of nuts, avocados and healthy fats have a massive impact on the way your skin looks. I’m a hugey fan of avocados but I could probably do a bit better on the fish and nut scene. If you want to find out more about what you need to eat to have better skin, this BBC Good Food article is really good.

DSCN3506

Anywhoo, I hope this is at least a little bit helpful if you’re suffering from dinosaur problems this winter. These 3 products are my favourites and are the only ones that have been working properly to fix my horrible skin. It’s not quite there yet though, so if you do have bad skin that nothing will shift – you may need to head to your GP like I will have to do soon! Cry.

|| Don’t forget that you can follow us on InstagramBloglovin’ and Twitter! ||

I’m A Scrubber | Exfoliating How-To & Review

Good day to you, lunatics dear readers.

I am here today to tell you that I am a scrubber. HA-HA, you think. What an excellent pun about exfoliating you are making, I applaud your wit and comedic tendencies. Well, you think wrong. I am just a tramp that lurks about eating Tesco Value food and who enjoys a wardrobe stuffed with Primark.

On a completely unrelated note, I am bringing you a post today about exfoliating. If you ever wondered how I get the scaly remnants of St Moriz off of my skin and keep my freckly bone coverings human cushion cover erm, skin looking excellent or at least as excellent as it possibly can – here it is.
Pic1

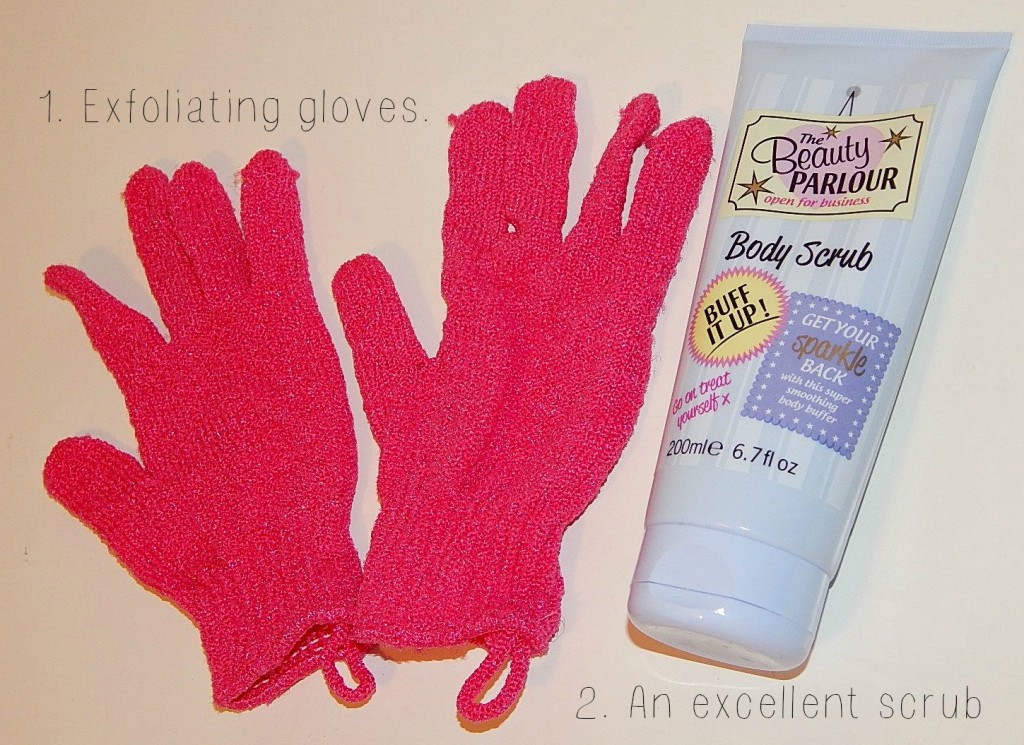
I’ve been scrubbing my skin for years and have used loads of different scrubs, scrubbing devices and loofah-based instruments. The best combination I’ve found is using a pair of exfoliating gloves and a good micro-bead body scrub. What irritates me about a lot of loofahs and exfoliating brushes is that they can lose their ‘roughness’ over time, meaning they’re ultimately useless when they wear down. With exfoliating gloves this doesn’t happen and they also let you get into the bits where fake tan gathers – like ankles etc. I usually buy my exfoliating gloves from places like BodyCare, Boots or whatever supermarket has them. These ones are from Morrison’s if I recall!

Top Stylingo Tip: If you’re an avid fake tanner, avoid getting white exfoliating gloves. They turn a manky orange colour and people will think you have an unusual skin disease.

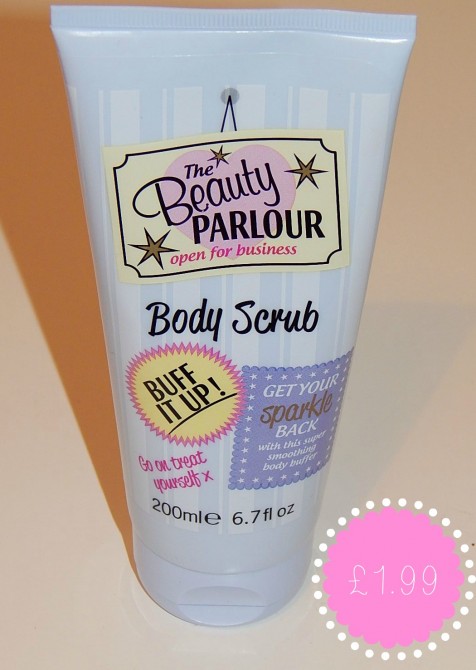
Scrubs are another thing I can get a bit picky about. I am not keen on products that have big exfoliating beads, mostly because they don’t give the best coverage and they feel a bit ‘nothingy’ afterwards (great description there, Lauren!). Micro-beads mean that a larger surface area of skin gets the scrubby-scrubby treatment. I quite like scrubs that have a nice moisturising feel to them too, which sort of hits two birds with one stone when you exfoliate. The best one I’ve used in recent years is actually The Beauty Parlour’s Buff It Up Body Scrub – it smells amazing and works brilliantly.

Pic2I picked this up for £1.99 in Morrison’s quite recently (I can’t remember if it was on offer or not…useless) but it’s SUPER cheap. It goes without saying that this is definitely a dupe for Soap and Glory and I’d say it’s most similar to The Scrub of Your Life Soap and Glory product. This is not only because of the suuuuuuper adorable packaging, but also the level of exfoliating beads and the ‘smoothing’ promise. For the price, this is an amazing product and I thoroughly recommend buying it if you’re looking for a new body scrub. Saying that, I can’t seem to find anywhere online to buy it, so you might have to stroll to your nearest Mozza’s to find this wonderful tube of joy.

This is my scrubbing routine and I hope you don’t have any weird mental images of me in the shower wearing pink gloves (sorry).

Have any of you hunnays tried this body scrub? Or use exfoliating gloves? TELL ME NOW.

|| Don’t forget that you can follow us on InstagramBloglovin’ and Twitter! ||


So Susan’s LacquerLove Beauty Subscription Box | Review

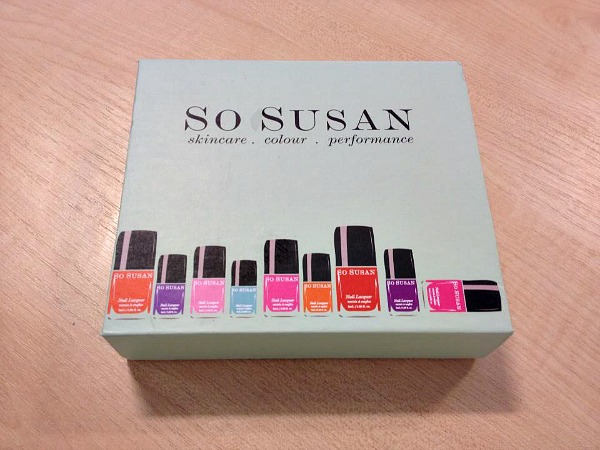
SS8First of all, with my Mystic Meg-type powers I know what you’re likely to be thinking: another beauty box? With Glossybox, Birchbox and Love Me Beauty to name but a few, the market for monthly beauty boxes is pretty saturated right now, and even companies ranging from Glamour magazine to Selfridges are going out of their way to get their foot in the beauty box door. If you’re getting a little tired of all these boxes though, then you’ll be pleased to know that the latest offering from So Susan Cosmetics thankfully isn’t just a carbon copy of the others.

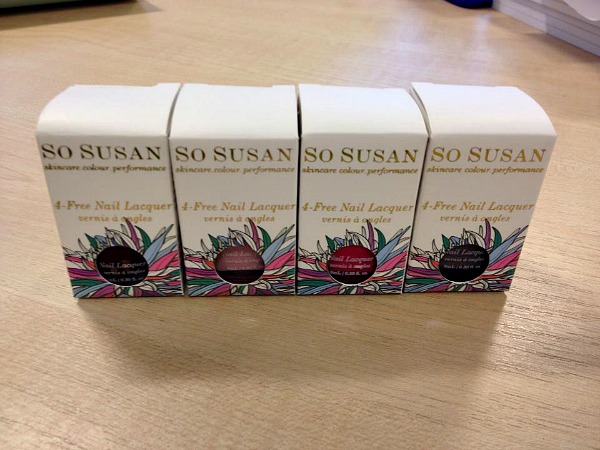
SS7The reason that my personal love affair with beauty boxes was cut quite short was due to the amount of products I received that simply weren’t relevant to me. I’m more into my makeup than skincare, so building up a collection of shower gels and face serums just didn’t thrill me all that much. When the lovely Susan herself contacted us to see if we would like to review one of their Lacquerlove boxes, though, what attracted me immediately to the concept was the focus of the products inside. The Lacquerlove Box is designed for nail polish lovers, and 3 of the 4 products that you receive each month will be from their range of 4-Free Nail Lacquers. So Susan also stocks a range of other cosmetics which may be included as the bonus items. So NO MORE SHOWER GELS, hurray!

SS6

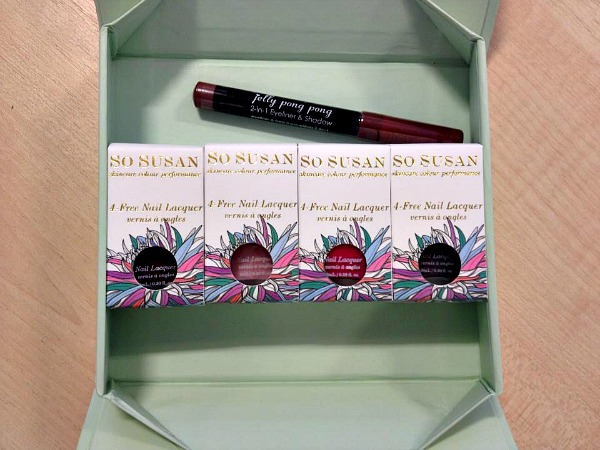
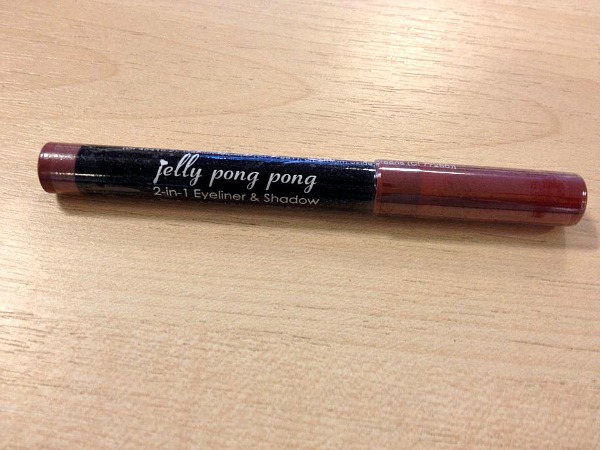
SS5We received the launch box this morning and are really impressed with its contents. It came with four nail polishes from the range, and also a 2 in 1 eyeliner and shadow product from Jelly Pong Pong. I actually received this item in a past Glossybox, so fans of other beauty boxes might be able to expect some other recognisable brands in the future.

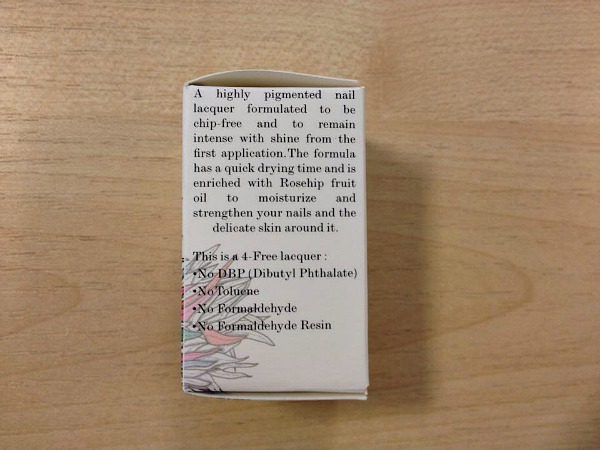
SS4If you’re into your ethical products, then you’ll be pleased to know So Susan has a very strong stance on what goes into their cosmetics. The 4-Free Nail Lacquers are specially formulated to be free from toluene, DBP, formaldehyde & formaldehyde resin. No, I’m not entirely sure what those things are either – but I’m sure I probably don’t want them. They’re also 100% cruelty free and contain no animal by-products.

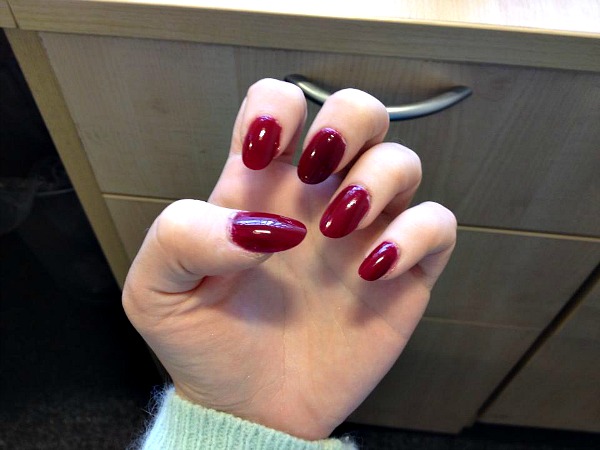
ss1We received a beautiful range of colours: Mimosa, a sugary pale pink; Raspberry, a classic deep red; Pink Guava, which is a shocking pink perfect for the party season, and Silver Clouds, which is a metallic polish with a purple sheen. The formula promises high pigmentation, high shine, quick drying and a chip-free finish. Of course I wanted to put one to the test straight away (it is a Friday, after all…) I chose Raspberry as I’ve been rocking nude nails for a while now and thought some vampy colour could be a nice change.

I can confirm that it goes on brilliantly, and in two coats was opaque. It dried nice and quickly, and really does carry the most intense glossy shine – fans of Barry M’s Gelly Paints will not be disappointed!

SS10Overall, I’m really impressed with the Lacquerlove Box. Obviously, receiving three nail varnishes a month isn’t for everyone – but if you’re a nail polish fanatic or want to build up your collection then it’s probably your dream situation. As we get closer to Christmas, it’s also easy to see that these cute little boxes could make brilliant presents.

A huge thank you to So Susan for sending this box for us to review. You can buy your own launch box for £14.95 here or you can find out more about the subscription service.

MUA Pro-Brow Eyebrow Kit | Review

‘Ello chaps!

If you read our MUA haul post (can we call it a haul? We probably spent less than £20 between us…), you might have noticed that I picked up their Pro-Brow Eyebrow Kit.

Eyebrows are a big part of my life. I probably spend more time drawing my eyebrows on in the morning than doing anything else and nothing distresses me more than a wonky brow (apart from you know, war and running out of hair bobbles). I have paley-paley eyebrows, which means I look like a lunatic without eyebrow makeup- particularly after dying my hair brown. I’m a big fan of eyebow kits as opposed to eyebrow pencils, mostly because I think you have a lot more freedom in terms of shape. Pencils also don’t give the same finish as powders and wax, so I say yay to eyebrow kits and nay to nasty pencils.

My all-time favourite kit in the history of the world ever is the Sleek Brow Kit (which I reviewed here), but I thought that I’d give this MUA one a whirl – mostly because it is just £3.50. You heard it here first guys, this is cheaper than a cheap thing on wheels.

1379671_10152573012122565_1568284889_n

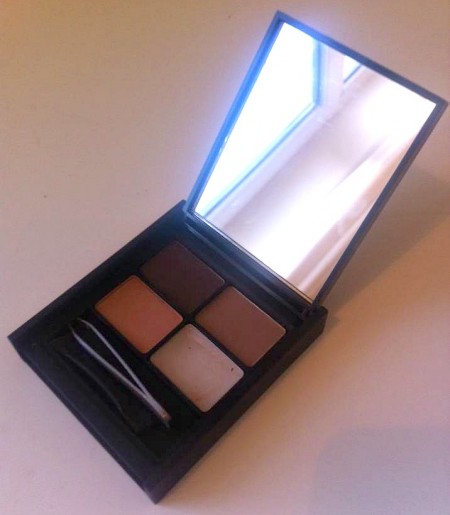
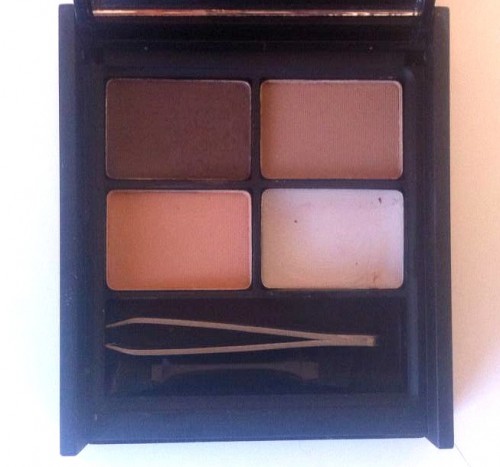
MUA have called it (nice and succinctly), the Pro-Brow Ultimate Eyebrow Kit, All-in-One Shape, Shade and Highlight. For all you Benefit fans, this is somewhat similar to the Brow Zings eyebrow kit or the Brows-a-Gogo eyebrow kit. I say this mostly because MUA have included a mini pair of tweezers, a brush, two main brow shades, a highlighter (we’ll get to this…) and an eyebrow gel.

1441392_10152573012547565_732471522_n

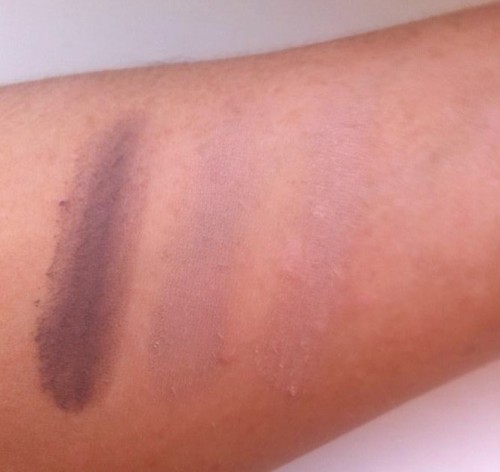
In a bit more detail, the Pro-Brow Kit has two brow shades: a deep chocolate brown and a paler more tan coloured brown. These are both powders and quite obviously, designed to fill in your eyebrows and I have no complaints really. They’re fairly pigmented and buildable – I’ve found that I do a couple of layers of the deep brown for my scousebrows. I don’t have much use for the lighter colour, but it may come in handy if I ever go lighter with my hair. The powder is quite loose as you can probably tell from the swatches, so beware of fallout chums!

The highligher I have beef with. It’s in no way light enough to be a highlighter in the way I know highlighters. For my browbone, I tend to use a very light shimmery colour and this bizarre tan colour is far too dark. I tried to give it a go but I just looked mad.

1394204_10152573011302565_248980509_n

The gel is fine, it took a bit of getting used to after using a lot of waxes in the past, but it keeps my eyebrow hairs in place and is most excellent for neatening things up a bit.

The brush is another part of the kit I didn’t get on with at all. As it is such a cheap eyebrow kit, it’s not really a big surprise that it isn’t great quality although I was a bit disappointed. The brush has really thick, firm plastic bristles that are impossible to work with – I wasn’t able to draw on my eyebrow shape accurately and it just made the powder go all over the place. Thankfully, I had my Sleek brush to hand and that worked perfectly. If you do plan on purchasing this bad boy, make sure you have a back up brush!

Overall, I really like the kit. I’m aware that I sound like a terribly Negative Nancy about it, but on the whole it is a great eyebrow kit. Some things leave a bit to be desired (what even is the highlighter?) but it’s doing to job of giving me eyebrows when there used to be none. HUZZAH AND THANKS TO MERRY ENGLAND MUA.

Has anyone else used this little kit? What do you reckon?

|| Don’t forget that you can follow us on InstagramBloglovin’ and Twitter! ||

The Best Deep Red Lipstick: MUA vs Sleek

Red Lipstick 1Red Lipstick 3

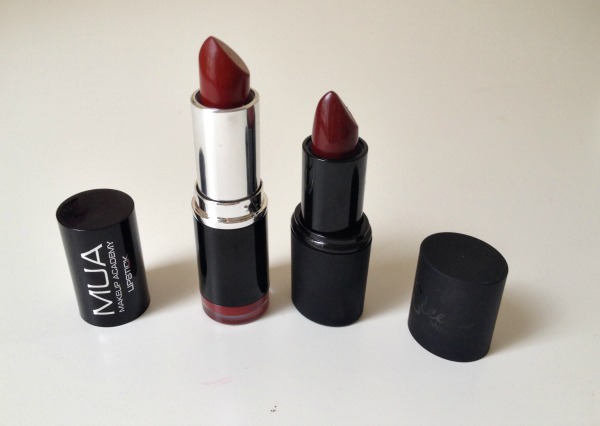
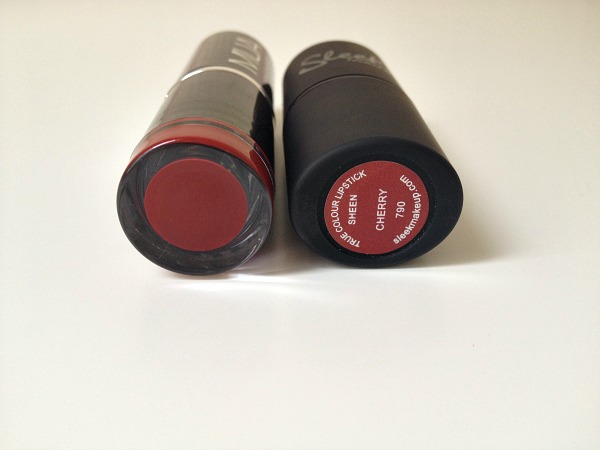
IN THE RED CORNER… we have MUA  in shade 1 (don’t stretch your creative brains too much MUA, they might explode). AND IN THE, ER, OTHER RED CORNER… we have Sleek in shade ‘Cherry’. These are two different lipsticks from two different brands, but they’re practically identical in shade. So – which is better?

First Impressions

MUA’s shade 1 retails for just £1. This is in itself completely ridiculous. How can a lipstick cost you just a quid? You go into Poundland and pick up a pack of Cadbury’s Chocolate Fingers for a pound and you’re happy to have got those that cheap; never mind a WHOLE lipstick that you can use time and again (unlike the Cadbury’s Fingers, which usually last for approximately one cup of tea). Cherry by Sleek costs the much more sensible price of £4.99, which is still extremely reasonable even for a high street lipstick.

In terms of packaging, MUA has its usual black casing, with the really nifty little pot at the end containing an extra bit of product. Although I know that this is a cool feature, I’m not 100% sure what its actual purpose is. Sleek also has black packaging, though the matte makes it look (correctly) a little more expensive. It’s very small for a lipstick, and actually only has 3.5g of product compared to MUA’s 3.8g. I don’t think that 0.3 of a gram is really going to ruin your life, but it’s worth mentioning – yes, mainly because I’m proud of myself for bothering to look at this detail, and now feel really maths-y like Carol Vorderman. Anyway, moving on…

Swatches

Red Lipstick 2

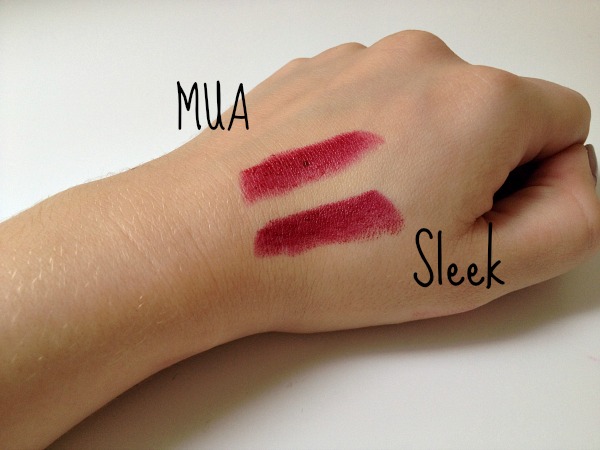
As you can see, the shades looks practically identical both within the packaging and when swatched on the hand. The only difference in the swatches is that Sleek seems to have a slight edge when it comes to pigmentation, though MUA is still extremely vibrant. Ain’t nobody accusing MUA of being wishy washy.

Red Lipsticks 4Red Lipsticks 5

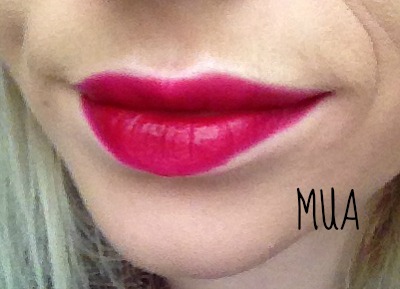
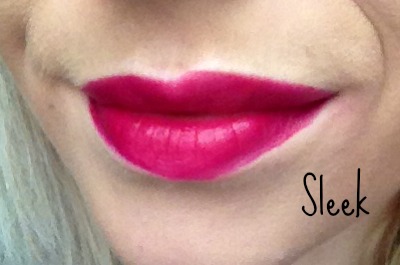
On the lips, again both shades look practically identical. They both apply nicely, have a very smooth finish and appear very vibrant after only one layer. Ignore the pinky tones in these pictures – both actually appear much deeper than this in real life, and I can confirm they’re BOTH that dark red shade that is so perfect in autumn/winter for vamping up a daytime look or for a glamorous finish on nights out (whatever they are). Both feel very hydrating on the lips and not at all cakey. Of course, a lot of things in life that seem great at first can quickly turn awful – certain men, BBC sitcoms, etc – so the proof with a good lipstick is always in the…

Staying Power

I wore the Sleek lipstick out for my birthday ‘meal and drinks’ shindig last weekend and can confirm that it is a BEAST. After several cocktails and a lasagne, I popped to the toilet to re-apply my lipstick and found that I didn’t even have to. It. Had. Not. Budged. Nor had it started to go cakey; it was just as much of a satin dream as it was when I first applied it. I think I only touched up once or twice throughout the rest of the night (memory gets a little hazy, damn fishbowls) and it never felt at all dragging upon re-application as some lipsticks can. A HUGE thumbs up from moi.

Determined to test the MUA lipsticks under the same circumstances, I FORCED myself, in the interest of RESEARCH, to head out on Saturday night for another couple of cocktails. You have to test things in the same conditions; that is just a fact I learned in Science GCSE. Although the colour stayed vibrant and looked okay overall, I did notice that after a couple of drinks the colour had began to come away from the inner part of my lip and needed touching up. Again though, it re-applied very well so wasn’t really a huge drama.

The Conclusion of the Matter

So here we have two insanely similar lipsticks, both extremely good value for money and very good quality. I think Sleek has a slight edge on MUA in this instance, due to being a bit more pigmented and longer lasting. MUA is only one pound and so a complete bargain, but then I also think £5 for a lipstick is really reasonable so can’t fault Sleek for pricing either. This was my first lipstick from both brands, and I’m happy to report that I’ve been left with a great impression of them both and will definitely be stocking up on more of them in the future!

Red Lip 6
Me wearing MUA 1

What do you all think of MUA and Sleek?

|| Also, don’t forget that you can follow us on Instagram, Bloglovin’ and Twitter! ||

How to Lighten Your Eyebrows | Smooth Care Review & Results

Eyebrows Bleaching 2As I think I’ve only mentioned, ooh, around thirty times in the past week, I recently decided to bleach my hair. When I told my mum of my decision, her question was the same that it was when I used to bleach my hair from the ages of 17-21 (as in she literally asked me this at least every other month for four years): “Don’t you think you should do something about your eyebrows then?”

Although I always quite liked the contrast of dark brows and glowing-like-a-beacon hair, I decided that this time she may have a point and a lighter look all over could look better this time around.

As always, I took to the internet to search for how to go about lightening my eyebrows. As always, the usual boring people on Yahoo Answers and beauty forums came back with the usual boring answers: go to a salon/get a professional/don’t do it yourself/you’ll go blind/BLAH BLAH BLAH. Some people just don’t have a sense of adventure do they? So then I took to Twitter, and had a few DIY kits recommended to me by you lovely lot (who are altogether much more knowledgeable than the Yahoo Answers Scaredycats).

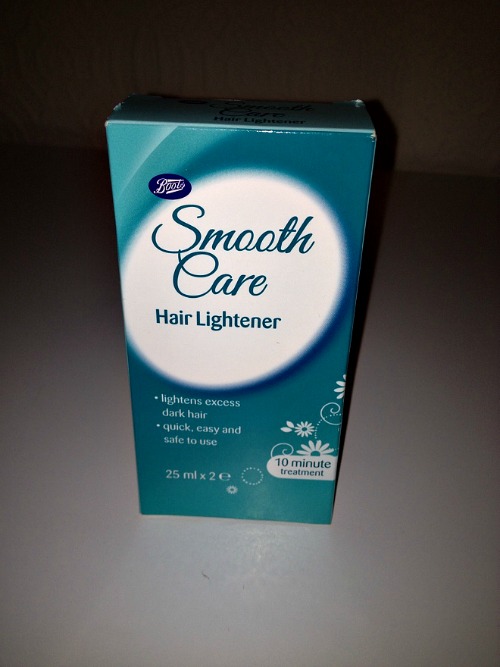
I assumed I would be looking for something specifically for eyebrows, but instead I had facial hair bleaches recommended to me, which made much more sense. I ended up buying Boots’ own brand Smooth Care Hair Lightener, which cost me just £2.66. Yes, the boy behind the till did have a sneaky look at my upper lip to see if I was rocking a ‘tache, and looked a little disappointed that I wasn’t.

Eyebrow Bleaching 3

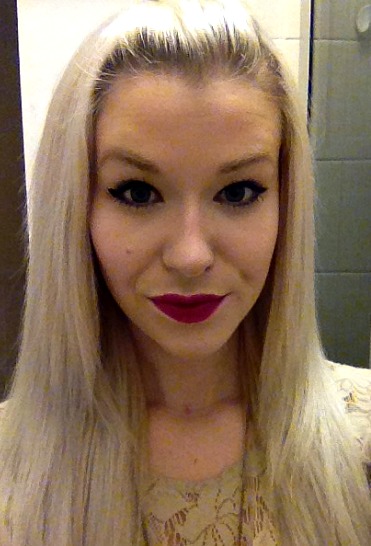
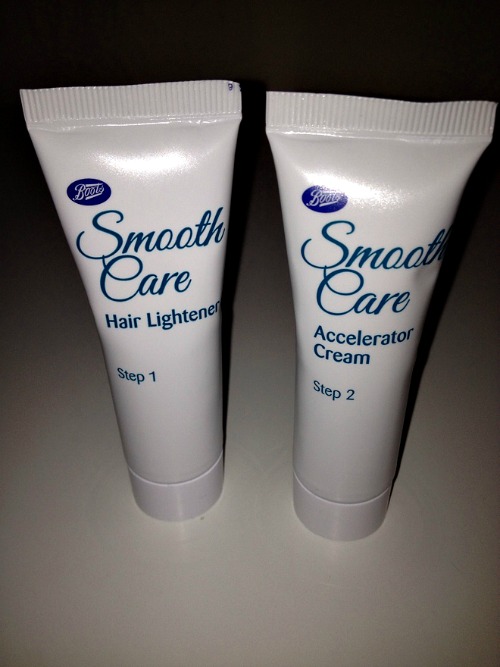
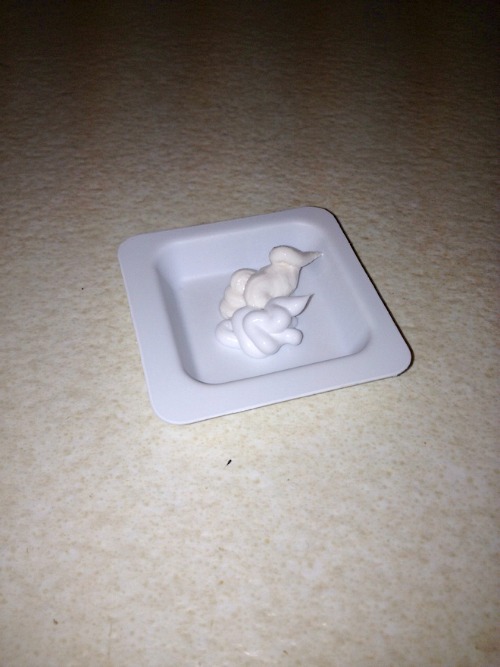
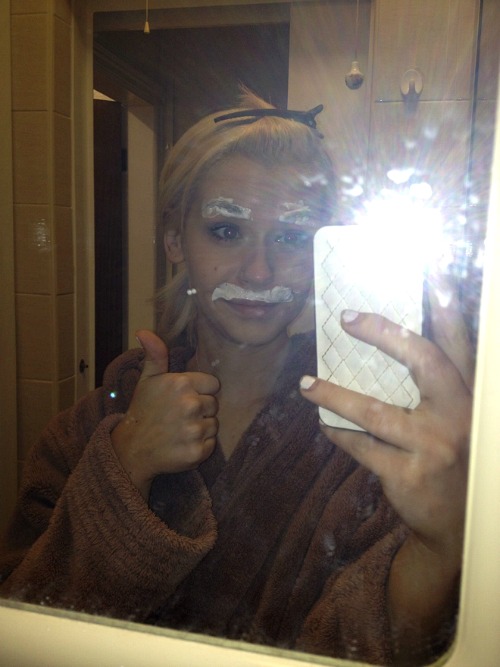
Eyebrow Bleaching 5The kit comes with a tube of Hair Lightener, a tube of Accelerator Cream, a pot and a spatula. The instructions are very simple: mix a bit of these together, whack it on the hair you want to lighten, leave for 10 minutes and VOILA. Of course it wasn’t quite a VOILA case with me, as those are instructions to fully bleach the hair and I only wanted to lighten my eyebrows. I therefore decided to check my eyebrows every 30 seconds or so to make sure they weren’t going too light. Oh, and I also put some on my lady-tache (or misstache)  anyway, just to get the most from my money. Here I am looking fit:

Eyebrow Bleaching 4Yes, my thumbs are weird.

After removing a bit to check the colour and dabbing a bit more on a few times, I think the cream was eventually on my eyebrows for about five or six minutes before I decided I was happy enough with the colour. Remember: you can always add more later if you still want them lighter, whereas over-lightening them could leave you  having to faff about fixing them.

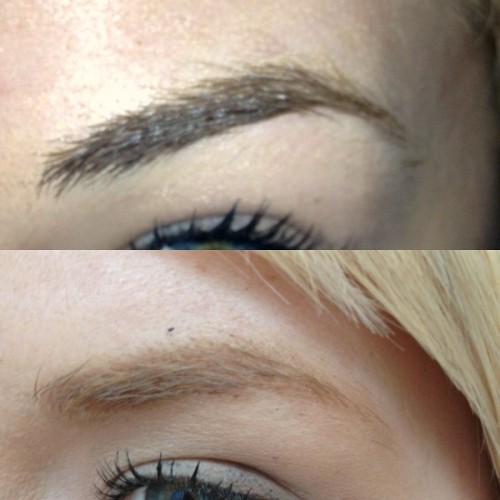
So here is how they turned out!

Eyebrows Bleaching 1I’m very very VERY pleased with the results, and consider this to be a victory for DIYers everywhere (didn’t even go blind so HA). I think it’s had quite a big impact on my overall look, with my face looking much softer now that my hair and eyebrows don’t look like they’re fighting on opposite sides of a war. Also, even though it was light before, the worry that you might actually have a moustache is one that can strike you with fear every now and then – usually when you’re on a date – so I’m also happy to know that my misstache is now completely bleached.

The other excellent thing is that I have LOADS AND LOADS of the kit left still, so it’s brilliant value for money if you need to re-apply, or if you want to get all your friends round for some kind of tache-bleaching party (I don’t know what you kids do for fun these days).

|| Don’t forget that you can follow us on Bloglovin’ and Twitter! ||

Manuka Doctor: Apinourish Introductory Kit Review.

AH SKINCARE. I’m on the eternal hunt for skincare that works miracles for my useless skin. I have big pores, oily, prone to blemishes, uneven… i.e. the biggest snore known to humankind. I’ve used products that work, products that don’t, but haven’t yet come across that one product that I am like, ‘yes, you are the one. Let’s settle down and have many children together’.

The kind humans at ChemistDirect.co.uk sent Claire and I a few products (I thoroughly recommend checking out their site if you haven’t already…makeup/skincare/EVERYTHING galore. The prices tend to be a bit cheaper than RRP – so worth it) and I picked the Apinourish Introductory Kit by Manuka Doctor. I’ve heard loads of good things about the brand and figured it would be a good way of trying a few of their products in one go.

So anyway…bee venom.

Am I the only one that imagines the concept of bee venom skincare as a swarm of bees stinging your face, while you run around shouting ‘GUT GOTT, I BETTER LOOK LIKE SCARLETT JOHANSSON AFTER THIS’? Apparently, that’s not actually how it works. The Manuka Doctor products come in quite unassuming packaging, not even a single live bee in sight. The idea of bee venom is to trick your skin into believing it’s been mildly stung, meaning your skin looks more youthful, wrinkle free and generally in better condition. I may only be 22, but I’m keen to get the anti-ageing process started so that I ideally look about 5 years old by the time I’m 40.

DSCN2937


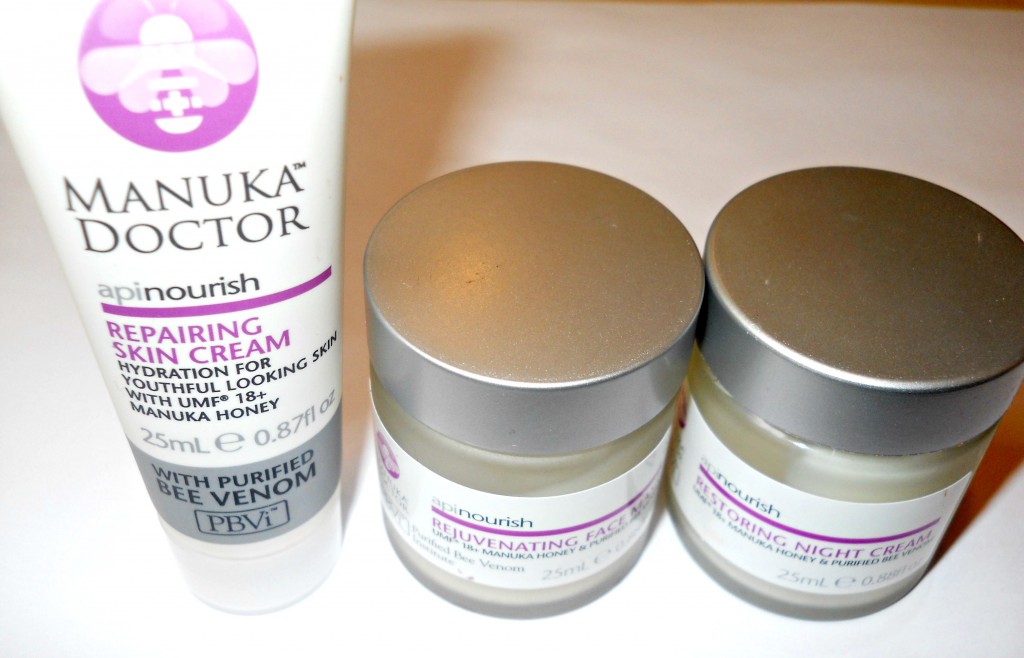
These are the products I chose, they’re sample size (25ml) but I’ve been using them for around a week and they are nowhere near running out. It’s practically magic.

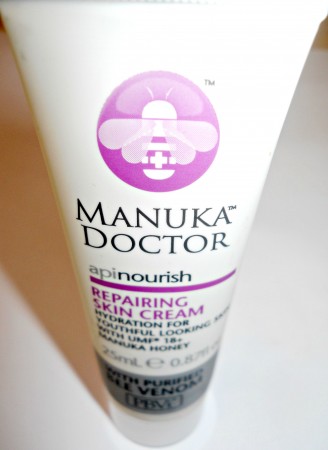
Repairing Skin Cream:

I’ve been using this as my day cream under makeup, and I’ve been hugely happy. It’s not greasy at all and is so so soft. It smells quiet nice, fresh with a hint of chemically smell (it’s not unpleasant!). It works well as a primer too and I’ve noticed my makeup staying on really well. Top marks Manuka Doctor!

DSCN2934

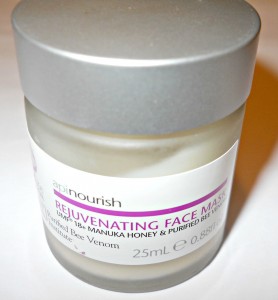
Rejuvenating Face Mask:

I love a face mask, there’s something about sitting with a load of gunk on your face to make you feel like a beautiful woman. This one is really moisturising and my skin feels and looks amazing afterwards. The large size of the face mask is £49.99 and I think you can really tell this is a higher end product (particularly as my masks masks usually come from the 99p price range). I totally recommend guys!

DSCN2921

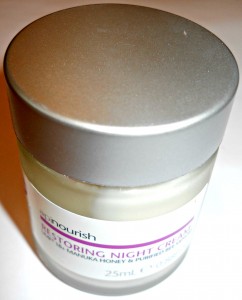
Restoring Night Cream:

Some of you may be horrified to know that I’ve never owned a night cream. I am a failure of a beauty blogger. So, I don’t have much to compare this one to BUT I love it! It smells lovely and is really thick/moisturising. My skin looks even and  smooth when I wake up in the morning, which is something that doesn’t happen often.

DSCN2941

OVERALL…I am truly loving this range of moisturiser. I’ve found my skin is improving daily (which is great for impatient gals like me) and I’m not wearing as much foundation as I usually do. HUZZAH AND THREE CHEERS FOR MERRY ENGLAND.

Manuka Doctor products are currently 3 for 2 at ChemistDirect.co.uk, so please do yourself and the bees of this world a favour and go and get involved!

Has anyone else tried Manuka Doctor? PLEASE LET ME KNOW WHAT YOU THINK!

|| Don’t forget that you can follow us on Bloglovin’ and Twitter! ||

La Riche Directions White Toner: Review & Results

White Toner 2

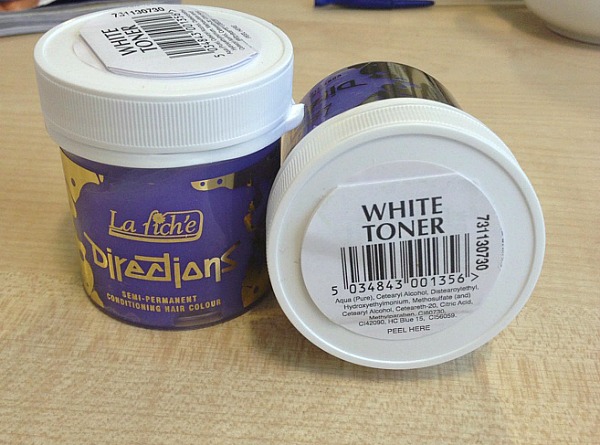
Why hello there, you scoundrels. Some of you might have read my post last week where I documented how I home bleached my hair. Although I was really happy with how it turned out (and most importantly, the fact that I didn’t go bald) I knew the yellowy-toned bleach colour wasn’t what I wanted this time around and so decided to buy a toner to attempt to get my hair the white/grey colour of my dreams. The toner that I bought was La Riche’s Directions semi permanent white toner. I bought two pots from this eBay seller for £7.89 – I think you can track them down cheaper in shops, but I was happy enough with this price for two.

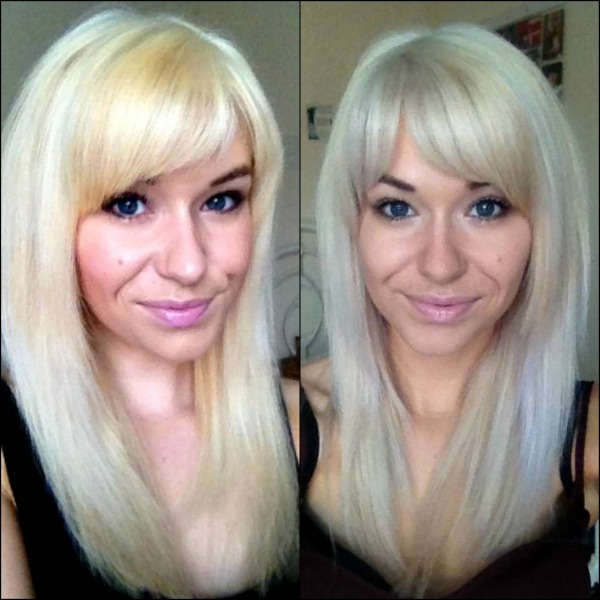
The toner was really easy to use. After washing hair, you apply this and then are instructed to leave it on for 15 minutes. Because I had some quite strong yellow tones in my hair, and also because I wanted it as white as possible, and ALSO because I just like being a risk-taking motherbitch, I decided to leave it on my hair for closer to half an hour. I rinsed it out and VOILA:
White Toner 4

Apologies for the poor quality iPhone pictures, but I think this demonstrates the results pretty well. As you can see, the toner managed to take almost all of the yellow out of my hair. The parts which had the brassiest tones – annoyingly, right by my fringe at the front of my head – still remained a slightly different colour, but this was to be expected considering all of the different things I had going on in my previously dyed, extension-filled head of hair. Because I left it on longer than suggested, some bits took on a lilacy hue but to be honest I was fully okay with this, and actually quite like it.

The toner left my hair feeling nicely conditioned, and one pot was enough to do my whole head (which might not sound like a great feat, but bear in mind it took three boxes to bleach). It’s supposed to fade after a couple of weeks, but I’m hoping my silver shampoo and conditioner, coupled with the fact that I try to get away with washing my hair as little as possible, will drag the colour out for a bit longer.

I’m still on a mission (entitled Operation Granny Chic)  to get my hair even whiter, so will keep everyone updated on how this goes. If anyone has any product recommendations for me then let me know!

Beauteco August Box Review: A Glossybox Replacement?

Beauteco Box 1Goooooood morning you ratbags. I’m here to regale you with yet another tale of my experiences with beauty subscription boxes – this time, the Beauteco Box.

Regular readers of this blog might know that for the last two months I’ve subscribed to Glossybox, which is probably the most popular beauty box in the UK and is bought by gazillions (yes, that is a real statistics) of bloggers and non-bloggers alike each month, who fancy a little surprise box of products landing through their door each month. You can read what I thought of my July Glossybox and August Glossybox in more detail if you like, but generally I felt a little underwhelmed each time.

So when I saw the Beauteco Box reviewed over on the lovely Hannah’s blog Cosmetic Crave I was extremely impressed and decided that maybe this lesser-known box was the one for me. I cancelled my Glossybox subscription and joined Beauteco instead (this meant that I was still eligible for the August box, so two beauty boxes for me this month, OOPS).

Beauteco works in a slightly different way to Glossybox. Each month you get a selection of three ‘menus’ to choose from, so you know exactly what will be arriving in your box. This aspect definitely appealed to me, as each month with my Glossybox there were products I saw in other people’s boxes that I would have loved to have in mine (yes, I am still talking about the Sleek Pout Paints – I’ll never get over it). With this month’s Beauteco box, I think the only item that was different across the menus was the Melvita product – and your other options were still just other Melvita items – so maybe it’s not quite as big of a deal as it could be but still, it’s a nice touch. 

Now, with less rambling, here is what I got in my Beauteco box…

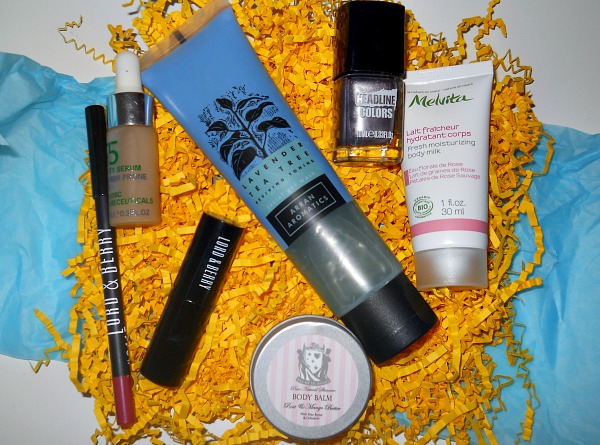
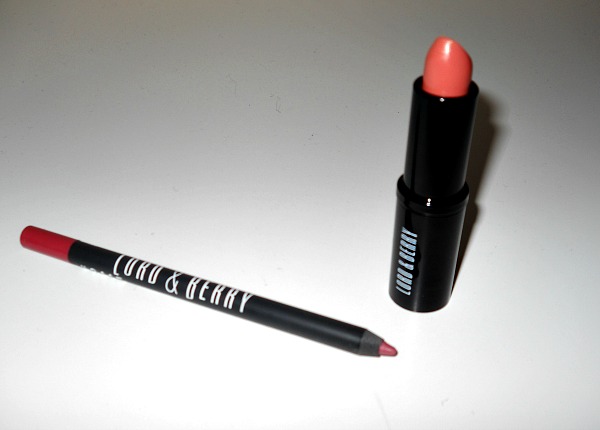
Beauteco Box 3Lord & Berry Intensity Satin Lipstick in ‘Peach Glam’ / Lord & Berry Kissproof Lip Colour in ‘Blossom’

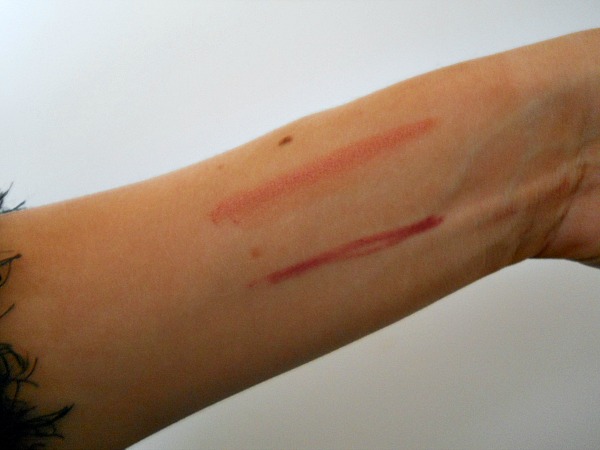
I was really impressed by these two products in the box. The lipstick alone retails at £12 and the lip pencil (which can supposedly be used either as a pencil or a lipstick in its own right) costs £7.50. The shades, which you can see below, aren’t the colours I would usually be drawn towards myself – but I think that’s kind of the point of these boxes, to make you try something new.

Beauteco Box 4Both products seem highly pigmented and long lasting so I’m really looking forward to giving them a proper go. They’re both full size and so have straight away made the box well worth it’s money.

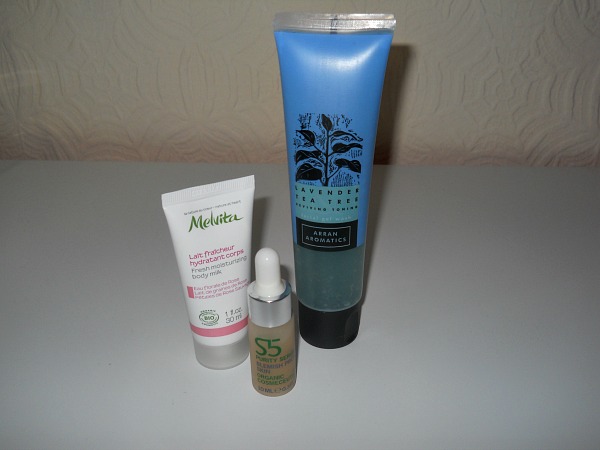
Beauteco Box 5Melvtia Fresh Moisturising Body Milk / S5 Purity Serum / Arran Aromatics Lavendar & Tea Tree Facial Gel Wash

I’m also really happy with this selection of products. The face wash is the only full size product, but considering this 100ml bottle usually retails at £12.95 you can see what a good addition to the box it is .The serum is only a 10ml sample, but this is actually still really good value as a 30ml ‘full size’ bottle of this stuff will set you back over £40! I think it’s also the sort of product that you only use sparingly (you won’t believe how excited I am to use a pipette) so it will probably actually last quite well. I chose the body milk for my Melvita product as you can never have enough moisturisers, can you? This smells amazing and feels really nourishing – I think it’ll be great for a pre-tanning night.

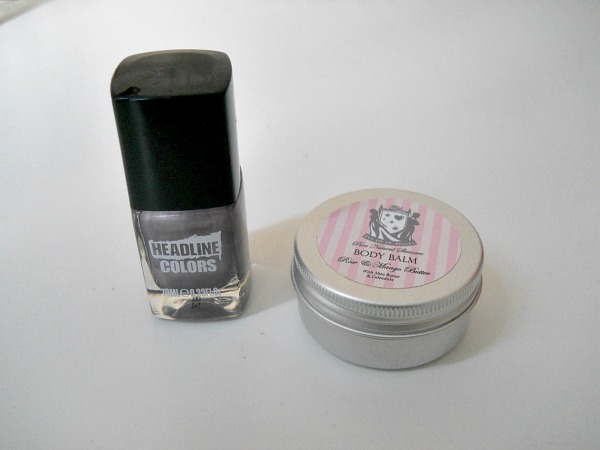
Beauteco Box 2Headline Colours Nail Varnish in ‘Spotlight’ / Eve of St Agnes Body Balm

Now THIS is exciting. Because I was a new customer and used the code FRIEND07 which Hannah put on her blog, I received an extra two products. The nail varnish is a metallic purple which isn’t a fave of mine, but this costs £9 to buy. The body balm is absolutely beautiful, and this travel-sized version of the full product costs £6.

I think it’s quite obvious that I am REALLY impressed with Beauteco. The menu feature is brilliant; the products are truly from luxury ranges (who spends £40 on a serum?!) and the value of the box is incredible. My two ‘freebie’ products this month were worth more than the whole box – which, seeing as I haven’t mentioned it, is £10 plus p&p, just like Glossybox.

I fully recommend these beauty boxes and will definitely be keeping my subscription next month. Even if you only get the first month’s box and take advantage of the introductory discount (code FRIEND07, don’t forget) then I think that is money well spent.

Have any of you tried Beauteco?

Primark False Eyelashes in ‘Sultry’ | Review

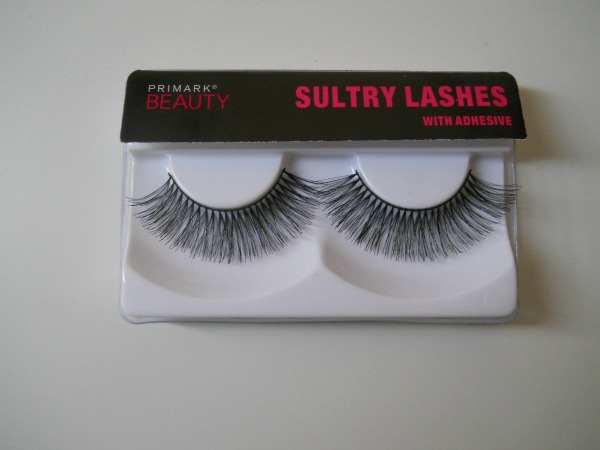
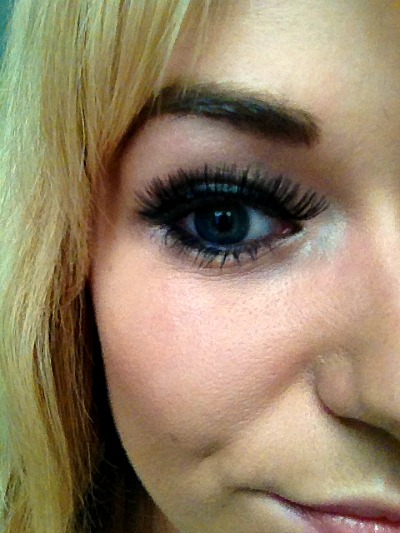
Primark Lashes 4Two of my main loves in life: Primark and false eyelashes. So I was beyond shocked when I found out that Primark are now selling their own range of lashes that I knew nothing about. Ever the dedicated blogger, I picked up a couple of pairs on my last trip to town and gave them a whirl at the weekend. There a few variations to choose from; I bought the above ‘Sultry Lashes’ as well as a pair of ‘Natural Lashes’ (I know this doesn’t sound like me, I think know I’m getting old and boring). The Sultry Lashes, believe it or not, weren’t the longest or thickest ones available so those of you who are dedicated to the proper Camel Lash might want to give the next size up a try. These are perfect for me though, as I always prefer slightly feathery false eyelashes, and ones that criss-cross over like this are a particular fave.

I’m definitely not snobby when it comes to lashes – although we all accept that Eylure are the metaphorical dog’s cojones, at a fiver a go they get mighty pricey. I therefore dabble quite a lot in cheaper alternatives from brands such as Brit Rocks which retail more around the £3 mark. These Primark ones though were just £1. Yes you read that right – ONE ENGLISH POUND STERLING. This is unbelievably cheap and so to be honest, I wasn’t expecting a huge amount from them. And guess what, dear readers and strange people of the world? I was so pleasantly surprised!

Tell-tale signs of cheaper lashes usually include a very thick, plasticky band and a very shiny finish. These factors are both pleasingly absent from the Primark lashes. The band is nice and thin, making them easy to glue down, and the lashes themselves are as feathery and flexible as more expensive brands. The lashes came with their own adhesive, but I think it’s the glue that often lets cheaper makes down. I shunned the included bottle in favour of my big bottle of Eylure glue, which I really recommend buying if you’re a regular lash wearer. Just don’t let any idiot pals like Lauren near it – the distress that I felt when she shattered my bottle by dropping it on the apartment floor in Kavos last year is something I’ve never quite got over (much like the fact that we even went to Kavos, but again that’s me being old and boring).

Primark Lashes

Primark Lashes 3

Have any of you tried the false eyelashes from Primark? What did you think?

|| Don’t forget that you can follow us on Bloglovin’ and Twitter! ||