MUA’s £1 Wonders: Blush & Powder | Review

MUA 1I used to be the most loyal customer of Boots in the entire world. I was an absolute Boots wifey, and the very thought of going to Superdrug made my lip curl in disdain. Why would I go to Superdrug when I can collect millions of points on my Boots card? Why would I go to Superdrug when Boots have such a superb Meal Deal?  Why would I go to Superdrug when at Boots I can be served by people wearing those funny tunics that make me feel like I’m some sort of beauty professional?

Well, ladies and gents, I am quite the changed woman these days and I regularly cheat on Boots by going into Superdrug too – sometimes I even go to them both in the same day, which just makes me a proper shopping sket. There is one brand in particular to be blamed for my infidelity: the Superdrug-exclusive MUA.

MUA has only really been on my radar for around a year and at first I dismissed the brand as simply too cheap to be any good. Then Lauren raved about their £1 lipsticks, and I discovered for myself the wonder that is the Undress Me Too palette, and then it was safe to say MUA had creeped its way up my favourite brands list.

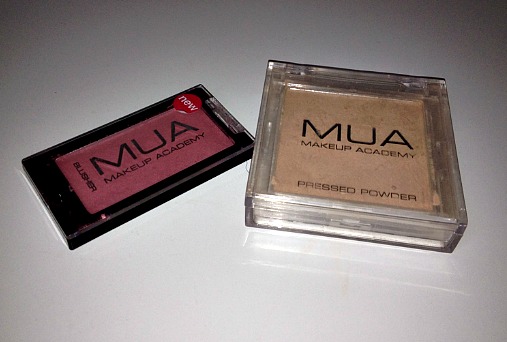
I picked up both of these items in the last couple of weeks and both amazingly cost me just £1. There isn’t a huge amount to say about the powder – is there ever? It’s translucent and stops people being able to check their reflection in my nose, which is all I can ask for really. The range of blushers is much more interesting. According to the Superdrug website, there are six shades available in the £1 range (you can see them all here): Bon Bon, Cupcake, Lolly, Marshmallow, Candyfloss and Bubblegum. Completely sickening names aside, the colour range is nice, ranging from pale peach through to bright purpley-pink.

The shade that I picked up was Candyfloss, a rather cool-toned pastel dusky pink:
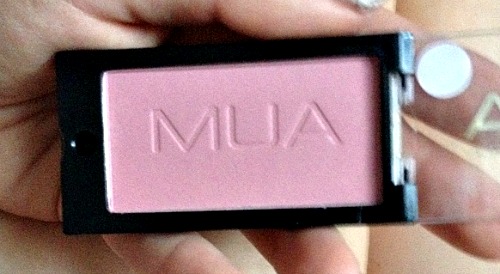
MUA 2(On a side note, am I the only one quite impressed that they bother with the MUA imprint inside the compact? If I was selling something for only a quid I’d probably just put the powder loose in a little sandwich bag and throw it at customers.)
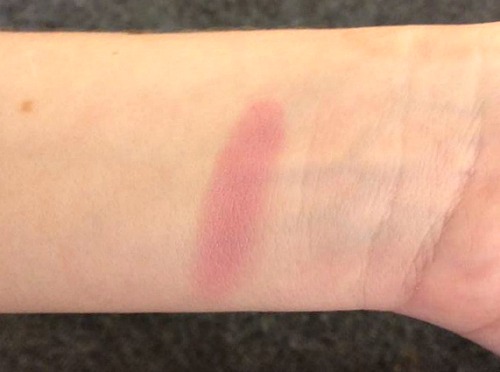
MUAIt’s a really nice colour which seems pretty perfect for winter, and is also a nice match on my new pasty, corpse-like pale skin. My only real bug bear is the flecks of glitter running through it – how hard is it for brands just to make matte blushers, I ask you? Pigmentation wise, though, it’s really impressive. A little goes a long way, to the extent that when I put a bit on without using a mirror while sitting at my desk at work the other day, it wasn’t until I went into the toilet that I realised I had accidentally made myself look like a clown (thanks for the heads up Lauren, you twit).

Overall I’m really pleased with these cheap and cheerful MUA products. The packaging is simple, but all that’s needed – and perfect considering these are the types of products you’re likely to carry around in your handbag anyway so don’t want to worry about having to keep pretty. I’m particularly impressed with the blusher, and think I’ll definitely be ‘investing’ (giggle, giggle – no really, I’m skint, that pound will be an investment) in another couple of shades for my makeup bag.

What do you all think of MUA? Have you tried either of these products? 

17 Wow! Skin Highligher & Flawless Poreless Primer | Review

17 4I have to admit, Seventeen has always been one of those brands that I just breeze past when I’m in Boots and never really bother considering buying from. It’s not a snobbery thang; it’s no secret that I’m more than happy to try the cheaper makeup brands and have plenty of Collection and MUA in my makeup bag. Rather, I just always assumed that Seventeen was just as the name suggests – a very young brand, on par with Miss Sporty in the sense that they cater to that ‘first makeup’ market.

However, when I saw Seventeen’s new releases I realised I might have been a bit quick to judge all these years, as they looked very interesting indeed. I popped into Boots at the weekend and lo and behold, they had a Buy One Get One Half Price offer on, so of COURSE both of these ended up coming along to the till with me. Sigh.

Seventeen Flawless Poreless Primer

17 1Up until recenty, my pores never really had much impact on my life. About six months ago, in our pre-beauty blogging days, Lauren complained to me about her large pores and I remember literally thinking ‘what are you on about you idiot, nobody cares about their pores’. For me, legitimate skin complaints included spots, blemishes, dark circles, dry skin, oily skin, flaky skin and scabby skin – people who actually thought about their pores were clearly people with too much time on their hands.

And then, I suppose I got too much time on my hands.

I suddenly one day became aware of my pores. I noticed they were definitely there, and more problematically, they were bloody massive. They were all I could see when I looked in the mirror and I genuinely wondered whether when people looked at me their eyes were just about to travel down a fraction and settle on my large pores.

So when I saw this Flawless Poreless Primer, I knew I immediately had to try it. I’ve only ever really used glorified moisturisers liquid primers before, so at first I was a bit bamboozled by this balm-like product. Also as I initially swiped my fingers across it and could feel and see absolutely nothing on my finger tips, I began to think I’d royally been had. Then I actually applied the primer to my skin, and most important around my nose a.k.a. Pore City (a.k.a. Pore-tsmouth if I’m feeling particularly humorous), and I was FLABBERGASTED. It just smoothed right over them, like Pollyfiller for the face. I’ve heard people use the word ‘airbrushed’ to describe their skin after some primers and foundations and thought they were being dramatic, but that’s honestly how that particular area looked after using this.

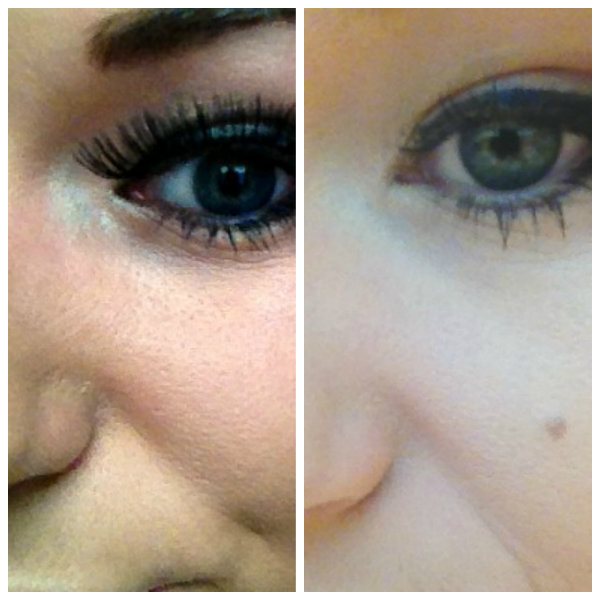
I know the lighting etc is completely different on the following photos, but hopefully they’ll still give you an idea of how visible my pores were without the primer, versus their invisibility cloak with the primer:

17 Prime CollageI am genuinely ridiculously impressed with Flawless Poreless for its ability at hiding my pores, but how is it for actually making my makeup last? Well… also ridiculously good if I’m honest. I don’t think I realised but I must be quite used to my foundation casually slipping off my face over the course of the day, as usually by the time I go to the gym after work I look a lot more bare-faced. This week though, I’ve been heading to the gym with what looks like a full face of makeup (which everyone knows is the ultimate gym faux pas; it’s been an embarrassing time, I assure you).

This is sold for £5.99 in Boots and is honestly worth every penny. Seventeen, I am sorry I judged you.

Seventeen Wow! Skin Highlighter

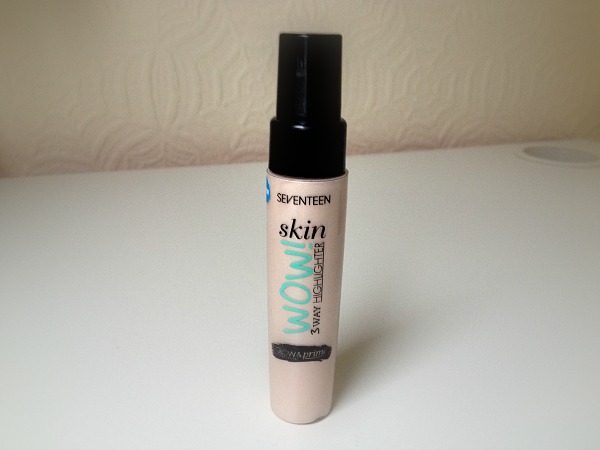
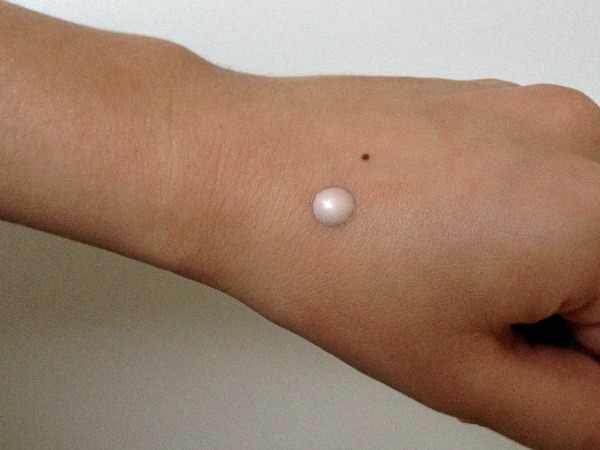
17 Wow 1The second product that caught my eye was this 3-way highlighter. As you may know, I’m very new to the highlighting game and was left somewhat unimpressed with my Bare Minerals ‘Radiance’ highlighter. When I heard this Seventeen product praised as a Benefit High Beam dupe then, I was feverish with excitement. It’s called a 3 way highlighter as, who’d have thunk it, it can apparently be used three ways – either underneath foundation as a primer, mixed in with foundation as some sort of all-over dewy base creator, or applied to cheekbones and all those other pointy bits you’re meant to put highlighter on (as I said, I’m new to this).

On day 1 I mixed it with my foundation. I wasn’t a huge fan of this look as it seemed primarily to thin out my foundation, leaving a much sheerer coverage. It also left me a bit glowy, but not really in an ‘ah, I’m an angel!’ way, but rather a ‘I’ve just had to walk pretty briskly to catch my bus’ way. HOWEVER, I do think that there are some days when this effect will be much more appropriate – I don’t mean to be a complete yob, but I’m mainly thinking those hangover days when your skin looks all pallid and you need to be perked up.

17 Wow 2

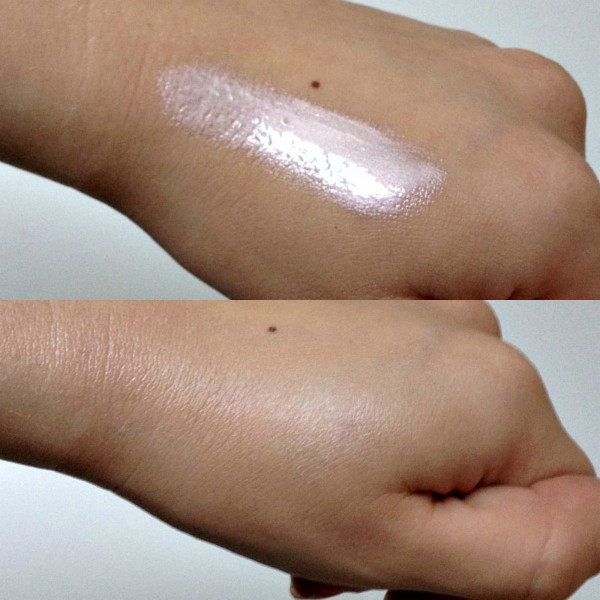
17 Wow CollageNext I used it just to highlight. It has a really lovely, pearly sheen to it that thankfully isn’t at all glittery (pet peeve). As you can see, when blended out it goes really sheer and is maybe not noticeable enough, so it’s a good idea not to try to blend it in too much and instead just stipple it on lightly.

At 30ml it’s not the biggest bottle, and depending on how you use it it might not last you that long. Again though, at £5.99 I would say it’s worth the money considering how expensive other brands can be (yeah Bare Minerals, I’m looking at you).

Have any of you tried these products? What did you think?
|| Don’t forget that you can follow us on InstagramBloglovin’ and Twitter! ||

3CE Lip Pigments / OCC Lip Tar Dupes | Review

3CE 1When these finally arrived at work for me after a 2-3 week delivery waiting time  from China, it was typically a day that Lauren was off sick. This meant that my yelps of “Look! Look what’s came! Look what they do!” were largely ignored by all the boys in the  office, who looked at me blankly for about 2 seconds before going back to talking about, I don’t know, servers or something.

I was SUPER excited about them though because as I say I’d been waiting flippin’ weeks for them and couldn’t wait to give them a whirl.

Most people are familiar with Obsessive Compulsive Cosmetics’ cult ‘Lip Tars’. These are highly pigmented products that are meant to have the smoothness of a gloss but the longevity of a lipstick – so a bit similar to Stila’s liquid lipsticks or Rimmel’s Apocalips, but the pigment factor means that the tiny tubes are meant to last you FOREVER. The range is also completely mixable and contains black, white, yellow and blue so that you can get all jazzy and creative with your lip colours. I’ve heard quite a few people rave about the OCC Lip tars, but at £11 each they’ve never sneaked their way to the top of my ‘to buy’ list.

3CE 2

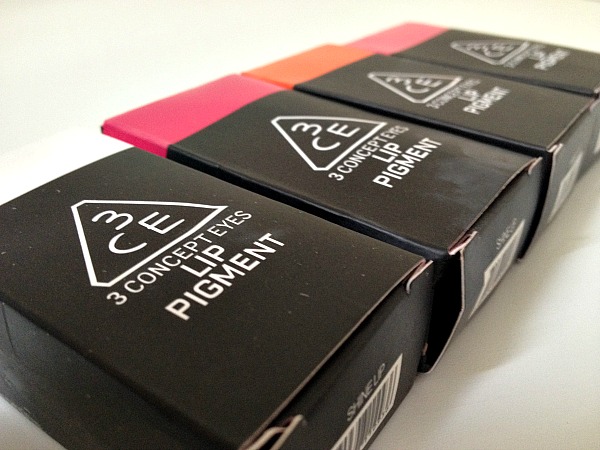
3CE 11But when I saw these 3CE lip pigments on someone’s Instagram (I wish I could remember whose, let me know if you’re reading this and it was yours!) my interest was piqued. Now, there have been a few high street attempt at OCC dupes – Sleek’s Pout Paints being one – but none as far as I know that are as cheap as these. Brace yourselves, women and children, for these are just £1.90 each. China, you never fail to amaze me.

I immediately decided to snap one up to see if they were any good. And then accidentally ended up snapping up 4. But at those prices, how could I say no? So with free delivery I had all four of the above products sent to me for just £7.60.

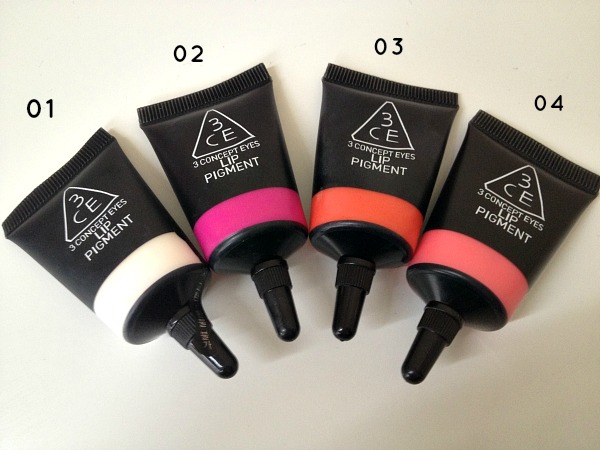
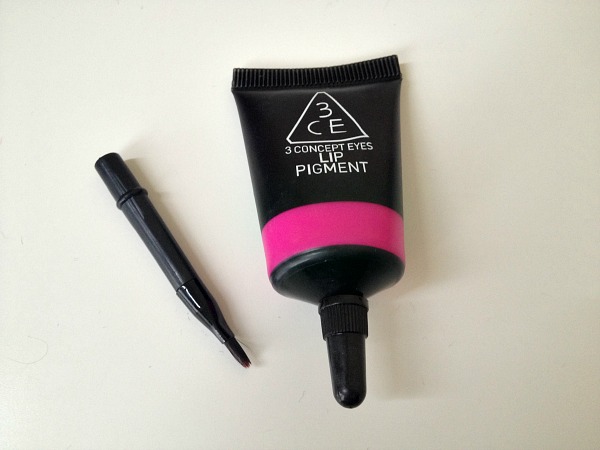
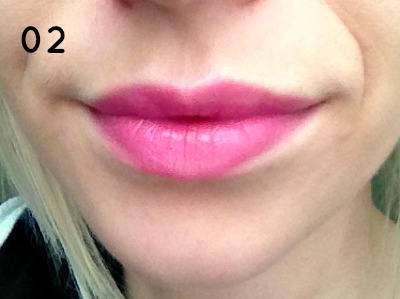
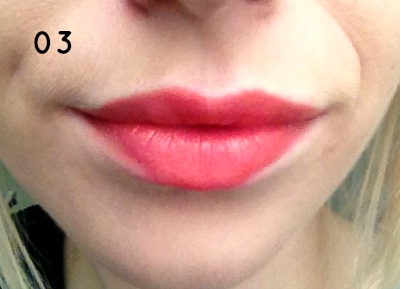
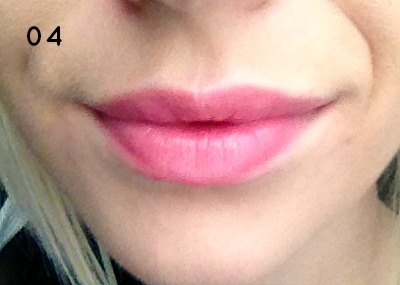
There are 7 shades to choose from, but I decided on the somewhat randomly named White, Plum, A1 (..?!) and Pink. When they arrived, these were thankfully labelled on the boxes in a much more understandable system of 01, 02, 03 and 04. 01 is the white mixing colour, 02 is a bright purple-pink, 03 a deep orange and 04 is my go-to colour of choice, a pale peachy-pink. Each pigment comes in a box with its own little lip brush.

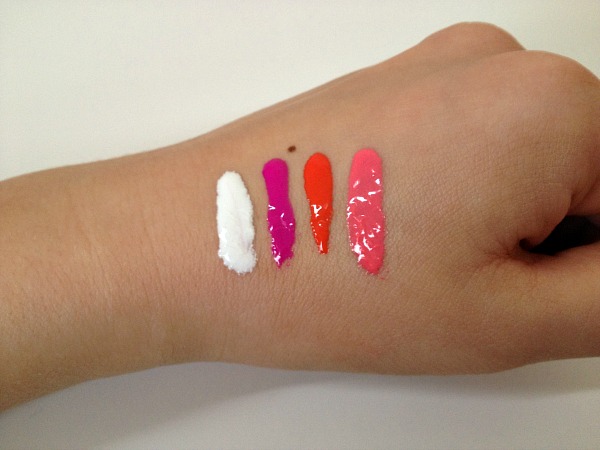
Swatches

3CE 3As you can see, the word pigment is CORRECT and these are very bright shades. The consistency is thick and not runny, but then not so thick it’s difficult to blend – it’s basically like those stupid expensive paints in the tubes you had to buy if you did GCSE Art (which are a proper waste of money when you only come out with a C, puh).

I found application a leeeeeeeetle bit tricky just because I’m not used to using a lip brush – also I suspect that the ones provided are too small to do the job properly, unless you have tiny thin lips or are planning to put these on your grandad. With a bit of a combination of lip brush action and some good old fashioned finger dabbing though, I eventually applied a nice coat of each for your perusal:

3CE 4

3ce 5

3CE 6

Mixed Swatches

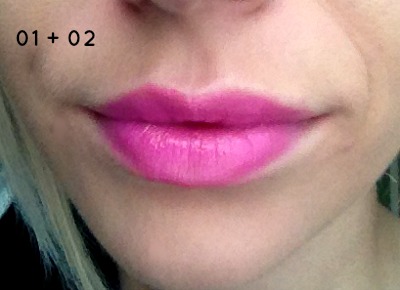
The really exciting part of the pigments for me comes when you get to the mixing. Although they can all be mixed with each other, I decided to keep it simple and so below is each colour mixed in equal parts with the white 01 shade.

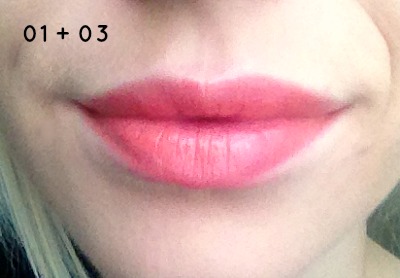
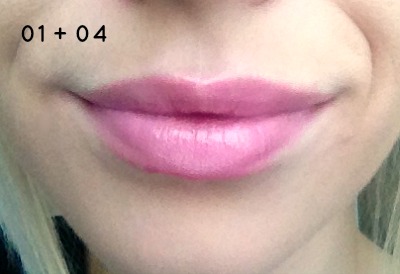
3ce 7Stating the obvious here but this created a lighter, more pastel version of each shade. I personally liked these colours more than the non-mixed versions, just because I’m not really a ‘bright lipstick in the day’ sort of person so these were much more in my comfort zone. I also don’t think stark orange looks very nice against my skin tone, whereas the more peachy colour that’s created when 01 is mixed in is much more wearable. I think the addition of the white also made each pigment look a bit glossier, though it’s also possible that I’d just got better at application by this point and wasn’t being such a cack-handed idiot.

3CE 8

3CE 9

3CE 10Ever a creature of habit, the final pale pink colour of 01+04 is of course my favourite, though I honestly do like the whole shade range.

I suppose the negative of these products is the fussiness of application in regards to the brush etc. It’s not a big problem with the individual shades as I have since found that finger application is okay; but when it comes to mixing up colours with the white then this definitely becomes a little less practical. You could find the perfect shade for a night out, but re-application is going to become a bit of a nightmare unless you want to crack out your artist’s palette and start mixing shades in the toilets of a nightclub.

The counter-argument to this though (ooft, mention of my GCSEs seems to have brought out the essayist in me) is that the high pigmentation means that the colour lasts. I would definitely back this claim up; I wore 04 to work yesterday and even after a good few hours there was still a strong stain of colour on my lips. Although my lips definitely started to feel dry and I had to slap a bit of lip balm on, I’m also happy to report that it didn’t end up caking or clinging to dry parts of my lips too much, which is always a worry of mine.

Overall I am vair, vair impressed with these cheap little beauties. The shade range of the OCC Lip tars is far more extensive and after watching a few Youtube videos with them in, they do look like they apply a bit slicker than these 3CE dupes. For the money though, you can’t complain. You just can’t, or I’ll have to proclaim you to be some sort of pedantic fool.

As I said, these lip pigments were just £1.90 and I bought them from this seller –  I can’t see them listed there anymore, but plenty of others also do them. As in most cases, you can find UK sellers who will get them to you much quicker but they’ll cost you a good few quid more.

Have any of you tried these, or any other 3CE products? Or are you loyal to OCC? Let me know what you think in the comments below, and leave your blog links too!
Bare Minerals Pure Radiance | Review

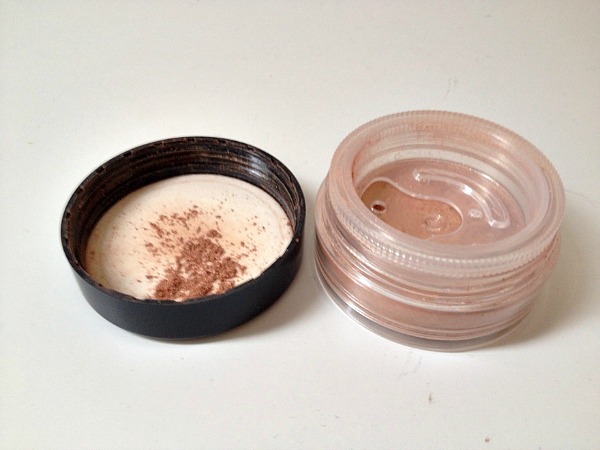
Bare Mins 2

Bare Mins 3

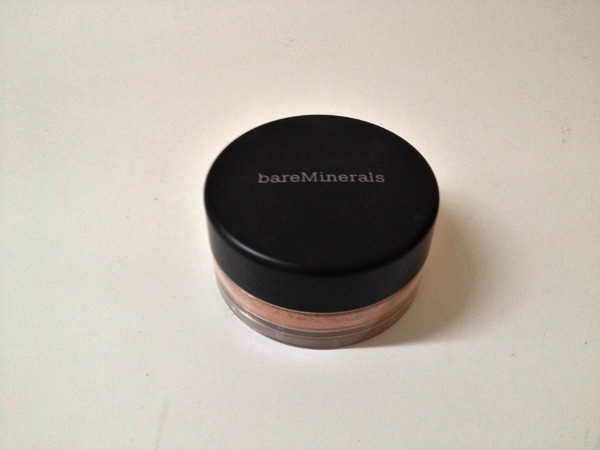
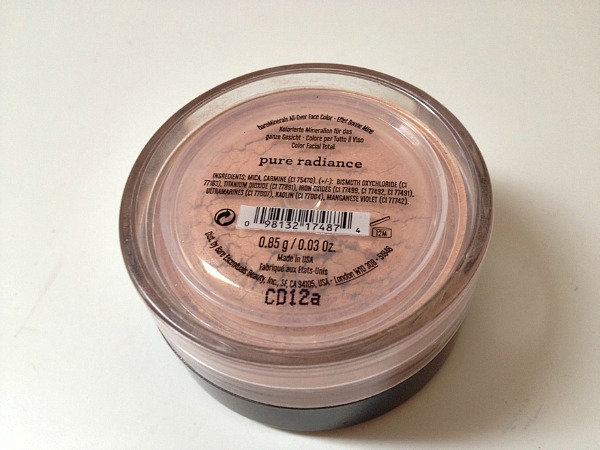
Bare Mind 5Bare Minerals ‘Pure Radiance’ – c/o Chemist Direct

I’m a big fan of reading reviews of products before I buy them, so when I saw one internet user casually announce that this product made her look “like an angel” I of course had to get my hands on it immediately to see what on earth the mad wench was on about.

The Bare Minerals Radiance range has five shades to choose from: Clear, Flawless, Rose, Tropical and Pure. They’re a selection of loose powders, all infused with a light shimmer to give you a ‘healthy, youthful vibrancy’. As I edge ever closer to my 23rd birthday, youthful vibrancy is something I’m starting to feel desperate for; plus, I’m really trying to step out of my matte comfort zone and embrace a lil’ bit of glow in my life.

On first impressions, the product could definitely look a little prettier. This retails in most places for £19 (though it’s only £15.11 on Chemist Direct so definitely shop wisely, women!) and I would personally expect something a little more luxurious for that price.

Once you begin using the product though, you can tell it’s definitely a higher-end product than your standard high street brand. It’s highly pigmented, and a little certainly goes a long way.

Bare Mins 5
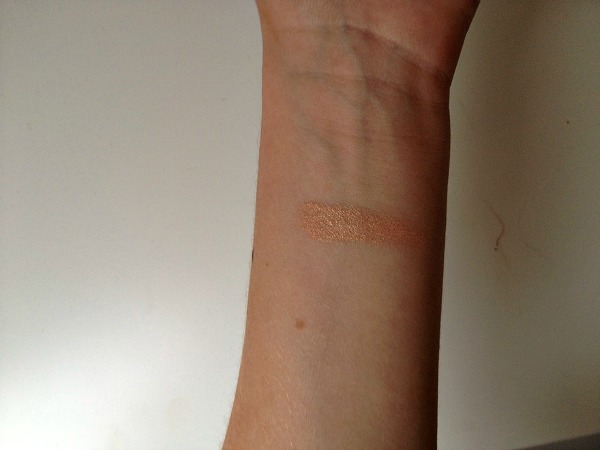
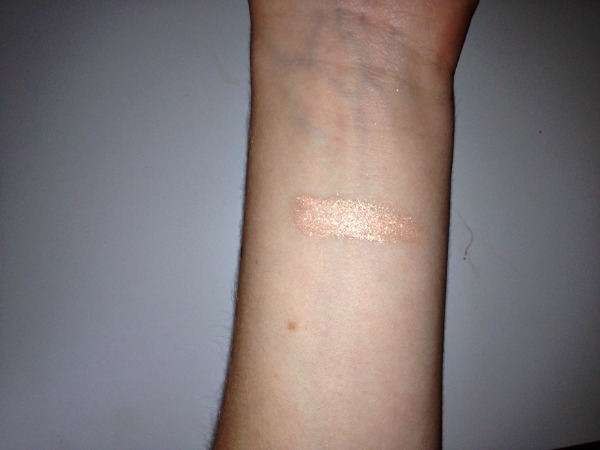
Bare Mins 6 (Without Flash / With Flash)

The Radiance powders can apparently be used under, over or blended in with your normal makeup. Some of the other shades might look fine all over the face, but Pure Radiance should definitely only be used for highlighting purposes. It’s described as being peachy in tone, which I would agree with. It’s a very warm powder with a gold sheen, and so is instantly noticeable when applied.

As far as the application goes, I’m not too impressed with the ‘tip it in the lid’ method. I don’t think that’s something that angels should have to do, do you? Though it does come with a useful twisty bit (technical terms as always) so no powder can escape once the lid’s back on, keeping messiness to a minimum.

Initially, I tried to use it over the top of blusher, as recommended – and ended up looking like I was about to enter a child beauty pageant and show everyone my talent for hula-hooping. Since then, I’ve been using it instead of my blusher, which works much better – though it still might be a bit too Disco Face for some people to wear on a day-to-day basis. I think this powder will really come into its own for night-out makeup when Disco Face is more appropriate (though be careful in case people start dancing around you thinking you’re actually the disco ball), or if you already have a pretty healthy tan and want to add some highlight.

In general, my thoughts towards this product are pretty mixed. The colour is well pigmented and has good staying power, meaning it should last quite a while. The ‘Pure’ shade might be a bit orangey for some, though if applied lightly can bring some nice colour to the face. I think my main issue with the product is its price – I would never personally pay £19 for this, though if you’re used to spending that much anyway then I’m sure it wouldn’t be a huge disappointment. Oh and it didn’t make me look like an angel, I’m still a crummy human.

Have any of you tried this product, or anything else from Bare Minerals or Chemist Direct? What did you think?

|| Don’t forget that you can follow us on Bloglovin’ and Twitter! ||

Barry M Liquid Brow Marker Pen: Review

I hate to be the bearer of bad news (what am I talking about, I LOVE BEING THE BEARER OF BAD NEWS), but this is going to be a blog post full of hatred and disgust.

I’m usually a big slut big lover for all beauty products and I don’t usually dislike things very often. As long is it vaguely looks ok, then it will have a place in my leopard print makeup bag. Unfortunately, today is a day that I have to hate on a beauty product. I have tried to like it, I truly have. But I just can’t, mainly because it doesn’t do the job properly and makes me look like an idiot.

1235131_10152404406212565_1157700395_n

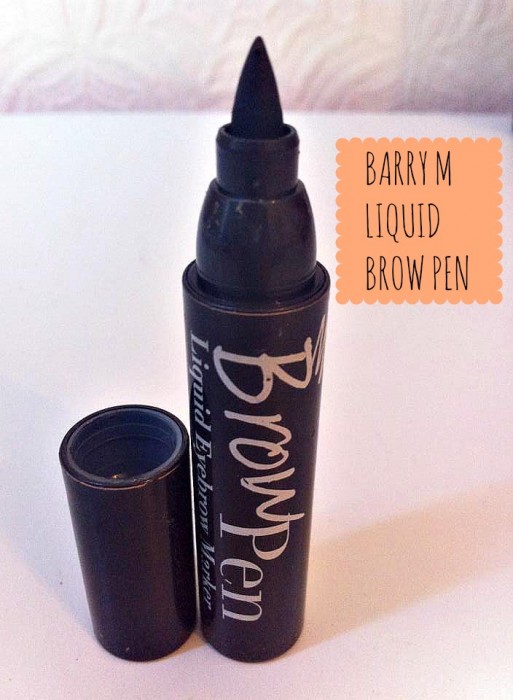
This mysterious product, if you hadn’t gathered from the giant picture and the title of this blog post, is Barry M’s Liquid Brow Marker Pen. I bought it at the weekend because I’m on the dregs of my Sleek Brow Kit (which I love by the way!) and I also needed some change for the bus (which is a great excuse to pop into Boots if you ever need one). I decided to branch out and get something different to my Sleek Brow Kit and spotted this eyebrow product lurking in the Barry M makeup display. You might have heard me shout ‘GREAT SCOTT, what sorcery is this’ if you’d been there at the time, as I rushed to shove it in my basket and pay.

I really like the idea of marker pen style makeup. They’re great for the cack-handed like me, and it makes me feel a little bit like Picasso every time I draw on my face. Unfortunately, the Liquid Brow Marker Pen actually made me look like one of Picasso’s abstract paintings and I have to say that this is THE MOST USELESS product in the history of useless products. I have a few main issues with it, which I have decided to list in a handy list (oo-er) for you all.

PicMonkey Collage

1. It doesn’t work properly if you have any foundation/makeup lurking in your eyebrows: This is an issue. I don’t know how you all do your makeup, but I tend to whack on my foundation/concealer and then do my eyebrows. This means that there tends to be a bit of product in there and while I could remove it with a cotton bud, why on earth would I bother doing that?! The problem with the Brow Marker Pen is that once the nib (ew) gets a bit of other product on it, it stops working. Basically, no more brown eyebrow stuff comes out of it and you look like a fool scraping away at your face with useless marker pen that is progressively ruining your morning makeup.

2. The colour that comes out is uneven: Even if you manage to get the pen working normally, the colour that comes out isn’t that even. I don’t know about you guys, but I don’t have time to faff around going over and over my eyebrows to make sure they don’t look patchy and bald. NO THANK YOU. (This is particularly problematic for me, because I have to draw my eyebrows on from scratch. I have blonde brows, so it is a full on mission rather than just filling in!)

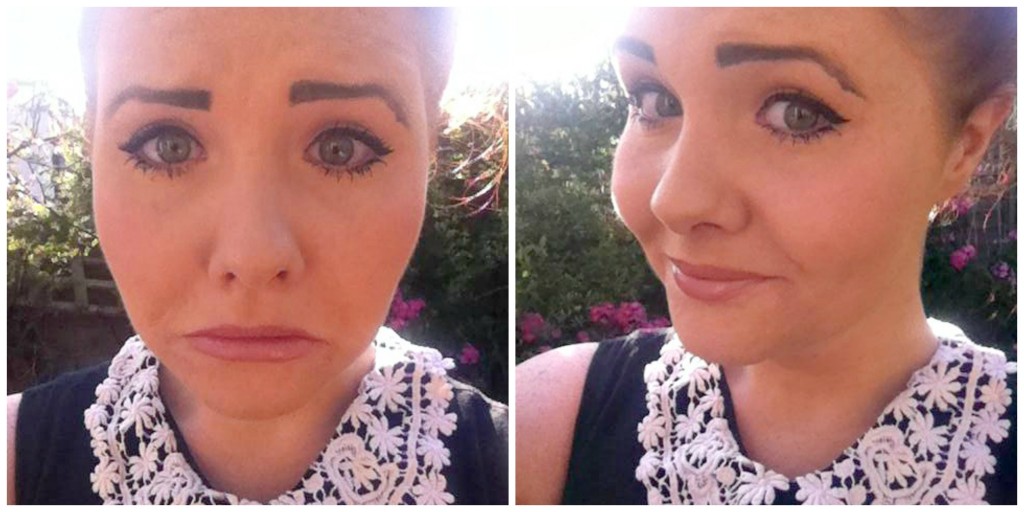
3. The ends of your eyebrows are DIFFICULT to do: As you can probably see from my tragic eyebrow picture, doing the outer ends of your eyebrows is really difficult with the Brow Marker Pen. I find that it slips a bit and gets all wonky. If the nib has stopped working too, then you have to faff around trying to use the side and IT ALL GOES HORRIBLY WRONG AND YOU END UP LOOKING LIKE A MAD PERSON.

All in all, I ended up spending longer on my eyebrows than the rest of my face when using the Barry M Liquid Brow Marker Pen. What is the point I ask you? This product might be ok if you already have dark eyebrows and just want to fill them in a little bit, but if you’re looking for heavy duty eyebrow makeup like I am, don’t bother. I was forced to fill in and try and fix the Brow Pen disaster with the last of my Sleek kit, and this was the result. Much better, ja?! JA.

560848_10152404418292565_1924766633_n

I think I’m just going to go back to my Sleek Brow Kit but if you guys have any other recommendations, please let me know! I would love to try something new and not tragically horrible.

|| Don’t forget that you can follow us on Bloglovin’ and Twitter! ||

Beauteco August Box Review: A Glossybox Replacement?

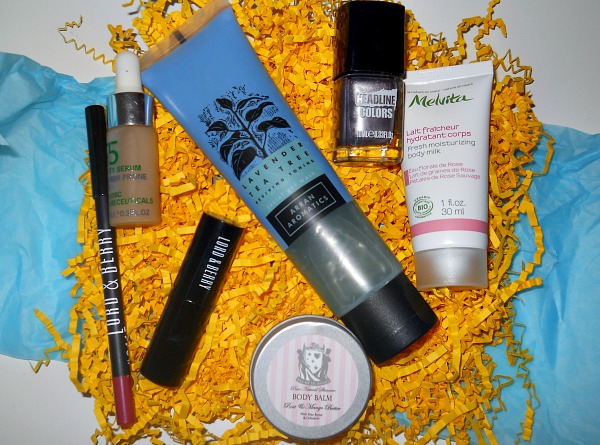
Beauteco Box 1Goooooood morning you ratbags. I’m here to regale you with yet another tale of my experiences with beauty subscription boxes – this time, the Beauteco Box.

Regular readers of this blog might know that for the last two months I’ve subscribed to Glossybox, which is probably the most popular beauty box in the UK and is bought by gazillions (yes, that is a real statistics) of bloggers and non-bloggers alike each month, who fancy a little surprise box of products landing through their door each month. You can read what I thought of my July Glossybox and August Glossybox in more detail if you like, but generally I felt a little underwhelmed each time.

So when I saw the Beauteco Box reviewed over on the lovely Hannah’s blog Cosmetic Crave I was extremely impressed and decided that maybe this lesser-known box was the one for me. I cancelled my Glossybox subscription and joined Beauteco instead (this meant that I was still eligible for the August box, so two beauty boxes for me this month, OOPS).

Beauteco works in a slightly different way to Glossybox. Each month you get a selection of three ‘menus’ to choose from, so you know exactly what will be arriving in your box. This aspect definitely appealed to me, as each month with my Glossybox there were products I saw in other people’s boxes that I would have loved to have in mine (yes, I am still talking about the Sleek Pout Paints – I’ll never get over it). With this month’s Beauteco box, I think the only item that was different across the menus was the Melvita product – and your other options were still just other Melvita items – so maybe it’s not quite as big of a deal as it could be but still, it’s a nice touch. 

Now, with less rambling, here is what I got in my Beauteco box…

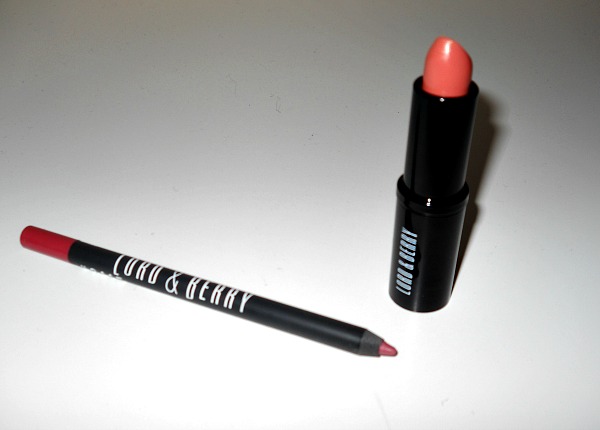
Beauteco Box 3Lord & Berry Intensity Satin Lipstick in ‘Peach Glam’ / Lord & Berry Kissproof Lip Colour in ‘Blossom’

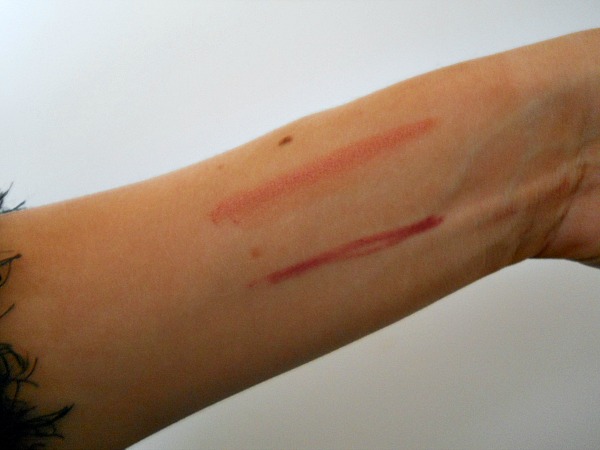
I was really impressed by these two products in the box. The lipstick alone retails at £12 and the lip pencil (which can supposedly be used either as a pencil or a lipstick in its own right) costs £7.50. The shades, which you can see below, aren’t the colours I would usually be drawn towards myself – but I think that’s kind of the point of these boxes, to make you try something new.

Beauteco Box 4Both products seem highly pigmented and long lasting so I’m really looking forward to giving them a proper go. They’re both full size and so have straight away made the box well worth it’s money.

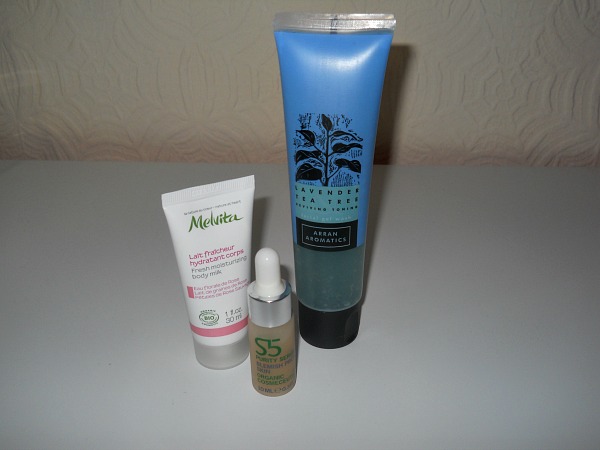
Beauteco Box 5Melvtia Fresh Moisturising Body Milk / S5 Purity Serum / Arran Aromatics Lavendar & Tea Tree Facial Gel Wash

I’m also really happy with this selection of products. The face wash is the only full size product, but considering this 100ml bottle usually retails at £12.95 you can see what a good addition to the box it is .The serum is only a 10ml sample, but this is actually still really good value as a 30ml ‘full size’ bottle of this stuff will set you back over £40! I think it’s also the sort of product that you only use sparingly (you won’t believe how excited I am to use a pipette) so it will probably actually last quite well. I chose the body milk for my Melvita product as you can never have enough moisturisers, can you? This smells amazing and feels really nourishing – I think it’ll be great for a pre-tanning night.

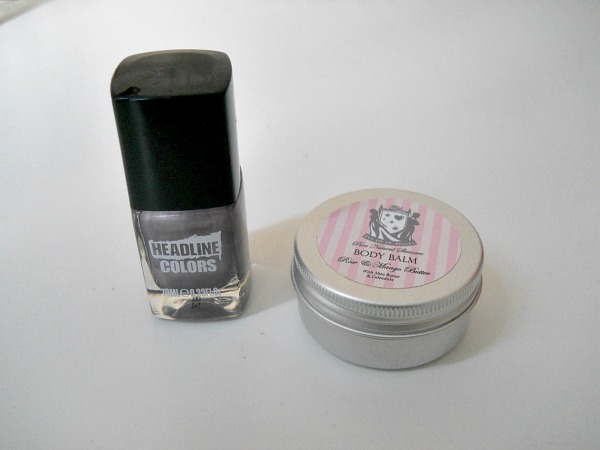
Beauteco Box 2Headline Colours Nail Varnish in ‘Spotlight’ / Eve of St Agnes Body Balm

Now THIS is exciting. Because I was a new customer and used the code FRIEND07 which Hannah put on her blog, I received an extra two products. The nail varnish is a metallic purple which isn’t a fave of mine, but this costs £9 to buy. The body balm is absolutely beautiful, and this travel-sized version of the full product costs £6.

I think it’s quite obvious that I am REALLY impressed with Beauteco. The menu feature is brilliant; the products are truly from luxury ranges (who spends £40 on a serum?!) and the value of the box is incredible. My two ‘freebie’ products this month were worth more than the whole box – which, seeing as I haven’t mentioned it, is £10 plus p&p, just like Glossybox.

I fully recommend these beauty boxes and will definitely be keeping my subscription next month. Even if you only get the first month’s box and take advantage of the introductory discount (code FRIEND07, don’t forget) then I think that is money well spent.

Have any of you tried Beauteco?

Estee Lauder Double Wear: Review

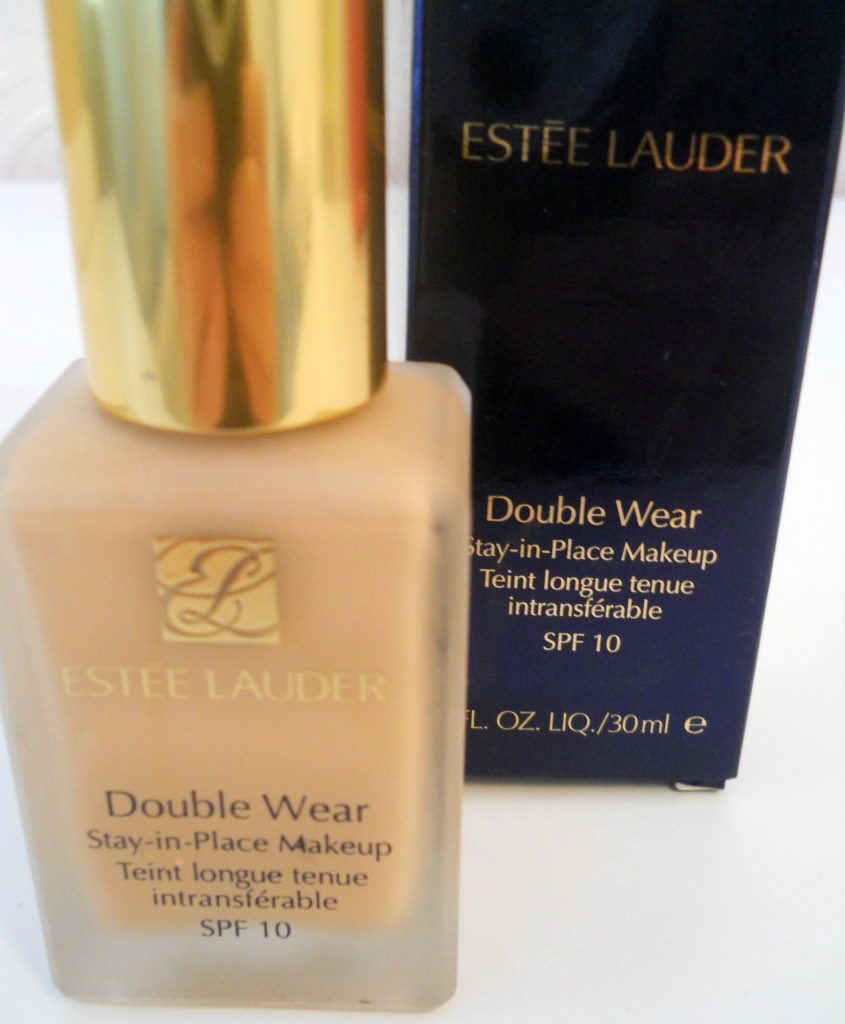
I have pretty much been using the same foundation for about 4 years: Rimmel Lasting Finish 25 Hour in Soft Beige. I really love it, I find it has a good heavy coverage, stays on for ages (albeit not quite 25 hours…) and it’s also hugely cheap (usually around £6.99). I’m a gal who is not a fan of change, particularly when it comes to makeup. So using a new foundation hasn’t really occurred to me until recently. I think it’s part of my ‘I am now a grown up, it’s time to stop being ridiculous’ phase (which has included buying a pair of brown shoes and saying ‘indeed’ a lot) and part of that phase is using better makeup products.

DSCN2808

I decided on my new grown up adventure to ask our lovely Twitter followers what foundation I should get for heavy coverage, and the general consensus was that Estee Lauder’s Double Wear is one of the best around. I definitely trust you lot when it comes to makeup recommendations, so I swiftly got to my nearest Selfridges to get involved with the Double Wear hype.

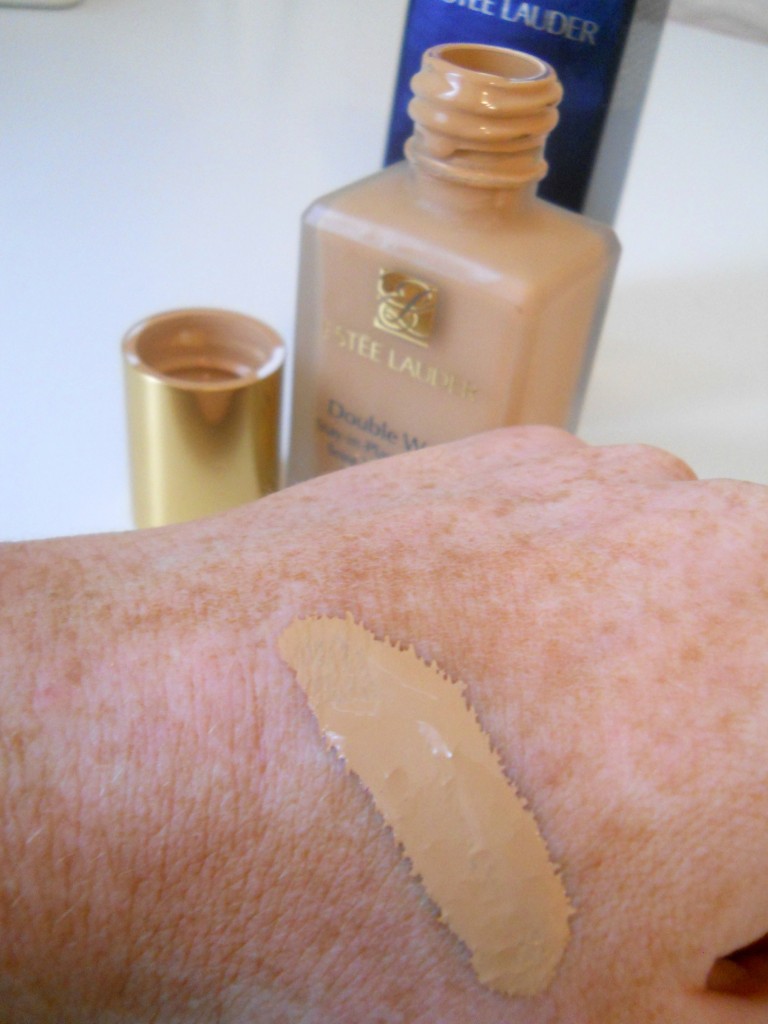
I was colour matched by a lovely lady called Charley and we decided to go for a colour that was a bit warmer than my actual skintone because I fake tan a lot and no one wants the whole pale-face-orange-body situation. I ended up buying the ‘Dawn’ shade, which blends well with my St Moriz colour but can also be lightened up with a bit of concealer in strategic places if necessary.

DSCN2811

Excuse my HORRIBLY freckly skin but that is just how my hand rolls.

I won’t go into too much detail, but the product is quite a bit ‘runnier’ than the Rimmel foundation and is also LOADS less oily, mainly because it doesn’t contain any oil (surprise there, eh?!). I’ve found that this means I use a lot less because it glides on quite a lot easier than my usual foundation. It also feels really light, which is excellent – heavy coverage with a light feeling is something I’m definitely not used to! I feel like I have lost about 2 pounds from my face.

PicMonkey Collage

Staying-wise, I’ve been pretty pleased with how it keeps throughout the day. Being totally honest, I don’t think it performs any better than the Rimmel Lasting Finish product. Set with powder, they both are on a par. What I do like is that the Estee Lauder Double Wear is lighter, matches better with my skin tone and also has a smoother finish than the Rimmel product.

Higher end makeup is something I want to get more into, and this is an excellent starting point! I would most defs reccomend it to anyone who likes to trowel on their foundation a heavy coverage.

What do you guys think? Anyone else given the Estee Lauder Double Wear foundation a whirl?

Revlon ColourBurst Lip Butters | Review

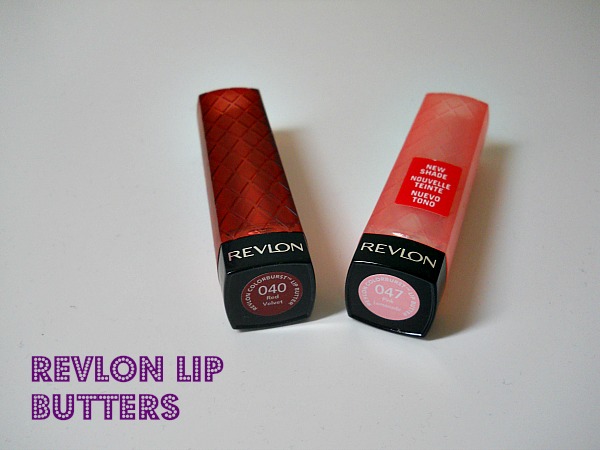
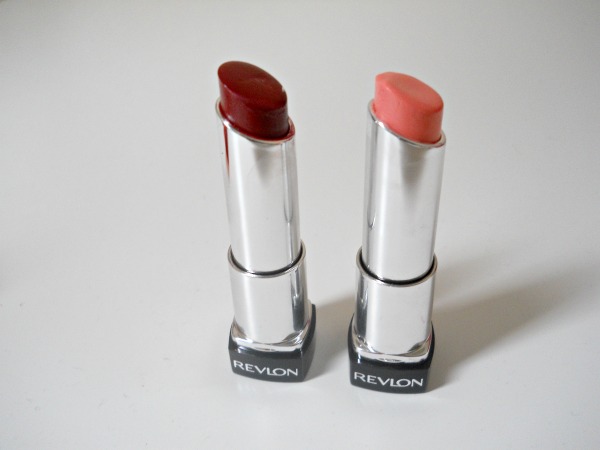
Revlon Lip Butters 1As I’ve stated probably more times than is necessary (and definitely more times than is attractive), my lips get dry quite easily and so lipsticks can often drag or look a bit cakey after a few applications. So while I was on the hunt for a new lip product this weekend, I decided to give Revlon’s much-loved Lip Butters a go. These are known for being smooth, hydrating alternatives to traditional lipsticks, so I thought they could be perfect for my flaky needs.

The Revlon ColourBurst Lip Butters usually retail at £7.99 each, which I think is a leeeeeedle bit pricey for a ‘buttery balm’, but seeing them on offer at 2 for £10 meant that I obviously had to get two. I chose shades 040 Red Velvet and  047 Pink Lemonade, which is one of the newer colours.

Revlon Lip Butters 2Red Velvet is a nice deep red, which I thought would be brilliant as we get into Autumn, both for nights out and during the day if I’m feeling a bit dramatic. Pink Lemonade is the sort of colour I’m always naturally drawn towards; a pale peachy-pink that’s perfect for everyday wear.

So, how did they turn out?

040 Red Velvet

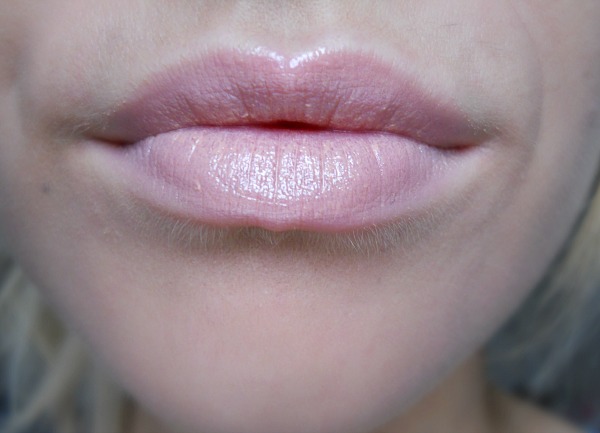
Revlon Lip Butter RedThe texture of the Lip Butters is lovely – they glide on smoothly, just like a balm. The colour pay off of Red Velvet after one application is pretty good, though you definitely need a couple of layers to get something near the colour in the tube. As you can see from the photo, it’s difficult to get the proper build up of colour that you get with a normal lipstick. It’s much more sheer, so slides around on the lip rather than settling as a lipstick does, making it a bit messier to apply than I would have expected. If you like your reds to have a matte finish then this isn’t really for you, as even with blotting it doesn’t really lose its sheeny finish.

047 Pink Lemonade

Revlon Lip Butter PinkOne swipe of Pink Lemonade does practically nothing to your lips – it literally just feels like you’ve applied some lip balm. Again, you need a couple of layers to start to see proper pay off from this very sheer lip product. Once you’ve applied it a bit thicker though, the texture and finish of this are lovely. Lips feel hydrated and smooth, with no possibility of dragging and drying out. The finish is perfect; somewhere between a gloss and a lipstick, it actually reminds me of the Cremesheen finish of my beloved MAC Creme d’Nude.

Overall, I do like both of these products. The Revlon ColourBurst Lip Butters are the sort of hybrid products that have been gaining a lot of popularity over the last year or so; along with Apocalips and Babylips, they’re aiming to give us the best qualities of lipsticks, glosses and balms in one product. From a personal point of view, I think the Lip Butter texture definitely works better in the paler shades, where the sheerness is less of an issue.

Have you tried Revlon’s Lip Butters? What did you think?
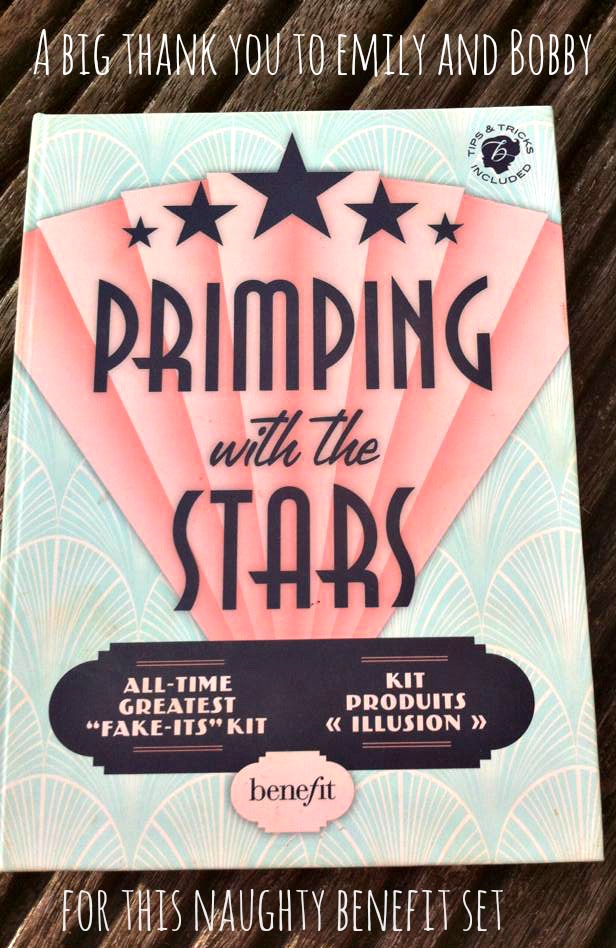
Benefit Primping With The Stars: Review

Good morning and happy Sunday to one and all!

I’m back on my makeup reviewing hype and I am VERY excited about it. I’ve been having some vonderful chats on Twitter with you all about making some makeup changes in my life (and we all know how important these changes are…), so I thought I would do a little review on something that I have been loving a lot recently.

1081662_10152383178302565_2076382288_n

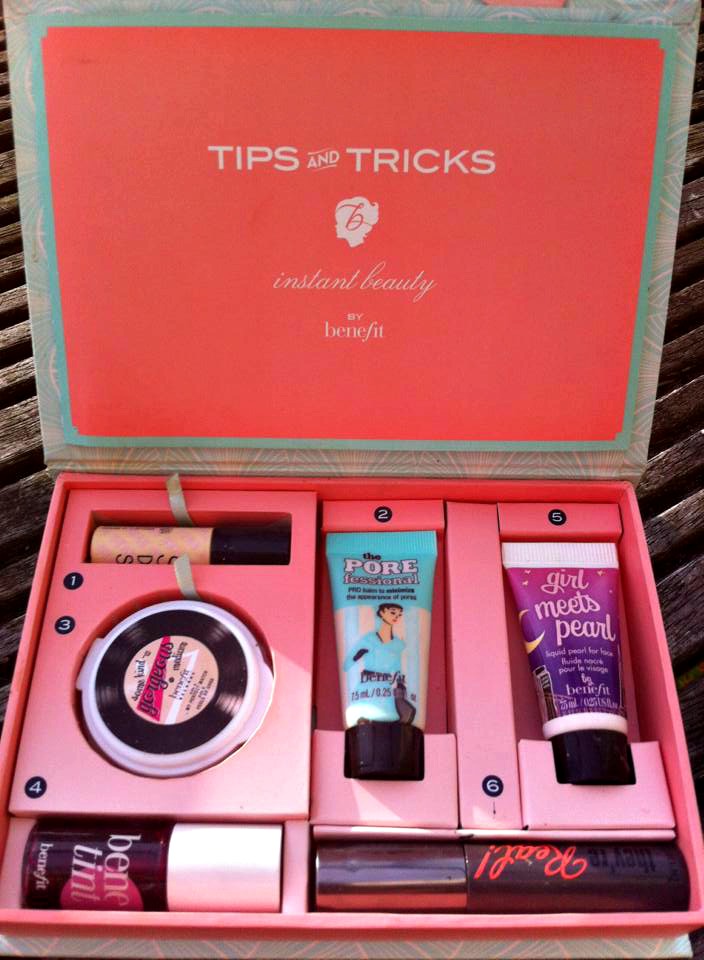
One of my best friends from uni (combined with her boyfriend, who is also a good friend) bought me this Benefit set for my birthday and I have to say how HUGELY excited I was when I opened the wrapping. I’m a big Benefit fan, I know some people are not quite as keen on it as some products can be seen as a bit ‘gimmicky’. But I’m quite a gimmick fan and the packaging makes me literally want to die with happiness inside. I had their smokey eyes palette for a long time when I was a bit younger and I still maintain that it has been my favourite eye kit to date.

The Priming With The Stars kit has a lot of the products I have wanted to try but haven’t been able to afford recently, so I love the fact that I could give these a whirl FOR FREE, and in smaller sizes so I can decide how I feel about them without having the big version (sorry about the terrible English in this sentence, my brain has fallen out).

1082720_10152383178372565_768560497_n

1. Stay Don’t Stray Eye Primer. 2. Pore Professional. 3. Some Kind of Gorgeous Foundation Faker. 4. Benetint. 5. Girl Meets Pearl Highlighter. 6. They’re Real Mascara.

So, what do I think of Benefit’s Primping With The Stars kit?

1. Stay Don’t Stray Eye Primer: I really like this primer. I’ve been loving eye primers recently, I find they keep my standard liquid eye liner flick in place without smudging. This one has a nice nude tint to it, so almost works as a concealer too.

2. Pore Professional: This is a kind of tinted primer and as far as primers go, I’m very impressed. I have very big pores and it really does reduce them significantly! It’s also tinted, which means it can be worn without makeup over the top.

3. Some Kind of Gorgeous: This is the only product that I’m not hugely keen on in this kit. It just doesn’t give the kind of coverage that I like – I love full coverage foundation and this is very, very light. For people who like a light foundation, this is great for a matte effect! I do like it, it’s just not heavy enough for me.

4. Benetint: I LOVE Benetint and I have for years and years. I like the rose colour for my lips and Posietint for my cheeks particularly, so I’ve been using this little one on my lips a lot recently. Not much more needs to be said, it is great.

5. Girl Meets Pearl: I love highlighters and this one is great. I’ve been using it on my brow bone and cupids bow mostly, because the blusher I’m using at the mo is quite shimmery, so I don’t want to look too disco-ball  like. Very impressed!

6. They’re Real Mascara: Everyone raves about this mascara and I was always a bit skeptical about it. I am no longer. This is amazing and I’m very very tempted to buy the full size when this runs out. BRILLIANT.

As a set, I’ve actually been keeping this in my handbag because it has a big mirror that’s useful if I’m doing my makeup on the train or bus! It’s also nice having a Benetint and mascara on me at all times, it reduces the panic in case you get invited to see Rihanna and have no makeup on you whatsoever.

My verdict? This kit is brilliant. I really recommend it for you gals who want to try some of Benefit’s most famous products without investing in the full ones. There is also a little booklet with handy tips, which is great if you are an idiot like I am.

Anyone else tried this kit? What do you reckon?