An Idiot’s Guide to Basic Contouring

Hey you, spade face! Do you have a face that’s all big like a spade and you would like to know how to get it to look less like a spade and more like a face? Well lucky you, you’re in the right place!

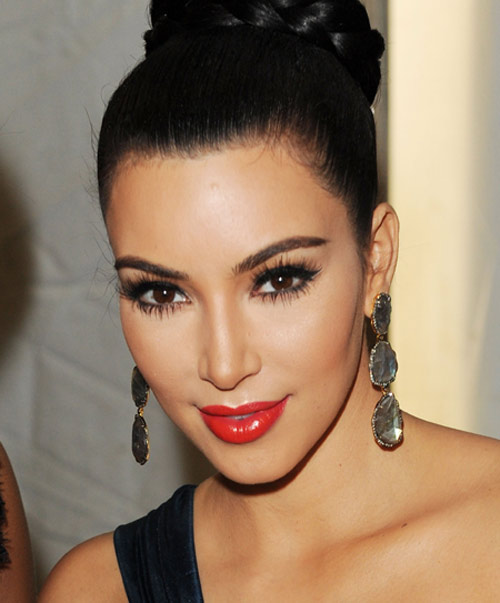
‘Contouring’ has without doubt been the buzz word of the makeup industry for a couple of years now. Made famous by that chiseled lunatic Kim Kardashian, contouring is the art of creating shadows and highlights to make your face look like someone else’s  the best it can.

kim-makeup--z

I’ve trawled through endless tutorials on contouring and now have a routine I’m fairly happy with. I’m by no means a pro (I don’t even have my own reality show OR a rapper boyfriend yet so I’m obviously no good at all really) and everything I do is just an amalgamation of other tutorials, so I’m not really going to be saying anything revolutionary. But if, like me, you find yourself a bit lost in some of the more complex contouring guides out there (and end up shouting “But I don’t own any Ben Nye Banana Powder!” furiously at the screen) then you may find something in this beginners’ guide useful.

What Products Do You Need for Contouring?

I’d say that all you essentially need for contouring is a bronzer that is several shades darker than your base and a highlighter that is several shades lighter. The greater the difference in these shades, the more prominent the contrast will be. I’ve tried powdered bronzers and highlighters before, but found that cream ones work best for me as they’re much more blendable. I’m currently using two Seventeen products: the Instant Glow Cream Bronzer (there’s only one shade I believe) and the Stay Time 18 Hour concealer in Extra Fair. The key is for both of these products to be matte – you don’t want glitter all over the place or you’ll look like a discoball.

For blending, I use either my buffing brush or my Real Teachniques Beauty Blender. Both work really well, so as long as you know you have a tool that’s good for blending then you should be fine.

Where To Apply Products for Contouring

After applying my base as usual, I then shadow and highlight in these areas:

Contour 1

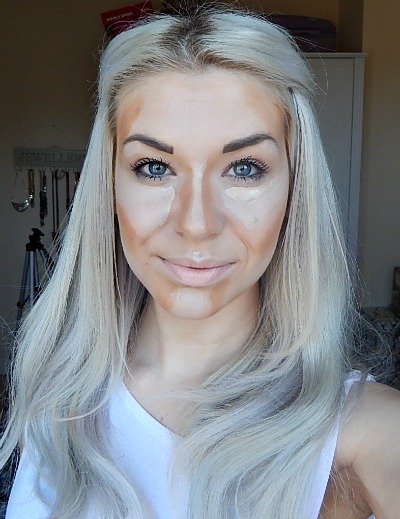
When I initially ventured into the world of contouring, I thought it was just about the cheekbones – bronzer below and highlighter on the bone. However you can basically shadow and highlight just about your entire face. Underneath the cheekbones, down the jawline, down the sides of your nose, on your temples and even a bit around the chin can all be made into shadows.

You can then highlight across the cheekbones and underneath the eyes (aim for a triangle shape), down the nose, on the cupids’ bow, your chin, your forehead, the archs of your eyebrows and the bit of cheek between the jaw and cheekbone. Once this is all blended in, the effect should be subtle – you shouldn’t notice any harsh lines whatsoever. 
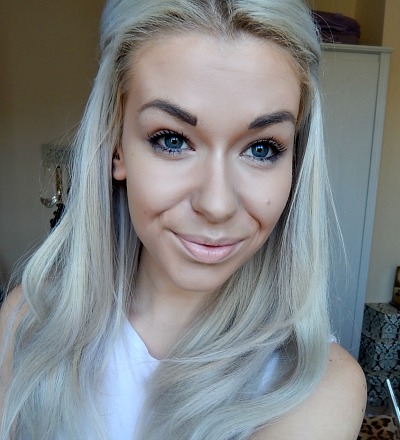
Contour 2And here are the results. As you can see it’s nothing extraordinary, but I do feel significantly less like a spade once I’ve contoured.

An optional extra step here is to add more highlighter onto certain areas, namely the top of the cheekbones, a bit on the bridge of the nose and the cupids’ bow. For this step, you can use more of a shimmery highlighter (I use Seventeen’s Wow! Skin 3 Way Highlighter), though be sure not to place it anywhere where it can be mistaken for oil/sweat – sweaty upper lips are so not Kim K.

 What do you all think of contouring? Are you a pro or new to the whole thing? Share your tips below!

|| Don’t forget that you can follow us on InstagramBloglovin’ and Twitter! ||

How to Shape Your Eyebrows at Home | Eyebrow Stencils

Eyebrows 1I’m well aware that this is a #FirstWorldProblems issue, but I’ve got to admit that I spend an alarming amount of my time worrying about my eyebrows.

Like most other girls of my age in the UK, in my teens I definitely followed the ‘less is more’ mantra for my eyebrows and so between the ages of about 13 to 18 – okay, 13 to 21 (embarrassing) – I barely had any eyebrow to speak of. Eventually, big eyebrows came into fashion and we all realised that we looked like chavvy gimps. The challenge then was how to go about growing out our eyebows and, even more problematically, what the hell we were supposed to do with them afterwards.

Eyebrow shaping is a tricky thing, no matter what magazines tell you about just ‘following the natural arch’. What the hell? I plucked away my natural arch years ago and it’s not showing much sign of coming back.

Many people therefore choose to leave eyebrow shaping to the professionals – but even that is a risky business. Once I spent months and months religiously growing out my eyebrows, only to go and have them threaded by a woman who – despite me saying over and over again “I just want them tidying up” – went on to completely rip out all of my hairs and leave me with baldy chicken skin. So, if we can’t trust the professionals to shape our eyebrows, what can we do? The answer is simple – eyebrow stencils.

What Are Eyebrow Stencils?

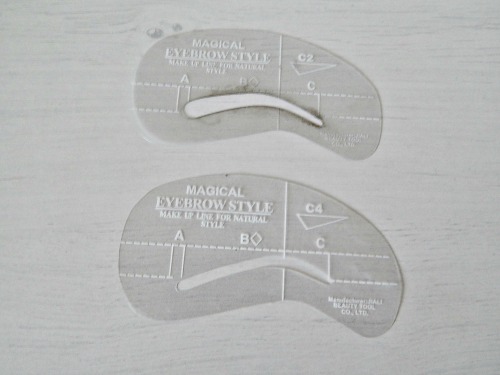
Eyebrows 2Eyebrow stencils are things I only learned about a few months ago. I think they’re mainly used for girls who draw on/fill in their eyebrows every day and want to achieve the same flawless shape each time, but they can also be used for initially shaping.
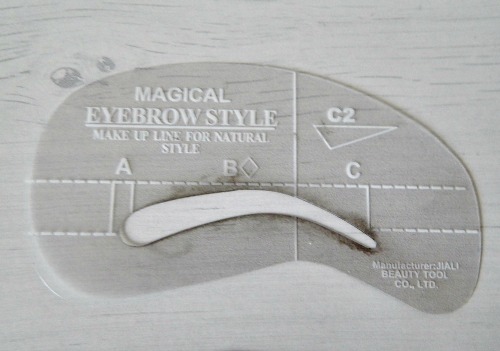
I bought a pack of stencils from eBay, which you can get for the tiny price of £1.29. This came with 4 stencils, all different shapes so you can choose the right one for you. Some were super thin, so I opt for C2 which is the thickest shape of the 4. If you’re not sure which stencil to use then you can always outline with each of them in turn to decide which one suits you best before plunging in with the plucking.

How to Use Eyebrow Stencils

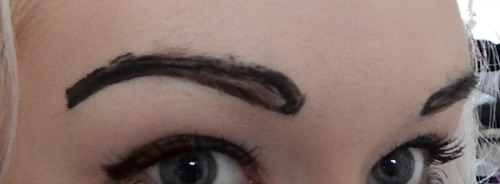
Eyebrows 3Shaping your eyebrows with stencils is pretty straightforward. Use the stencils and make an outline of the shape on your eyebrows. You could do this with powder or pencil, but I prefer to use a liquid eyeliner pen – mainly because I think it looks really funny. Apologies I couldn’t get any photos of this actual step – I needed a third hand coming out of my arse to do so, and unfortunately humans haven’t evolved to have that yet.

Once you have your shape, start plucking away around the outline with gay abandon. However scary it might be, my top tip is to trust the stencil.  Don’t get attached to where your eyebrow hairs used to be and feel like you’re plucking too much – you need to follow the stencil if you want to get the proper shape. Also, that old saying about never plucking above your eyebrow – I’d say just ignore it. The majority of the time when you get your brows done professionally they’ll go above the eyebrow, so I think it’s just one of those beauty myths.

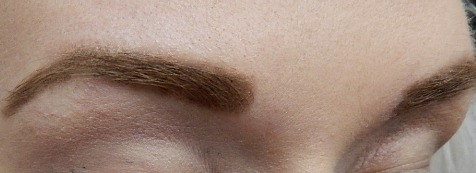
Eyebrows FinalOnce you’ve finished plucking, wash off the outline and say hello to your new eyebrows. As well as getting rid of a lot of unneeded hair, I think the stencils are also brilliant for showing you the parts of your eyebrows that you need to grow back. Particularly when it comes to the middle part of my brows, I have a tendency to over-pluck, and carry on plucking whenever the strays grow back. The stencils should show you where your eyebrows should really start from, meaning that you know to grow these bits out (and can fill in with powder/pencil in the meantime).
Overall I think eyebrow stencils are a good DIY eyebrow shaping tool, and are perfect for those of us who are a bit scared of our own eyebrows. For such a cheap price they’re definitely worth giving a go.

What do you use to shape your eyebrows? Do you ever DIY or do you trust the professionals?

|| Don’t forget that you can follow us on InstagramBloglovin’ and Twitter! ||

How to Curl Your Hair Without Heat: Bendy Rollers

rollers 1_nFirst off: I know, I know – proper Art Attack skills there, right? How I only got a C in GCSE Art is simply a mystery that will never be solved.

And now secondly: I’m sure I speak for most girls with long hair when I say this: I LOVE having curly hair – but I do not love the damage that heat from curling tongs can cause. I have hair extensions and so have to be particularly careful to not over-expose them to heat if I want them to stay in good condition and avoid the ‘skanky rat’ look for as long as possible – so this means that regularly curling is a bit of a no-no. To create waves in my hair I’ll often plait it before going to bed, but my new favourite method for achieving a more dramatic curl, but still without the heat, is to use these babies:

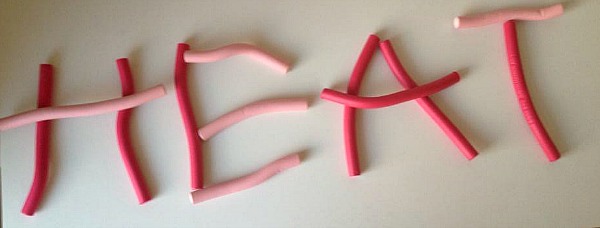
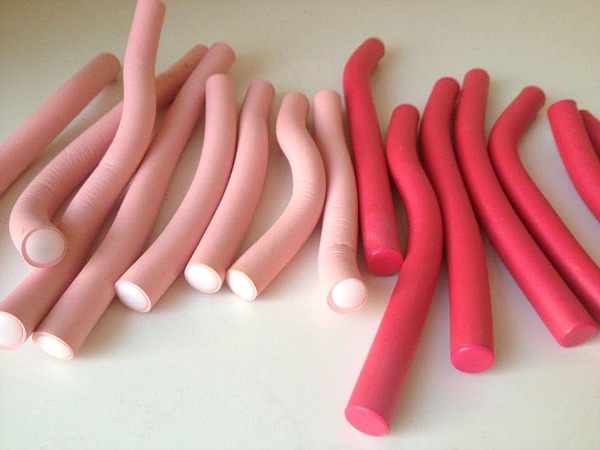
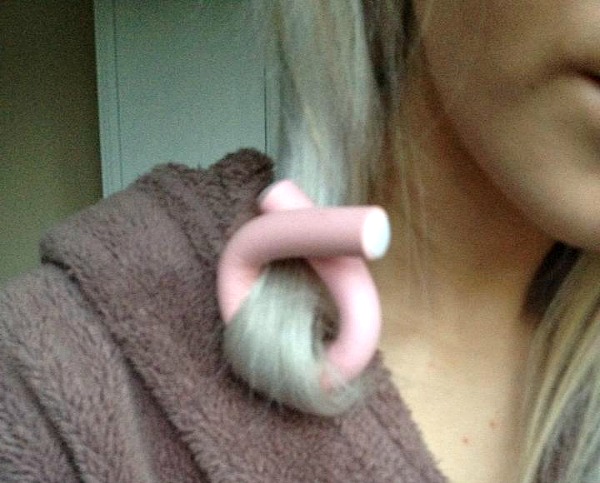
rollers 2These bendy rollers were first recommended to me by the girl who fits my weave, and I’m amazed at how good they really are. Packs of these can be picked up in most pound shops, and are also sold in Primark for the mere price of one English pound. You usually get around 8-10 in a pack, but if you have particularly thick hair or want to create smaller curls – or want to use them to spell out words – then you might want to pick up two packs.

Using these rollers is ridiculously simple – and this from a girl who can barely do a neat ponytail (the cackhand strikes again, huzzah!) You section your hair and wrap the ends of each piece around the rollers. You can roll them as high as you want the curl to start. You then secure them by bending them.

rollers 4For maximum effect, I leave my bendy rollers in overnight. I personally find them really comfortable to sleep in as I usually have them secured below chin level so there’s nothing actually digging into my head – if you have them higher then they might feel less comfortable, but it all depends on how easy you find it to sleep with things in your hair I suppose.

When I unravel the curls in the morning, they’re extremely tight and I look a bit like Honey Boo Boo. However after brushing them through a bit, I’m left with something resembling this:

CurlsDepending on what look you’re going for, you can make the curls as groomed or as natural looking as you like. Separating all of your hair evenly will help you to produce matching ringlets, while putting the rollers in a bit more ad hoc (which I do, but mainly because I’m lazy) will leave you with a messier, somewhat more natural look. I’ve found that the curls stay in brilliantly all day; in fact, much better than they tend to when I use a curling wand.

As well as looking pretty good (if I do say so myself, trumpet blowing) and being ridiculously cheap, these curls also leave me safe in the knowledge that I’ve not damaged my hair ONE TEENY BIT. This means they get a thumbs up from me.

Have any of you used bendy rollers? How do you get curls without using heat?

How to Lighten Your Eyebrows | Smooth Care Review & Results

Eyebrows Bleaching 2As I think I’ve only mentioned, ooh, around thirty times in the past week, I recently decided to bleach my hair. When I told my mum of my decision, her question was the same that it was when I used to bleach my hair from the ages of 17-21 (as in she literally asked me this at least every other month for four years): “Don’t you think you should do something about your eyebrows then?”

Although I always quite liked the contrast of dark brows and glowing-like-a-beacon hair, I decided that this time she may have a point and a lighter look all over could look better this time around.

As always, I took to the internet to search for how to go about lightening my eyebrows. As always, the usual boring people on Yahoo Answers and beauty forums came back with the usual boring answers: go to a salon/get a professional/don’t do it yourself/you’ll go blind/BLAH BLAH BLAH. Some people just don’t have a sense of adventure do they? So then I took to Twitter, and had a few DIY kits recommended to me by you lovely lot (who are altogether much more knowledgeable than the Yahoo Answers Scaredycats).

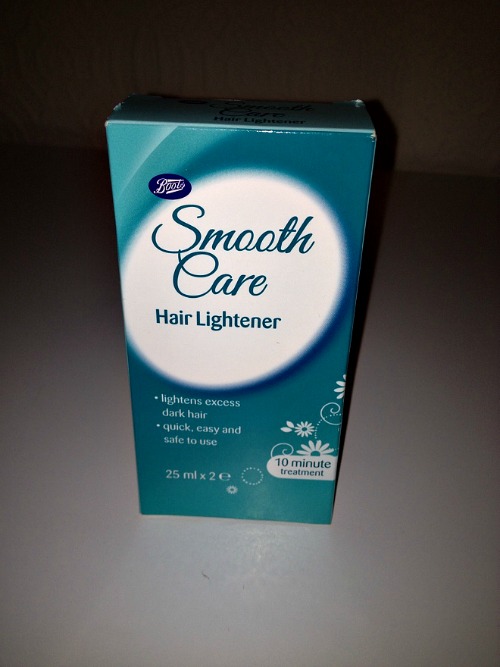
I assumed I would be looking for something specifically for eyebrows, but instead I had facial hair bleaches recommended to me, which made much more sense. I ended up buying Boots’ own brand Smooth Care Hair Lightener, which cost me just £2.66. Yes, the boy behind the till did have a sneaky look at my upper lip to see if I was rocking a ‘tache, and looked a little disappointed that I wasn’t.

Eyebrow Bleaching 3

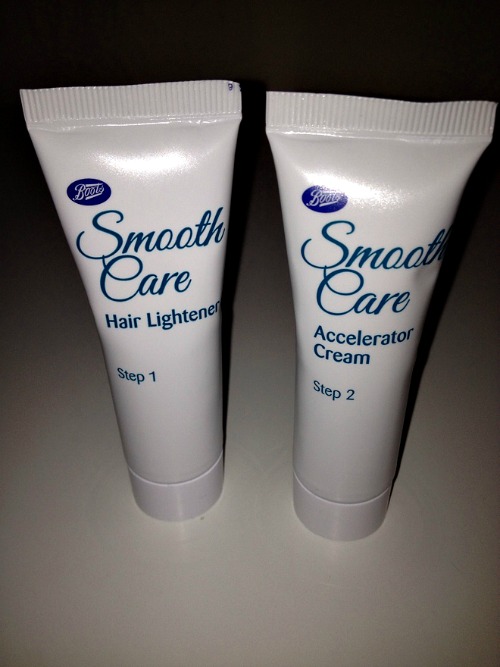
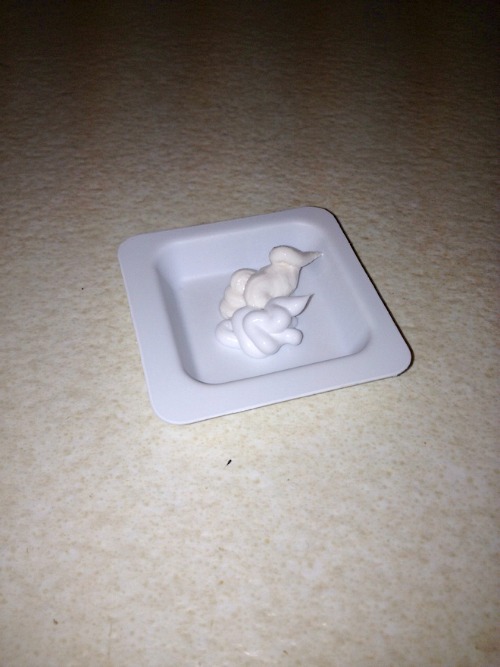
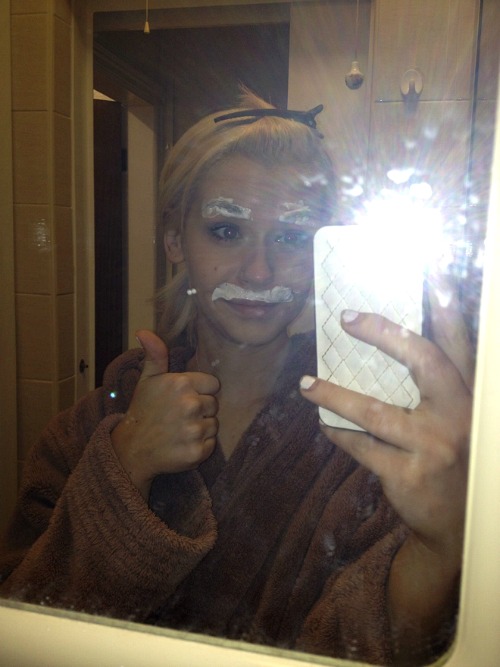
Eyebrow Bleaching 5The kit comes with a tube of Hair Lightener, a tube of Accelerator Cream, a pot and a spatula. The instructions are very simple: mix a bit of these together, whack it on the hair you want to lighten, leave for 10 minutes and VOILA. Of course it wasn’t quite a VOILA case with me, as those are instructions to fully bleach the hair and I only wanted to lighten my eyebrows. I therefore decided to check my eyebrows every 30 seconds or so to make sure they weren’t going too light. Oh, and I also put some on my lady-tache (or misstache)  anyway, just to get the most from my money. Here I am looking fit:

Eyebrow Bleaching 4Yes, my thumbs are weird.

After removing a bit to check the colour and dabbing a bit more on a few times, I think the cream was eventually on my eyebrows for about five or six minutes before I decided I was happy enough with the colour. Remember: you can always add more later if you still want them lighter, whereas over-lightening them could leave you  having to faff about fixing them.

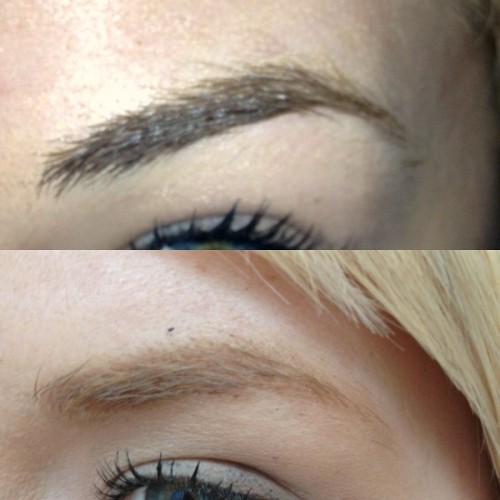
So here is how they turned out!

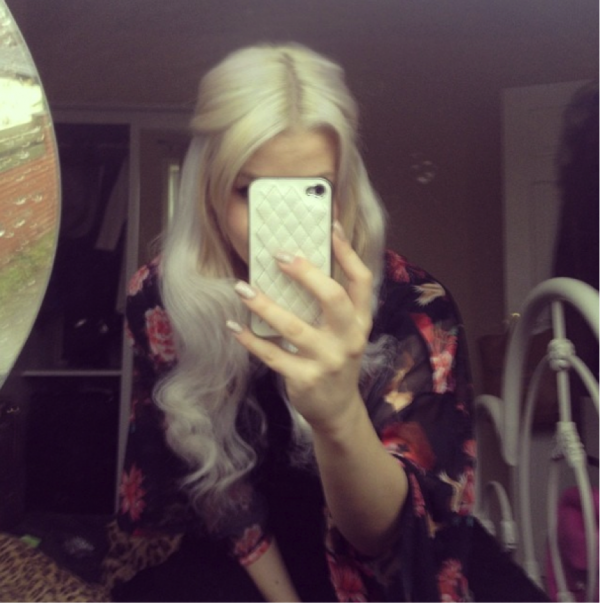
Eyebrows Bleaching 1I’m very very VERY pleased with the results, and consider this to be a victory for DIYers everywhere (didn’t even go blind so HA). I think it’s had quite a big impact on my overall look, with my face looking much softer now that my hair and eyebrows don’t look like they’re fighting on opposite sides of a war. Also, even though it was light before, the worry that you might actually have a moustache is one that can strike you with fear every now and then – usually when you’re on a date – so I’m also happy to know that my misstache is now completely bleached.

The other excellent thing is that I have LOADS AND LOADS of the kit left still, so it’s brilliant value for money if you need to re-apply, or if you want to get all your friends round for some kind of tache-bleaching party (I don’t know what you kids do for fun these days).

|| Don’t forget that you can follow us on Bloglovin’ and Twitter! ||

How to Bleach Your Hair at Home

Bleach 2

Last weekend, I was sitting on my bed having a casual catch up of blogs and Youtube videos, when suddenly an idea hit me. I was like Paul on the road to Damascus (big up the Catholic school kids who get this reference), struck with a blinding light and a life-changing epiphany: I wanted to go back to being bleach blonde.

I used to bleach my hair for about four years during sixth form and uni, and then in a moment of wanting to be a grown up, decided to take it a more natural mid-blonde. Since then, I’ve realised being a grown up has nothing to do with your shade of hair, and people will never take me seriously as long as I go round acting like a tit (ie always) so bleach was calling me.

Enthused by my decision to go back to the light side, I set off into town first thing Sunday morning for supplies. I then pestered my extremely hungover sister until she agreed to assist me in my mission.

Before I go into how I did it, I will put a couple of huge disclaimers out there:

  • I’m NOT in any way, shape or form a professional hairdresser, nor do I really know anything about colouring hair beyond a couple of years of my own experiences
  • I have no idea whether these same steps would work for you
  • Your hair may well fall out if you do this, I don’t know
  • Your hairdresser will probably hate you. I’ve become quite accustomed to annoying hairdressers over my years of bleaching, straightening and gluing and sewing random wefts of hair into my head
  • I’m used to having hair that has never been in good condition. and am truly okay with this. If you’re not, then definitely definitely seek the advice of a professional before doing anything as dramatic as this to your hair.

Okay, now that I’m sure nobody can sue me – on with the show!

What I Used:

Bleach 5

Bleach 4

Bleach 3

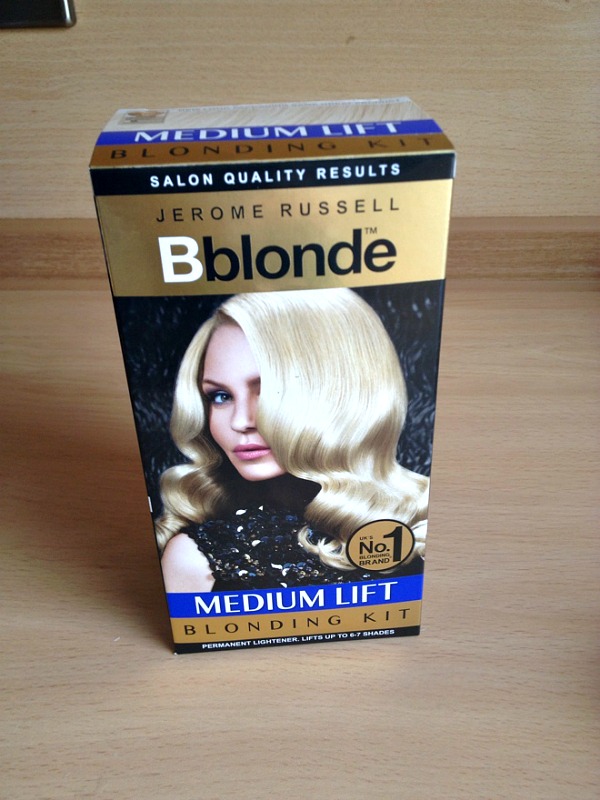
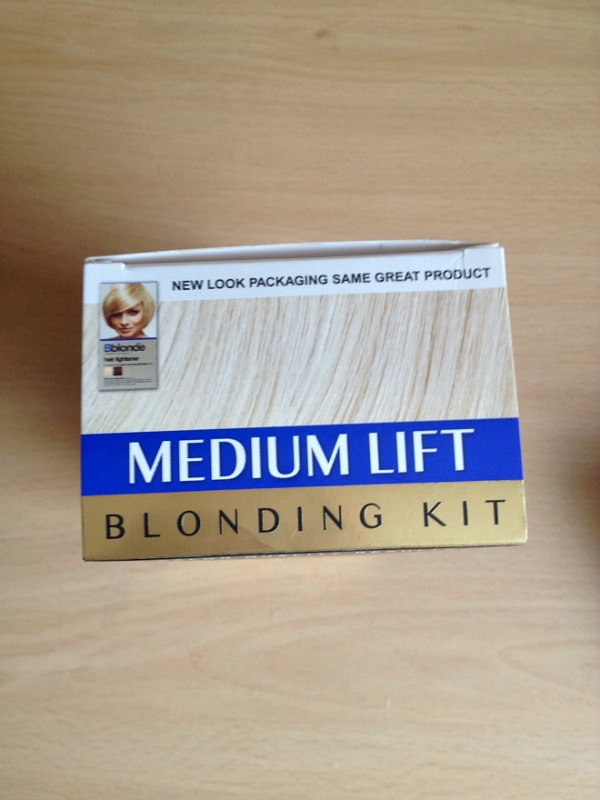
Jerome Russel B Blonde Blonding Kit in ‘Medium Lift’

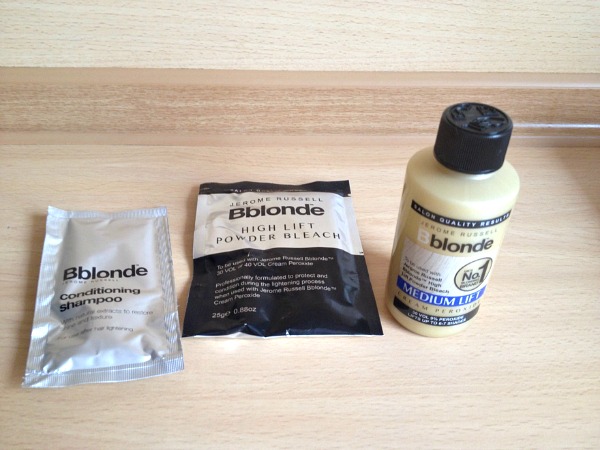
To bleach my hair, I use powder bleach and cream peroxide. I used to buy these separately, but when I went into my old haunt of Bodycare today they didn’t seem to have any of the powdered bleach in a separate box, so I bought this set (which is the brand of cream peroxide which I used to use, so I knew I was in good hands). This cost around £4 (much cheaper than it is in Boots or Superdrug, FYI), and I picked up two because my extensions have meant my hair is very thick.

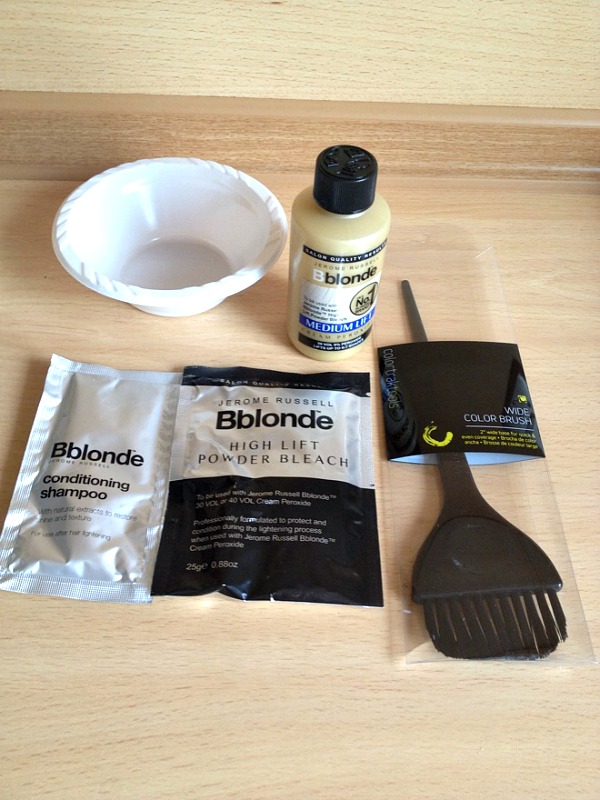
I got the ‘medium lift’ option because I was bleaching dyed blonde hair, and also because my own natural is a very mousey brown so not much lifting was really needed. They’ve got a higher lifting option for people who have darker hair so make sure you get one strong enough for your hair. The set came with the cream peroxide, powder bleach and a conditioning shampoo. It also came with a handy little brush and pot to mix it all in, but I’m stupid and I didn’t realise this, so bought a toning brush and bowls when I made my next trip into Sally. I therefore insisted on using my newly purchased ones, which you can see in the top photo.

Method

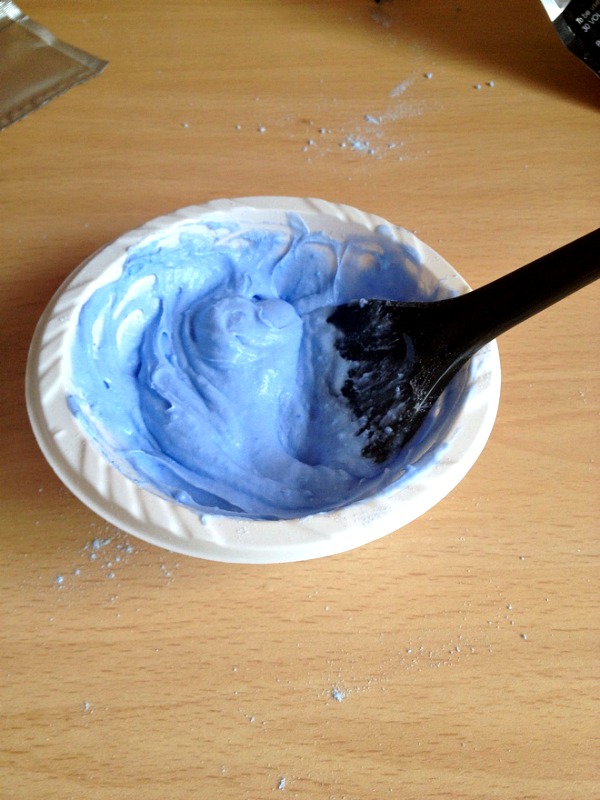
Bleach 1You mix the cream and powder as so, until you get this very nice blue paste. I wouldn’t recommend applying the bleach yourself, in case you miss bits. This is where my hungover sister came in. After making me move from the conservatory into the garden, and then into a more shaded bit of the garden (hangover sweats, what can you do) she started applying. My sister always used to bleach my hair for me, and always did a good job. The method? You SLAP IT ON. I don’t think that’s a technical term, but as I’ve stated – I’m a rookie and I just don’t care about doing things in a remotely proper way. She had a vague system which involved doing all of my roots first and then working it through the lengths. The bleach doesn’t work in quite the same way as normal hairdye; the thicker consistency means that you have to really apply it to all of the hair on both sides, instead of just kind of squidging it in as you can with other dyes (more technicaly terminology for you there).

It was quite a lengthy process and so by the time we were finished, a lot of the bleach had already been on for an hour. The instructions said that on dark blonde/light brown hair the bleach should be left on for 90 minutes. I had no idea how long it should be left on dyed dark blonde hair – so as usual we guesstimated and I left it on for a further half hour after we’d finished applying.

Aftercare

Bleach 6

Bleach 7

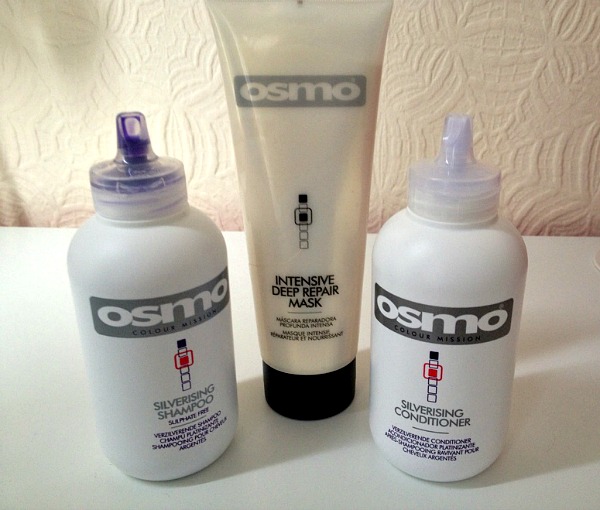
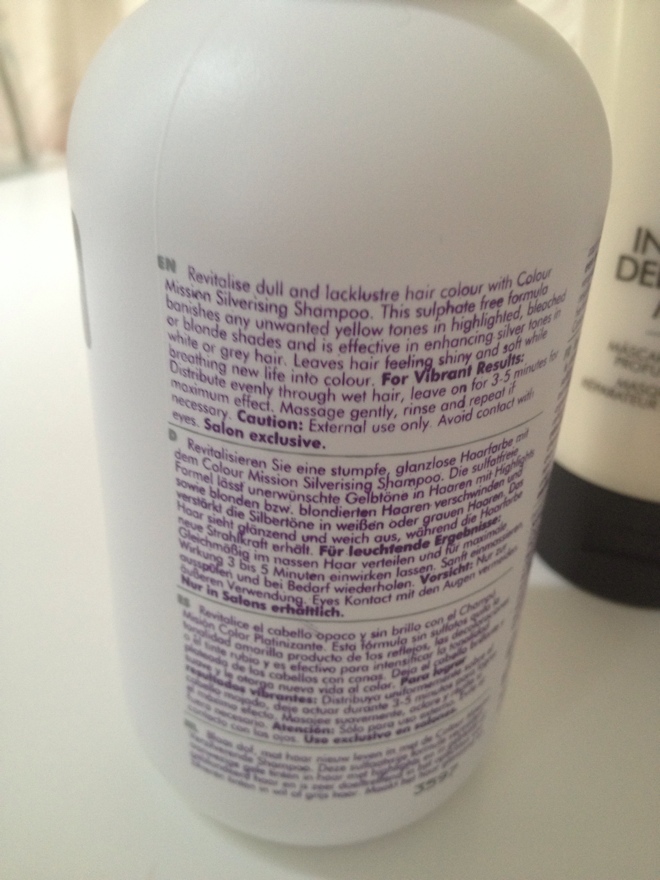
Stating the obvious here, but bleached hair needs a lot of TLC. I headed to Sally which, if you don’t have a physical store in your city or town, is a hair and beauty suppliers that stock salon brands. It is also potentially the most exciting place on earth (no exaggeration). To take care of my new straw-like hair I purchased Osmo Colour Mission Silverising Shampoo, Osmo Silverising Conditioner and Osmo Intensive Deep Repair Mask, which were each around the £6 mark. The silverising shampoo and conditioner are both designed to be left on for between 3-5 minutes for maximum results, and are supposed to take the brassier, yellow tones out of bleached hair. Seeing as I’m a trampo and basically never wash my hair (should I admit to that?) I think these should last me a fair few weeks so should be well worth the money.

Results – Before and After

Bleach Comparison

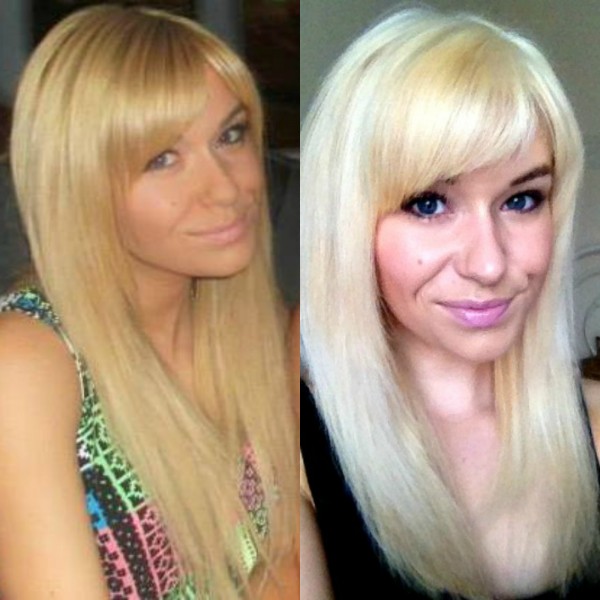
This was how my hair looked after its initial bleaching and one wash and condition with the Osmo products. There were still some strong yellowy tones, which was to be expected considering I was bleaching not only coloured hair but also extensions, which have been through Laaaawd knows how many processes before they landed on my head.

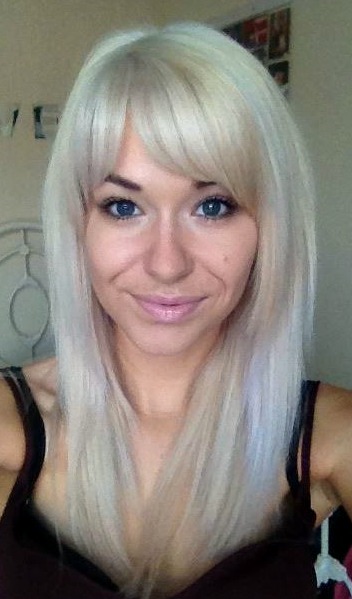
Some people might be happy with this as a final colour but I had a lusting for white blonde hair, so knew my work was not done. Because I’m a bloody mysterious bitch I’m not going to tell you what I used just yet because I have a full review of the product planned buuuuuuuut…. THIS is the final result!

Bleach

Have any of you ever bleached your own hair? Share your tips in the comments below! 

|| Don’t forget that you can follow us on Bloglovin’ and Twitter! ||